Back to Blog
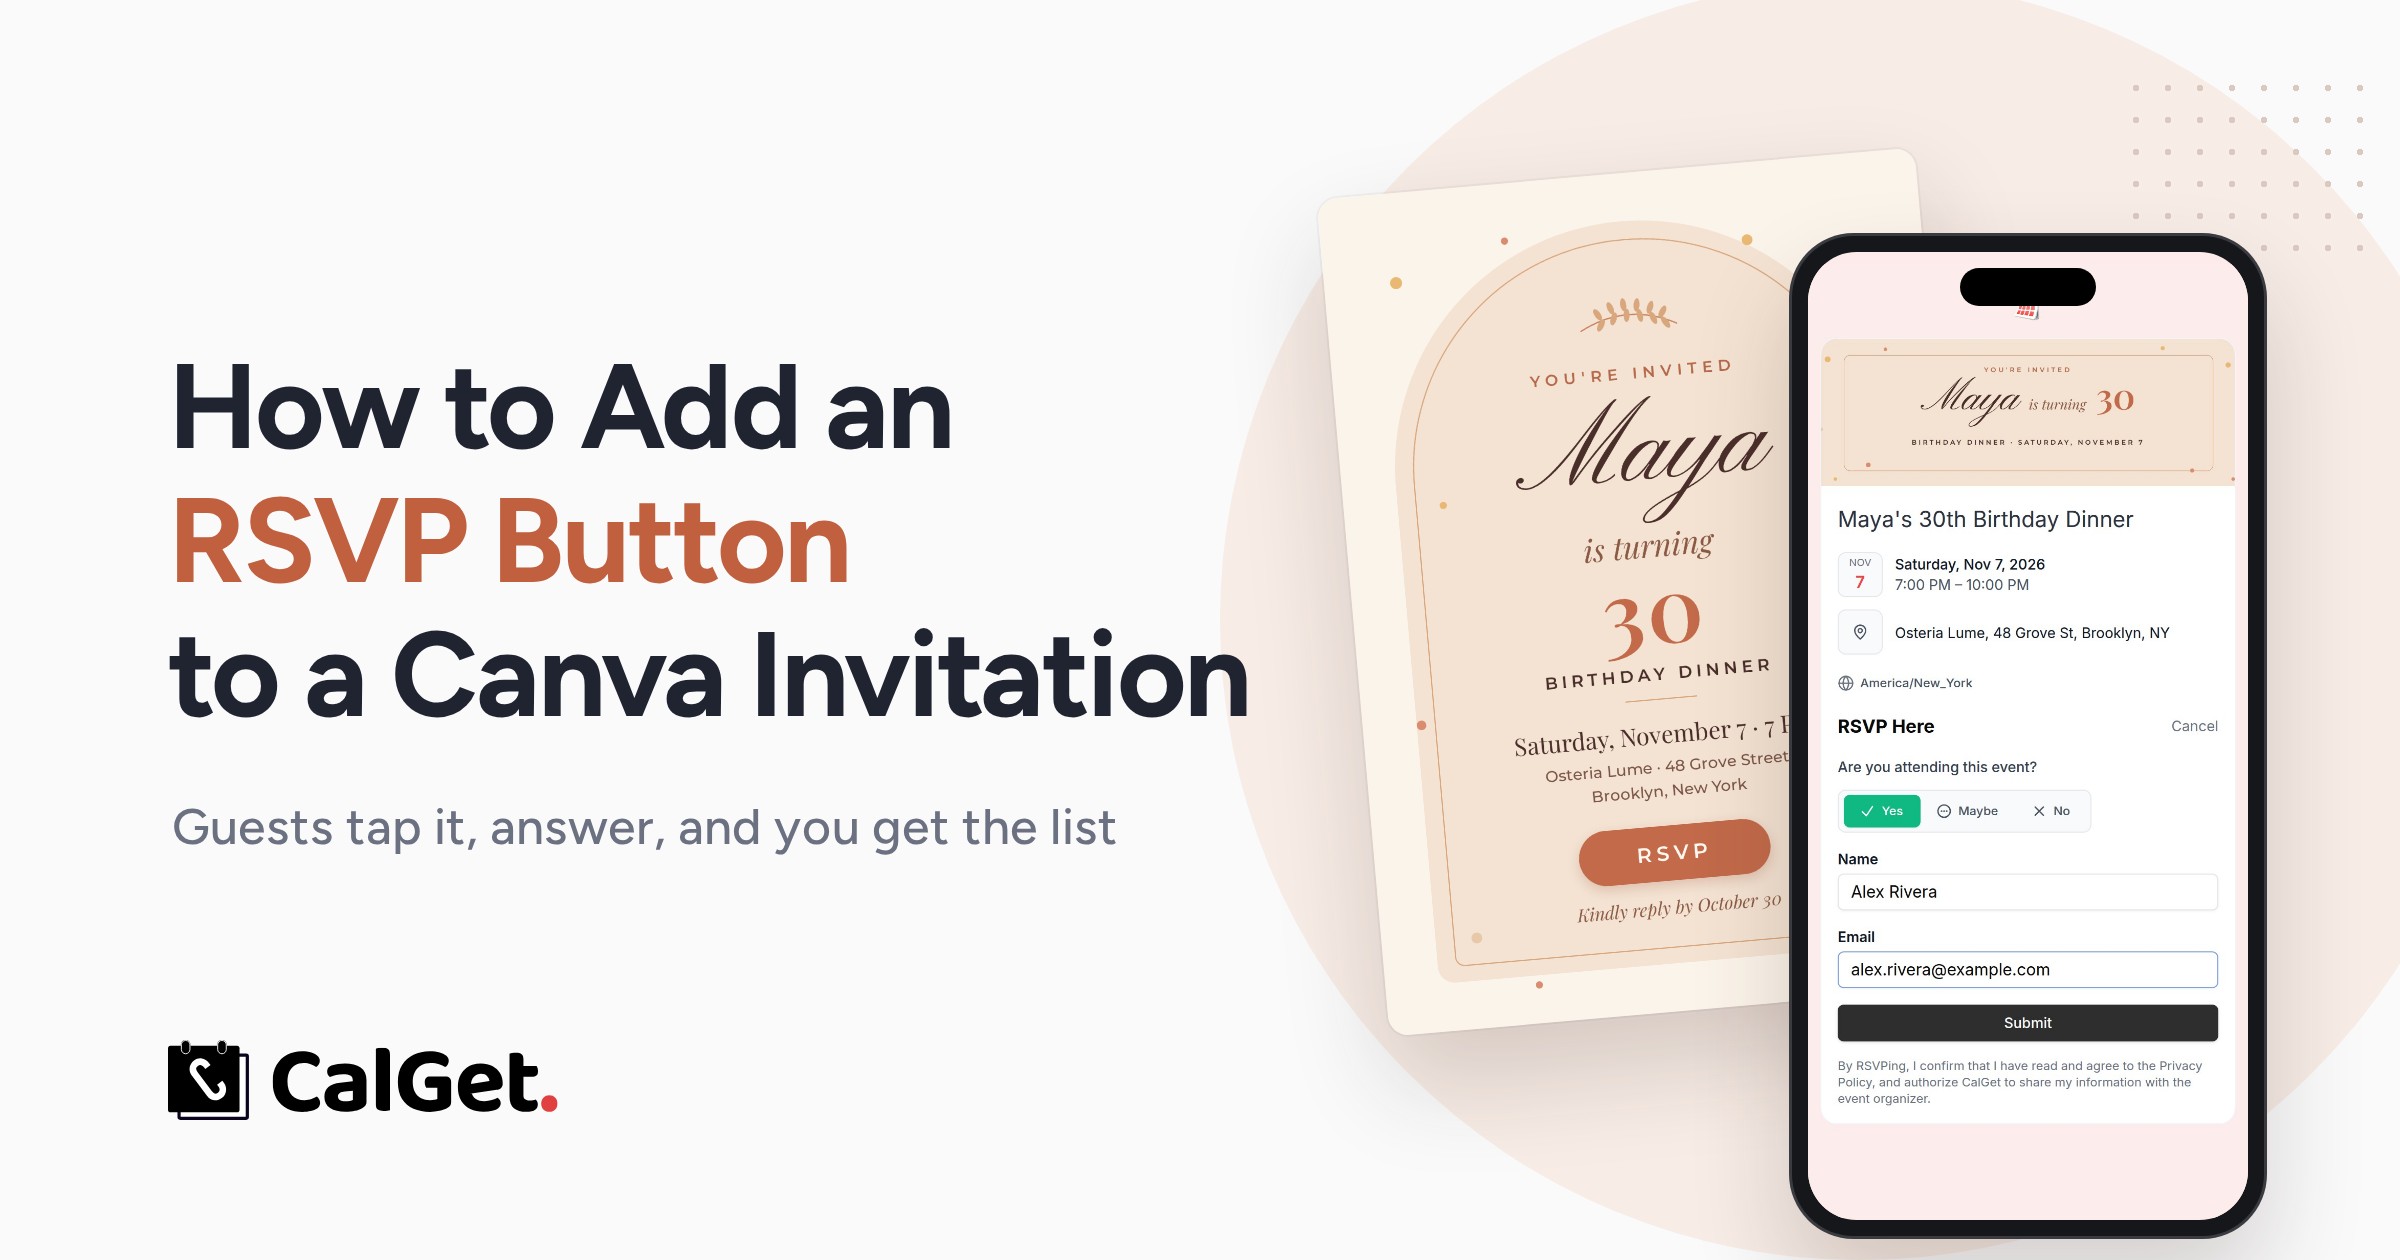
How to Add an RSVP Button to Your Canva Invitation
Canva can put an RSVP button on your invitation, but it can't collect a single answer. Here's how to make that button work in five steps, including a QR code for printed cards and the download setting that keeps the link clickable.
Written by
Last updated: October 2026. Every CalGet step below was tested on a real event in October 2026.
You found the perfect template in Canva, changed the names and the date, and there's a lovely little button at the bottom that says RSVP. Send it to your guests and they'll tap it. Nothing will happen, because a button in Canva is only a shape with a word on it.
Canva doesn't have its own RSVP feature, so the button needs somewhere to send people. This guide shows you how to add a working RSVP button to a Canva invitation: an RSVP page your guests can answer in a few seconds, the link that connects your button to it, a QR code for printed cards, and the one download setting that decides whether the button works at all.
Prefer to watch? The whole setup is a 2-minute video.
Why the RSVP button on your Canva invitation doesn't work yet
Canva is a design tool. Anything on the page can carry a link, but Canva won't collect answers or keep a guest list for you. So "add RSVP to a Canva invitation" really means two jobs: make a place where guests answer, then point your button at it.
You have three ways to do the first job. Canva's app marketplace lists a few third-party RSVP form apps; we didn't test them for this guide. Many people use Google Forms, which works fine for collecting names.
The third way, the one this guide uses, is an RSVP page made for events: it shows the date, time and place, asks Yes, Maybe or No, and lets each guest put the event in their own calendar right after they answer. That last part matters more than it sounds, because a guest who said yes in September still has to remember your dinner in November.
If you're new to the term, our explainer on what RSVP means and how to ask for one covers the etiquette side.
Step 1: Create the event and turn on RSVPs
In CalGet, open Events and click New Event. Fill in the title, the date, the start and end time, the place, and a short description. Check the time zone in the top corner, because your guests' calendars will use it.
Then turn on Collect RSVPs at the bottom of the form and click Create Event Link. We put the reply-by date in the description too ("Please RSVP by October 30"), so it's on the page guests see as well as on the card.
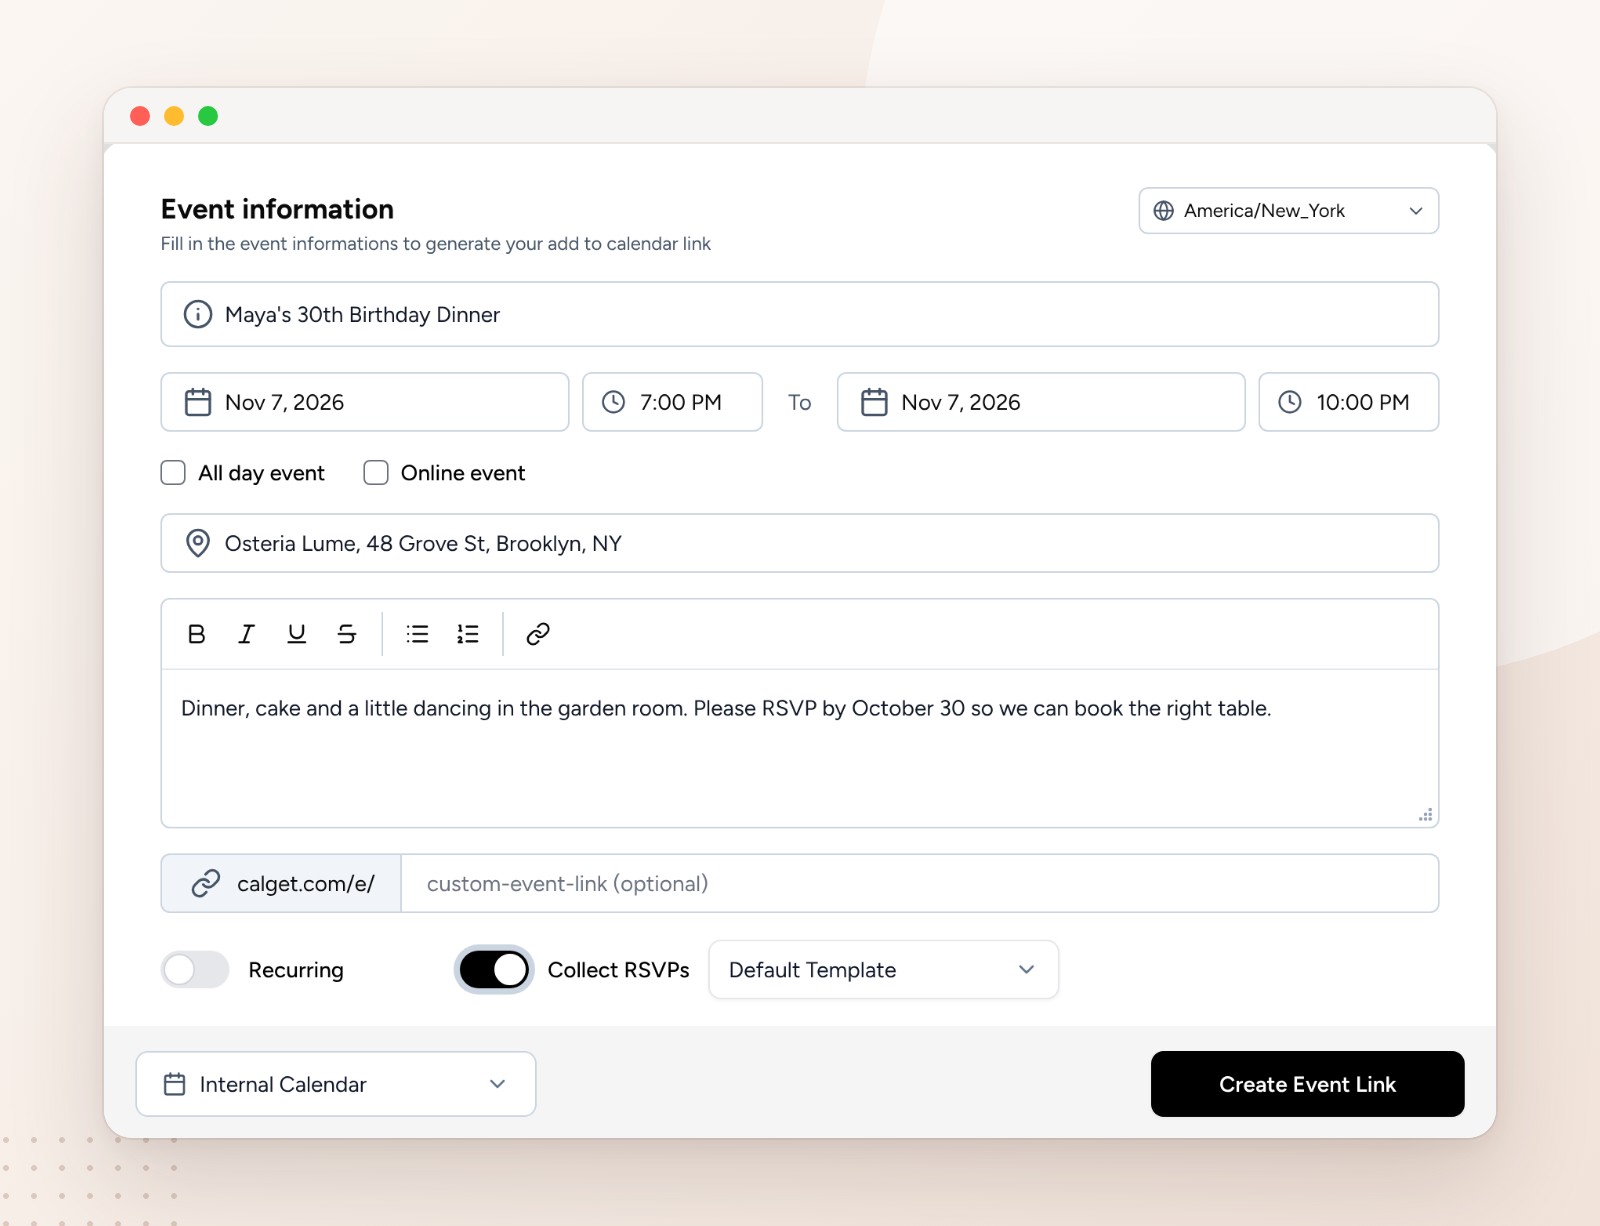
The field that starts with calget.com/e/ is optional. Leave it empty and CalGet makes a short link for you, or type something your guests will recognize, like your names and the year.
Step 2: Copy your RSVP link
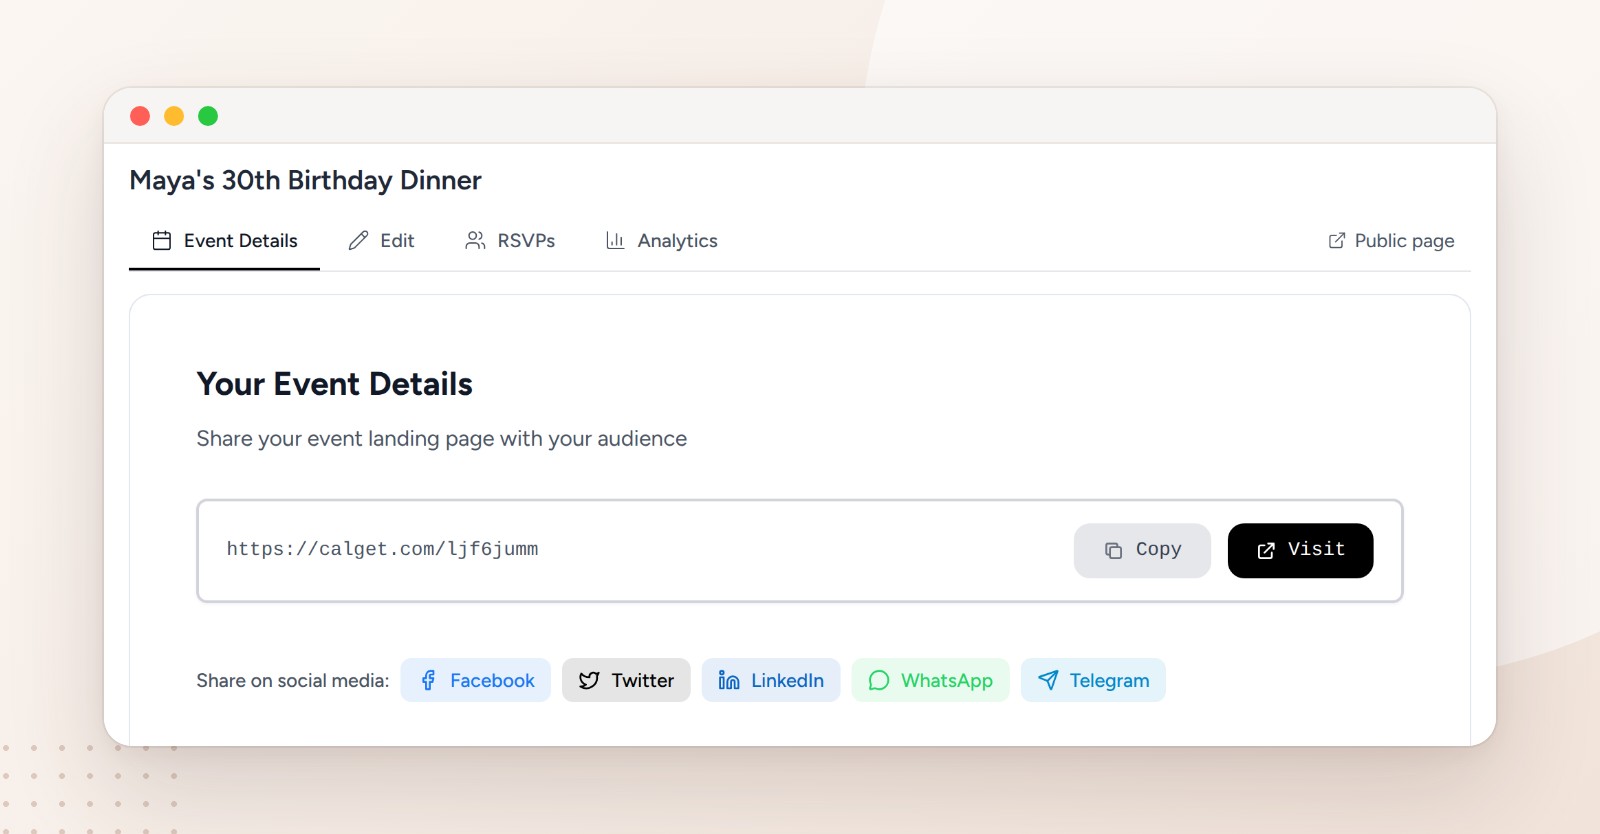
After you create the event, you land on its Event Details tab. Your RSVP link is at the top. Click Copy, and click Visit once to see the page your guests will get.
Step 3: Link the RSVP button in Canva
Open your invitation in Canva on a computer. Click the RSVP button, then click the three dots (More) in the toolbar, choose Link, paste your RSVP link and click Done. Canva describes the same steps in its help article on adding links.
One detail trips people up. Most template buttons are two layers: a shape and the word RSVP on top of it. If you link only the word, a guest who taps the edge of the button gets nothing. Link the shape and the text, so the whole button works.
Step 4: Add a QR code for printed invitations
A link can't be tapped on paper, and it disappears when an invitation is shared as a picture. A QR code covers both. In Canva, open Apps in the left panel, search for "QR code", paste the same RSVP link and click Generate code. Drag the code into a corner near the button.
Two habits save trouble later. Keep the code large enough to scan from a printed card; about 2 cm (0.8 inch) wide is a common minimum. And scan it with your own phone before anything goes to the printer.
Step 5: Download it so the button stays clickable
This is the step that decides whether your RSVP button works. In Canva, click Share, then Download, and pick PDF Standard. Leave Flatten PDF unchecked. Flattening turns the whole page into one picture, and the link goes with it.
Canva is direct about the other formats: "Hyperlinks only work on PDF files. Hyperlinks will not work on PNGs, JPGs, MP4s, etc., or when you post your design on social media." So if you're sending the invitation as an image in a group chat or posting it on Instagram, the QR code is doing the work. Add the RSVP link to the message text as well, so guests on their phones can tap it.
What your guests see when they tap RSVP
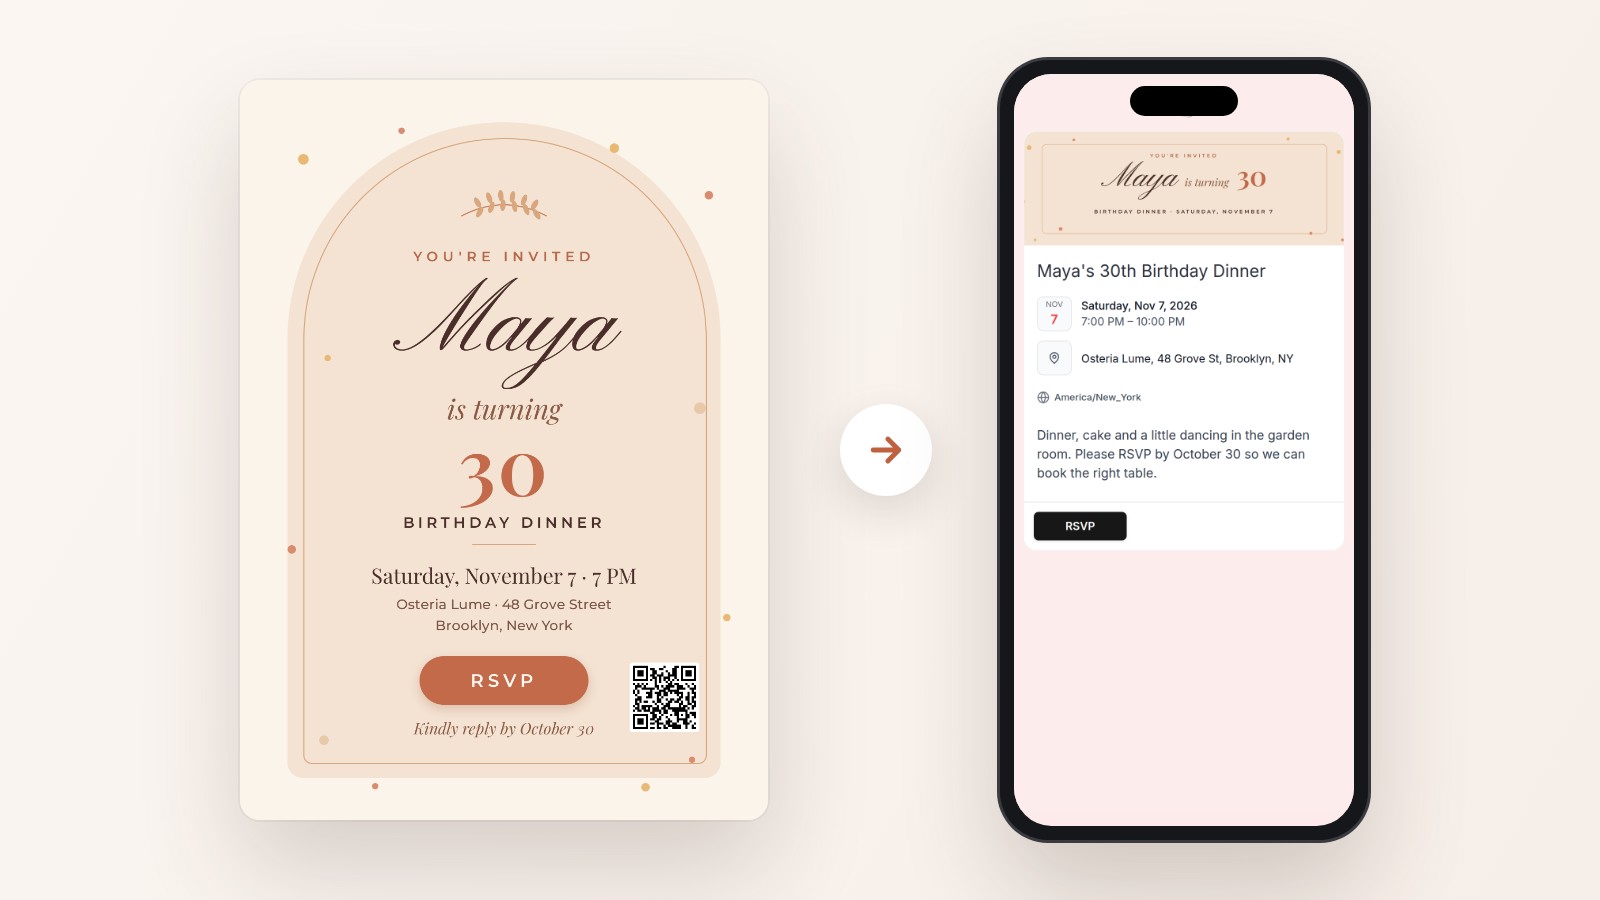
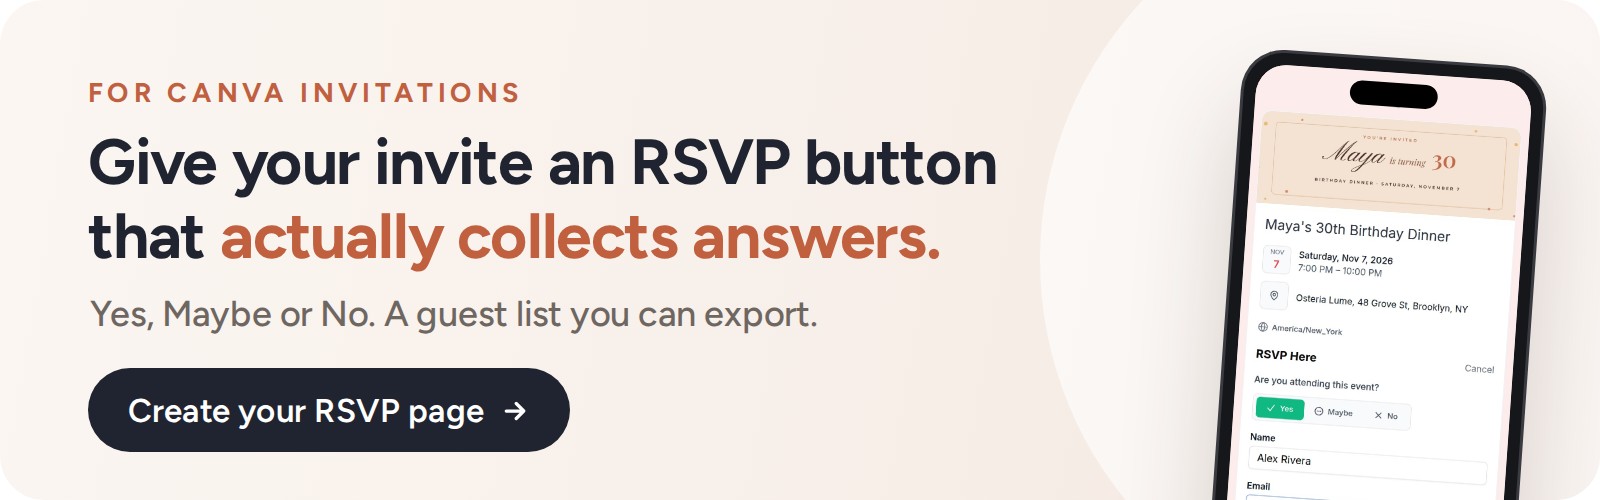
The button opens your event page with the date, time, place and your note. Guests tap RSVP, choose Yes, Maybe or No, and type their name and email. There's no app to install and no account to create.
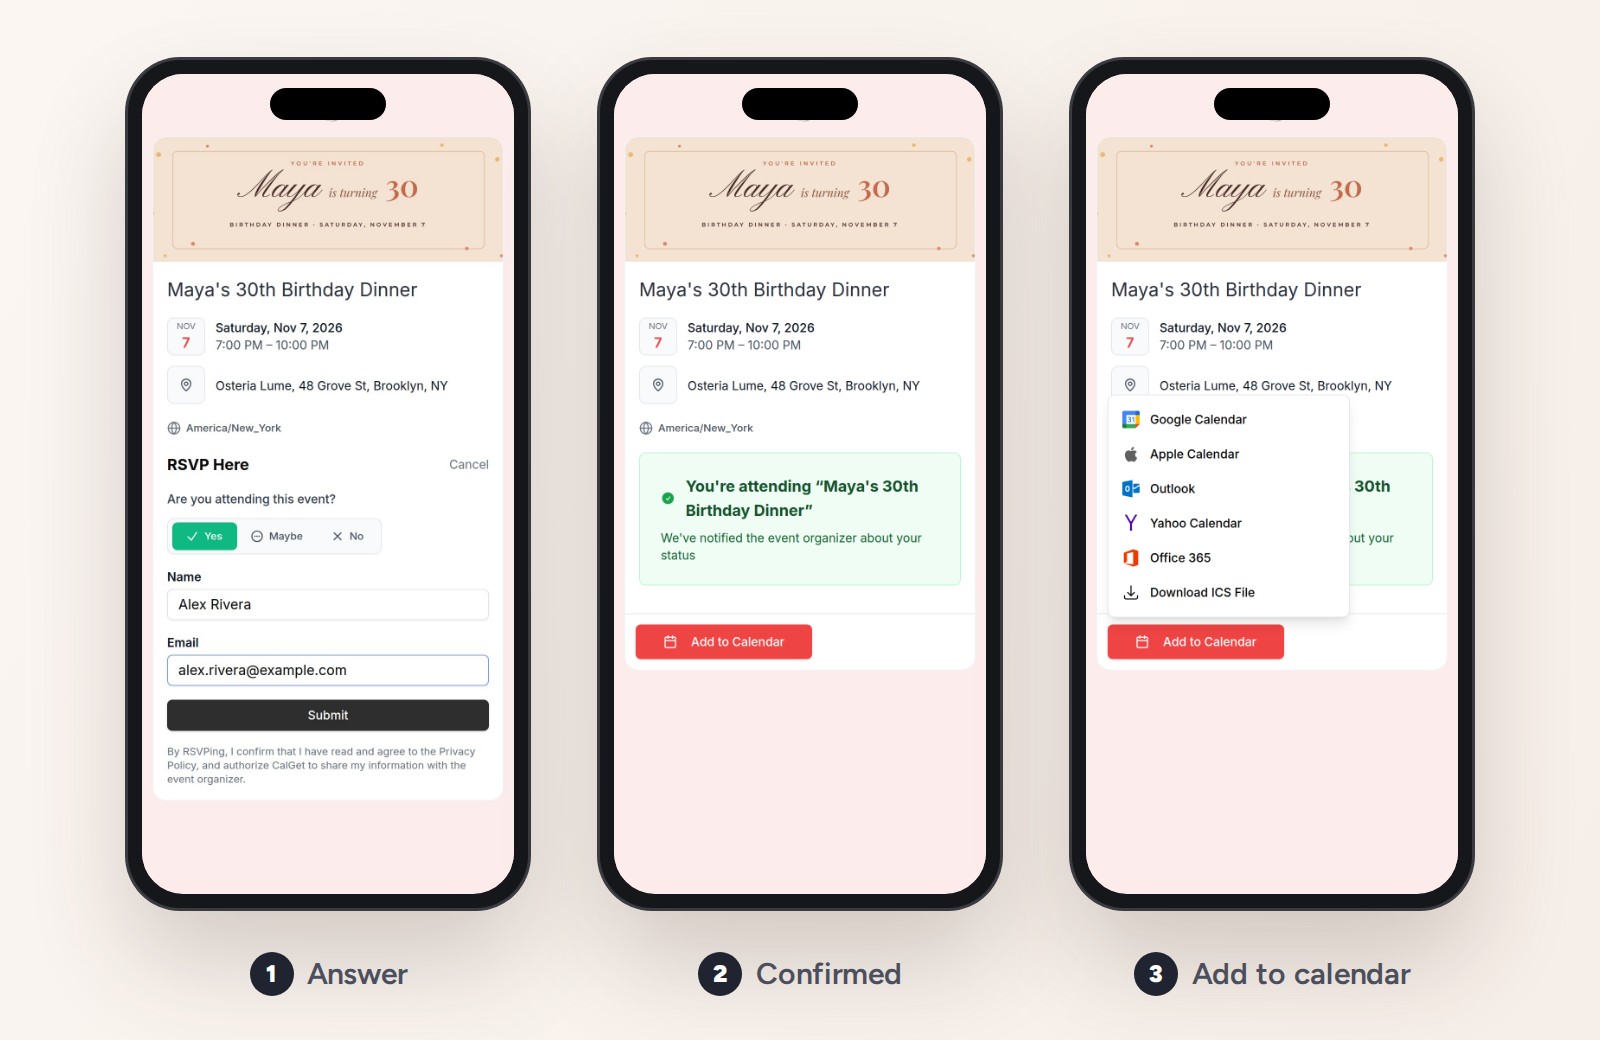
After they submit, guests see a confirmation, and you're notified about their answer. Then comes the step that helps people actually show up: Add to Calendar. One tap puts the dinner in Google Calendar, Apple Calendar, Outlook, Office 365 or Yahoo, or downloads a calendar file. It's the same kind of add-to-calendar link you can put on a Canva design, built into the RSVP page.
See who's coming, and close RSVPs on time
Every answer lands in the RSVPs tab of your event. The counts sit at the top, Attending, Maybe and Not Attending, with the full list of names, emails and reply times underneath.
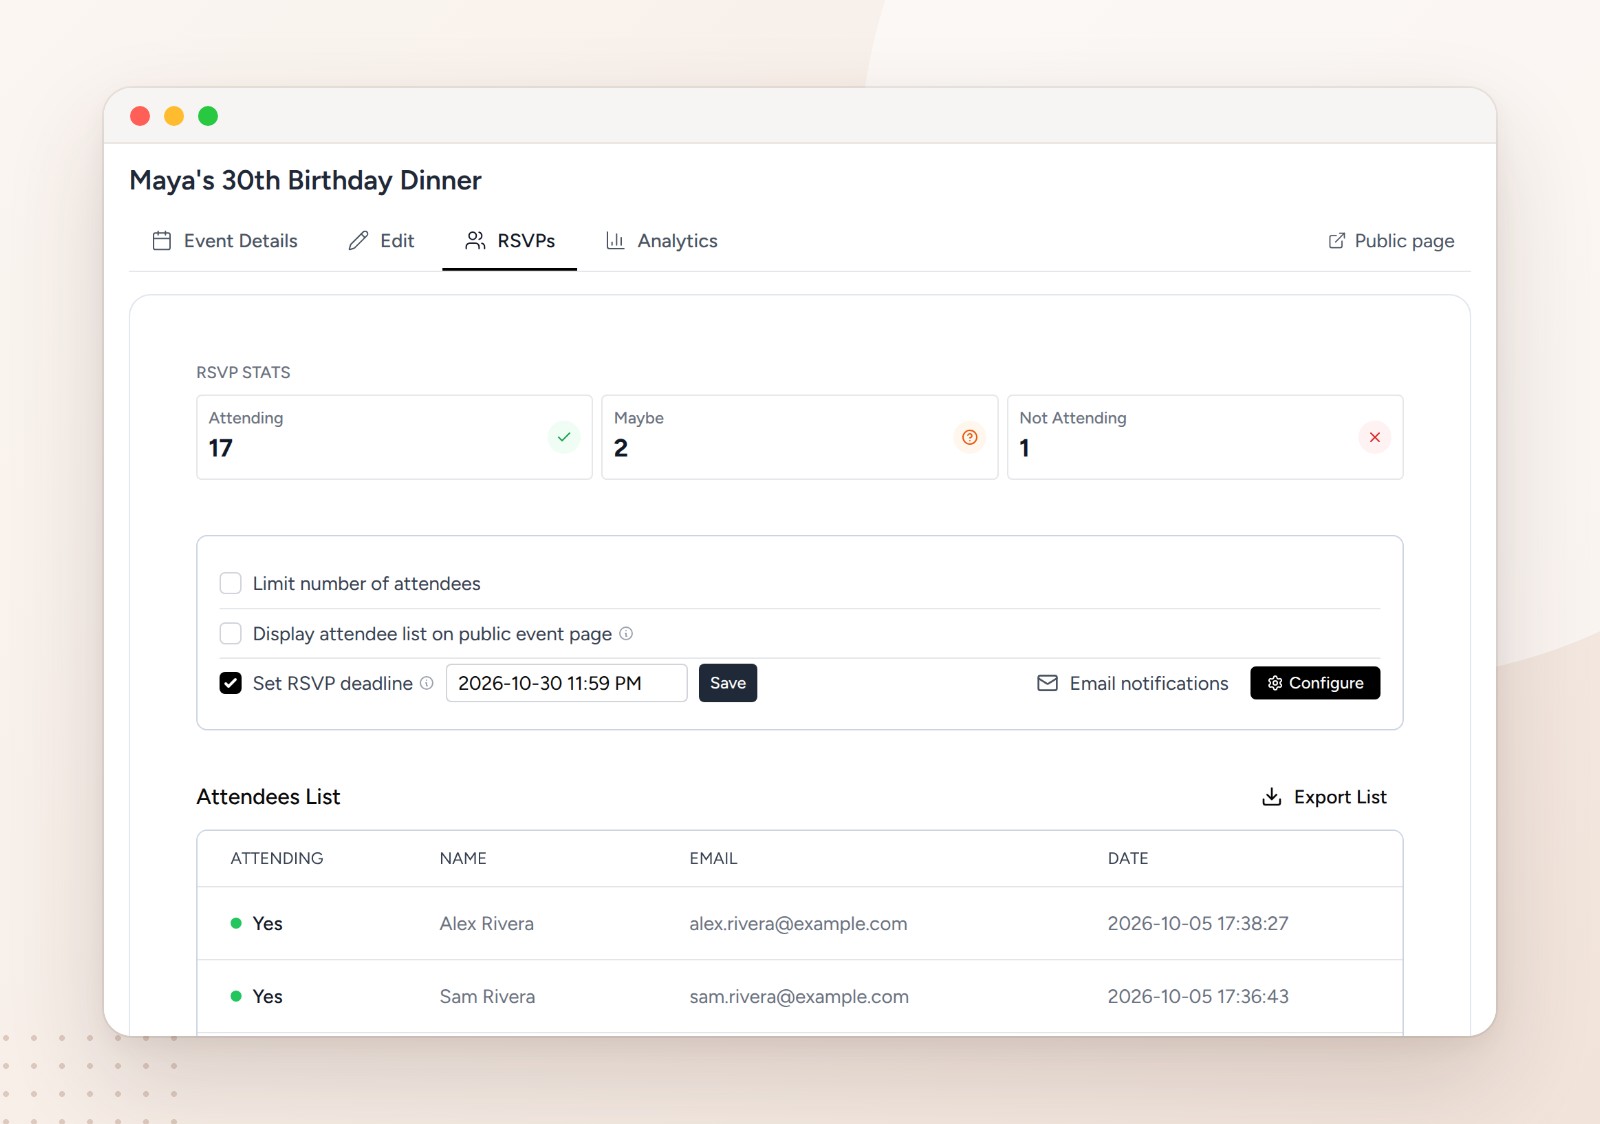
Three settings on that tab are worth knowing:
- Set RSVP deadline. Use the date on your invitation. It gives you a firm number for the restaurant or caterer.
- Limit number of attendees. Handy when the room only holds so many.
- Export List. Downloads the guest list as a spreadsheet file for seating plans, name cards or a headcount for the venue.
For more on what an RSVP page can do beyond invitations, see CalGet's RSVP feature.
Google Forms, a Canva app, or an RSVP page?
All three can sit behind your Canva button, and the honest answer depends on the event.
| Google Forms | CalGet RSVP page | |
|---|---|---|
| Guests see the date, time and place | Only if you type them into the form | Yes, it's the event page |
| Answer options | Any questions you build | Yes, Maybe or No, plus name and email |
| Guests can add the event to their calendar | No | Yes: Google, Apple, Outlook, Office 365, Yahoo |
| Counts of who's coming | A summary of answers | Attending, Maybe and Not Attending at the top |
| Best for | Collecting lots of custom details | Events where you need a headcount and people to remember the date |
If you need meal choices, song requests and dietary notes from every guest, a form builder gives you more room. If you mostly need to know who's coming and want them to actually remember the date, an RSVP page is less work for you and for your guests. We haven't tested the RSVP apps in Canva's marketplace, so we can't compare them fairly here.
Common mistakes with Canva RSVP buttons
Downloading a flattened PDF. It looks identical, and the button does nothing. Download again with Flatten PDF unchecked.
Sending a PNG or JPG and expecting the button to work. Images can't carry links. Use the QR code, and paste the RSVP link into your message.
Linking only the word RSVP. Link the shape behind it too, or taps on the edge of the button go nowhere.
Skipping the test. Before you send it, open the PDF on your phone, tap the button, and scan the QR code from your laptop screen. Two minutes now beats 40 guests texting you that the button is broken.
Printing the date on the card and nowhere else. Put the reply-by date on the RSVP page and set it as the deadline, so all three agree.
How we tested this
We made a real event in CalGet, Maya's 30th Birthday Dinner on November 7, 2026, with RSVPs turned on and the reply-by date set to October 30. Twenty replies came in from separate browsers, using made-up names and example.com email addresses, which is the list you see in the screenshots. The QR code on the sample invitation is real and opens that event.
Maya, the restaurant and the invitation design are made up for this guide. The Canva steps follow Canva's own help center; Canva updates its editor often, so a button may sit in a slightly different place on your screen.
Frequently asked questions
Can you add an RSVP button in Canva?
Yes. Canva doesn't collect RSVPs itself, but you can link any button in your design to an RSVP page. Select the button, click More, then Link, paste your RSVP link, and download the invitation as a PDF so the link stays clickable.
Why isn't my Canva RSVP link clickable?
Usually because the invitation was downloaded as a PNG or JPG, or as a PDF with Flatten PDF turned on. Links only survive in a standard, unflattened PDF. If you need to send an image, add a QR code and paste the link into your message.
Can guests RSVP from a printed Canva invitation?
Yes, with a QR code. Add one in Canva through Apps, then QR code, using the same RSVP link as the button. Guests scan it with their phone camera and land on the RSVP page.
Do guests need an account to RSVP?
No. On the CalGet RSVP page, guests choose Yes, Maybe or No and enter their name and email. That's all.
Can I set an RSVP deadline?
Yes. In the RSVPs tab of your event, check Set RSVP deadline and pick the date and time. Use the same date you printed on the invitation.
Give your Canva invitation a working RSVP button
Your design is already done. Making the RSVP button work is one event, one link and one careful download, and it means you get your answers in one list instead of in texts, comments and voice notes.
Create your RSVP page in CalGet and link it to your Canva invitation today.
Written by the CalGet team. We build the RSVP and calendar tools that hosts use to get answers from their guests and get their events into guests' calendars, and we tested every CalGet step in this guide ourselves.
Get Your Events on Everyone's Calendar.
Generate universal "Add to Calendar" links that work everywhere. Perfect for social media, emails, and websites.