New Calendar By CalGet: Embed Your Event Calendar in Canva

Changelog.

Every new feature, improvement and fix we ship to CalGet, in one place.

Calendar By CalGet: Embed Your Event Calendar in Canva

Add your live CalGet event calendar to any Canva design with the Calendar By CalGet app. It stays up to date on your published site.
Calendar By CalGet: Embed Your Event Calendar in Canva

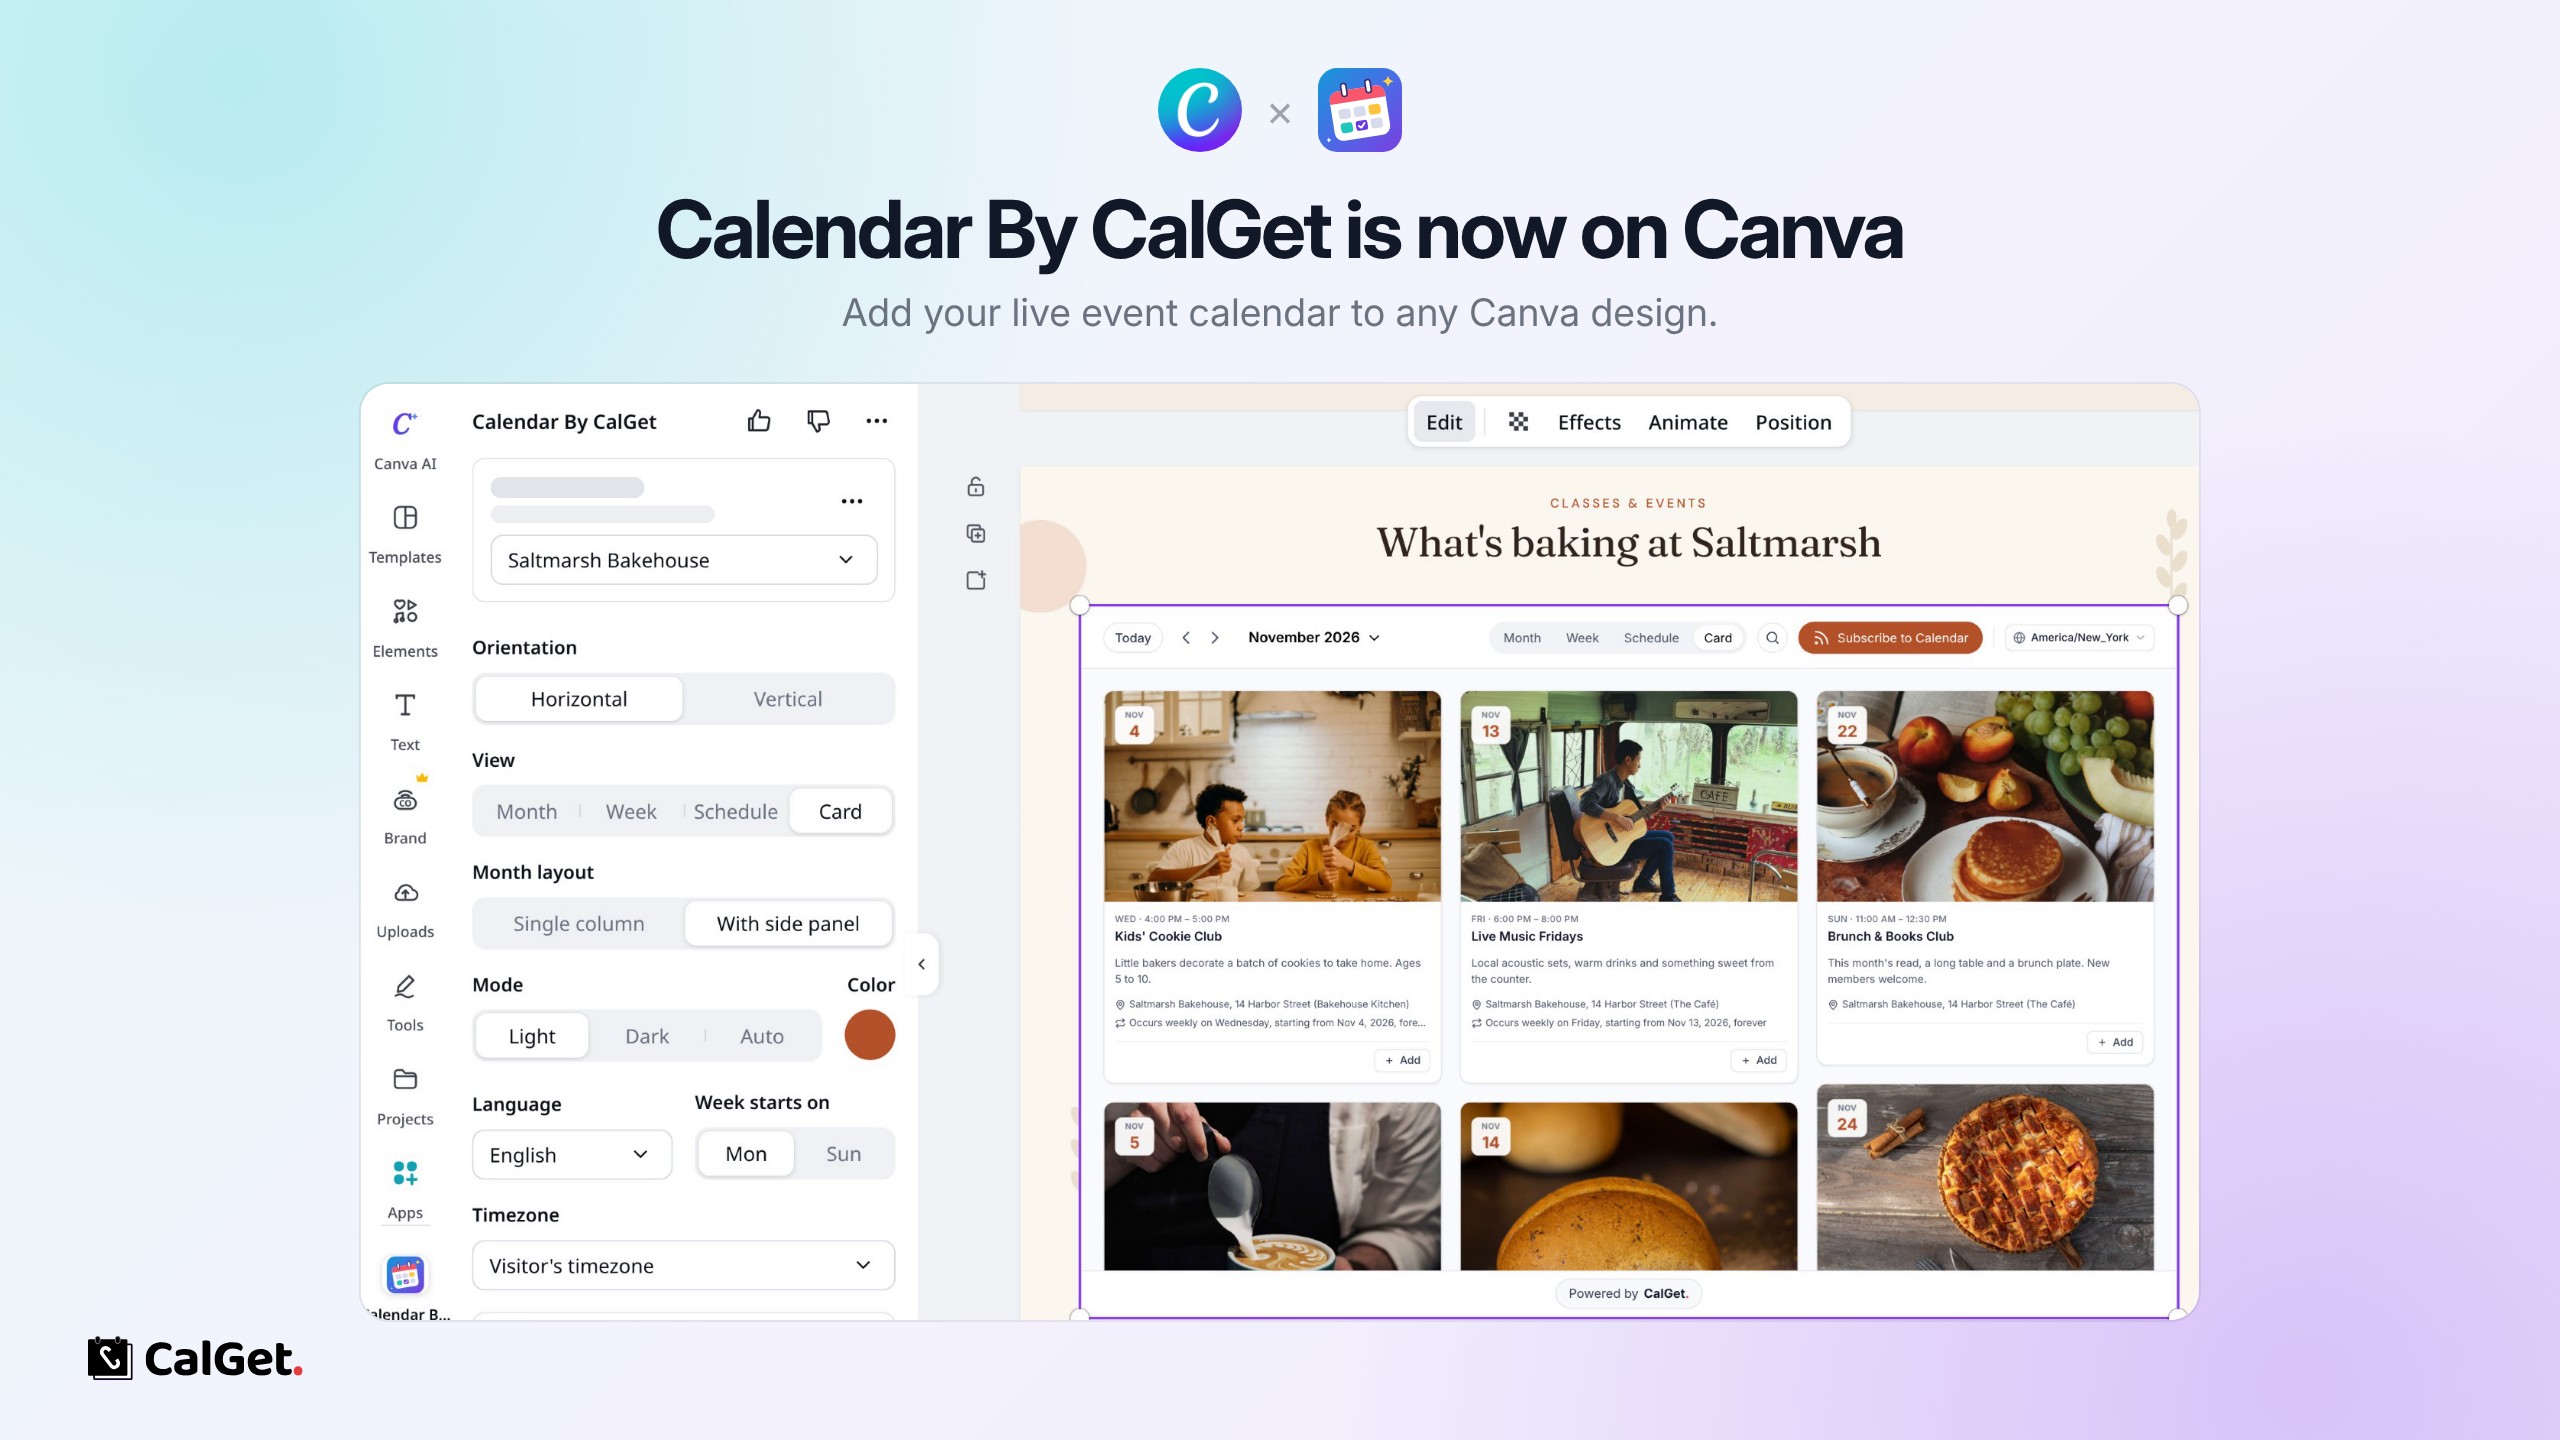
CalGet is now on the Canva Apps marketplace! With the Calendar By CalGet app, you can add your live CalGet event calendar to any Canva design, including Canva websites, without leaving the editor.

Here's what you can do:

Add It in a Few Clicks – Open Apps in your design, search for Calendar By CalGet, connect your CalGet account, pick a calendar and click Add calendar to design.

Style It Right in Canva – Choose Month, Week, Schedule or Card view, a horizontal or vertical layout, light, dark or auto mode, and your brand color. You can also set the language, the first day of the week and the time zone, and hide the elements you don't need.

Always Up to Date – Your calendar stays live on your published site. Add or edit an event in CalGet and it shows up by itself, with no redesigning or republishing.

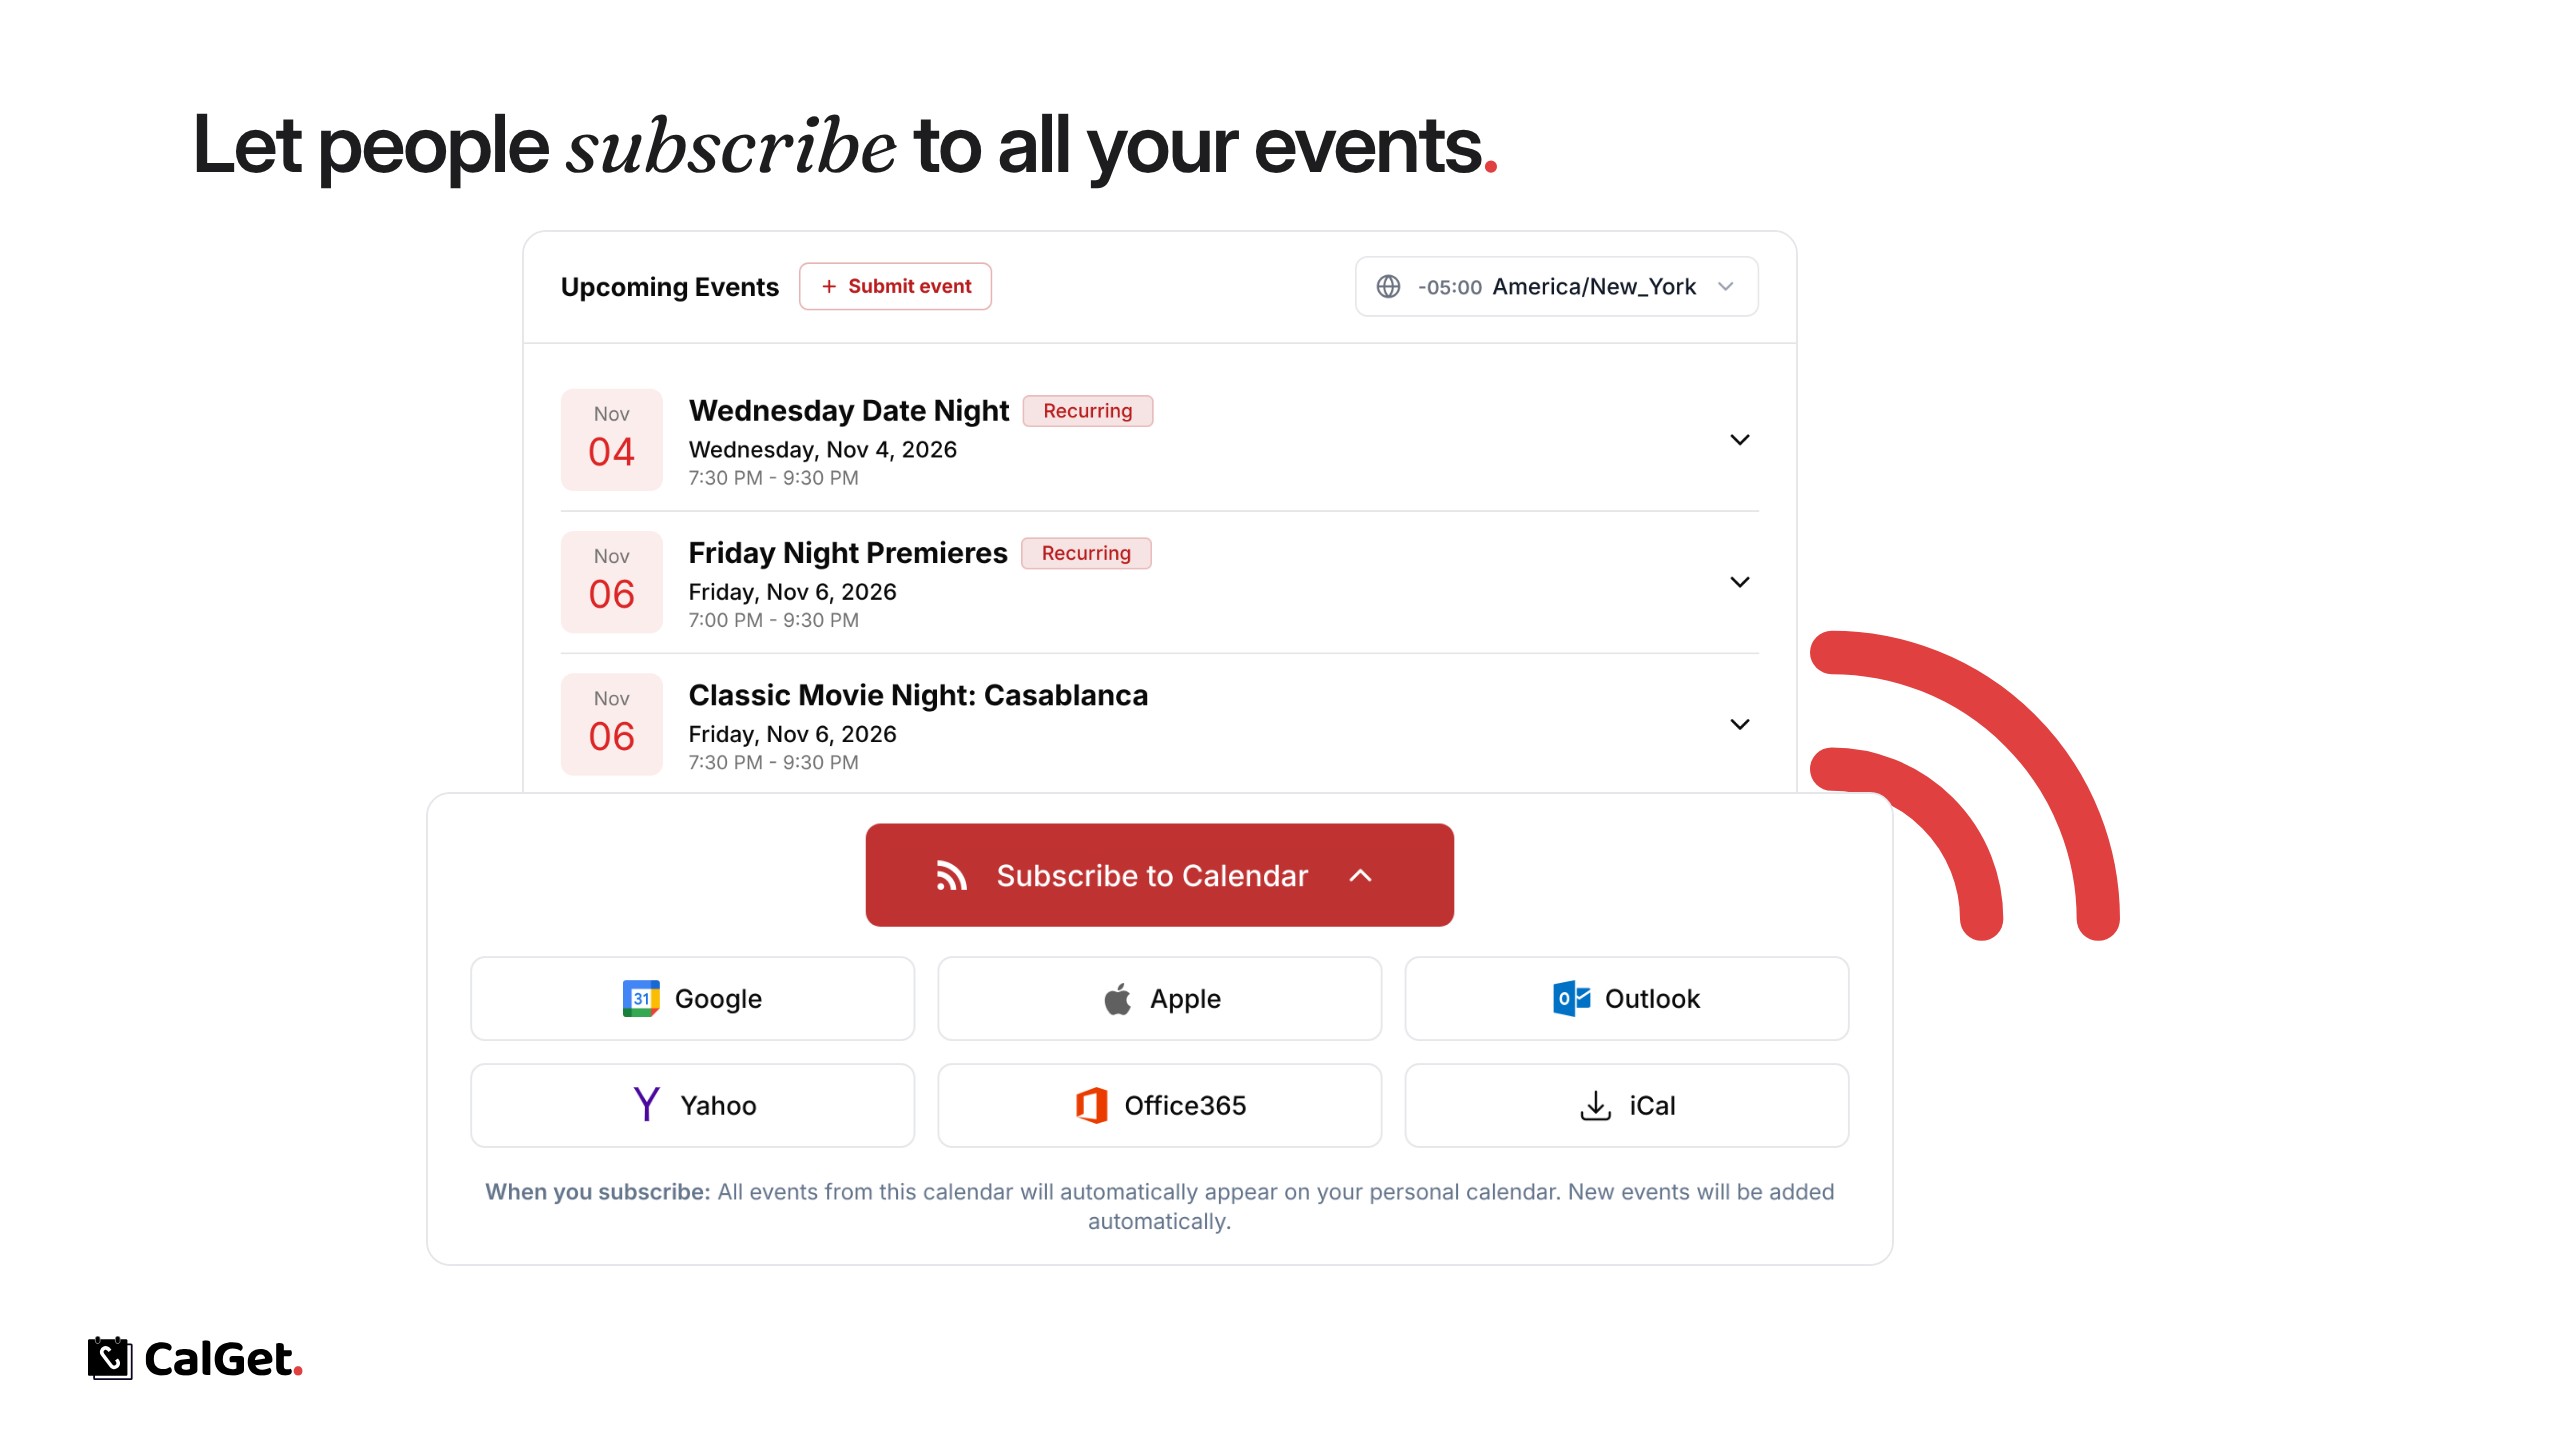
Easy for Your Visitors – Anyone can open an event, add it to Google, Apple, Outlook or Yahoo, or subscribe to your calendar.

Perfect for studios, schools, nonprofits, venues and small businesses that run their website on Canva.

Get the app: Calendar By CalGet on Canva
Step-by-step guide: How to Add an Events Calendar to Your Canva Website
Guest Event Submissions

Visitors can submit events from your public calendar page or an embedded form. Nothing is published until you approve it.

Guest Event Submissions

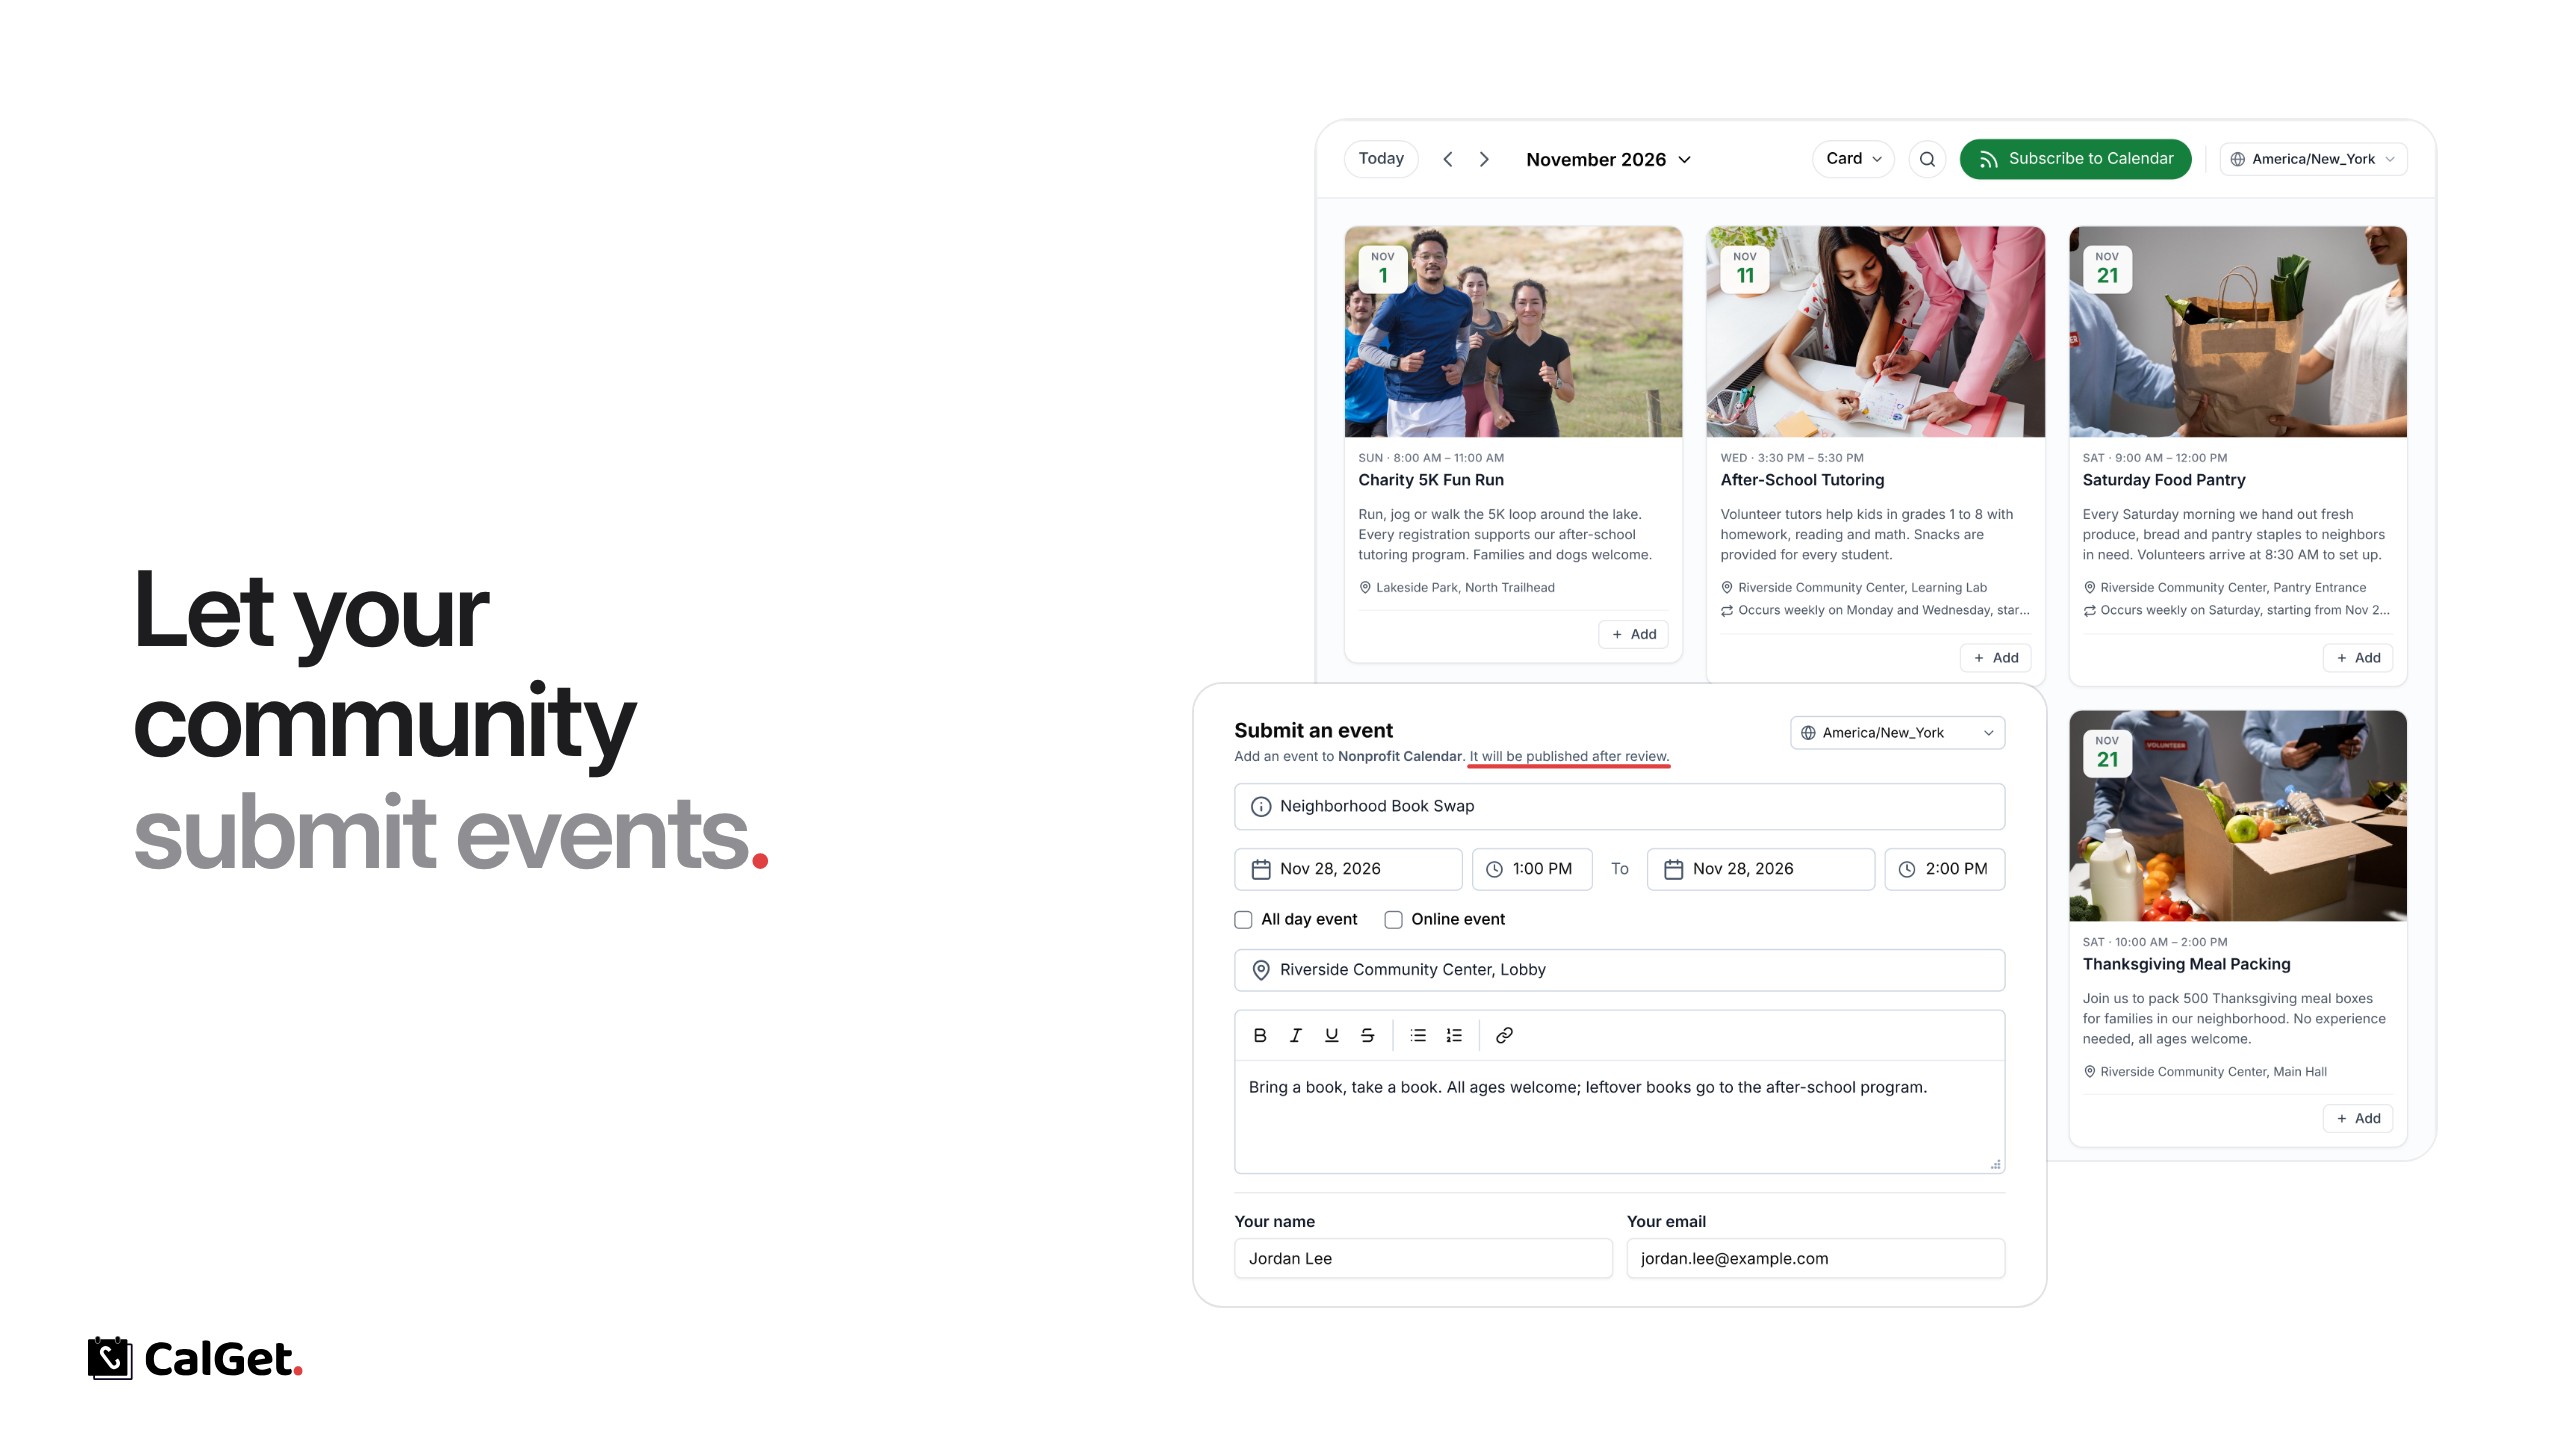
Your community can now submit events to your calendar. Visitors click Submit event on your public calendar page (or use an embedded form), and nothing is published until you review it.

Submit an event – Guests add the title, date and time, location and description, plus their name and email. They don’t need a CalGet account.

Review – Submissions wait under Pending until you approve them; approved ones move to Approved and appear on your calendar.

To turn it on, go to Calendars, open a calendar, choose the Guest Events tab and switch on Accept guest event submissions. Use Embed guest event form to put the form on your own website.

Rebuilt Embeddable Event Calendar: 4 Views, Dark Mode and Full Styling

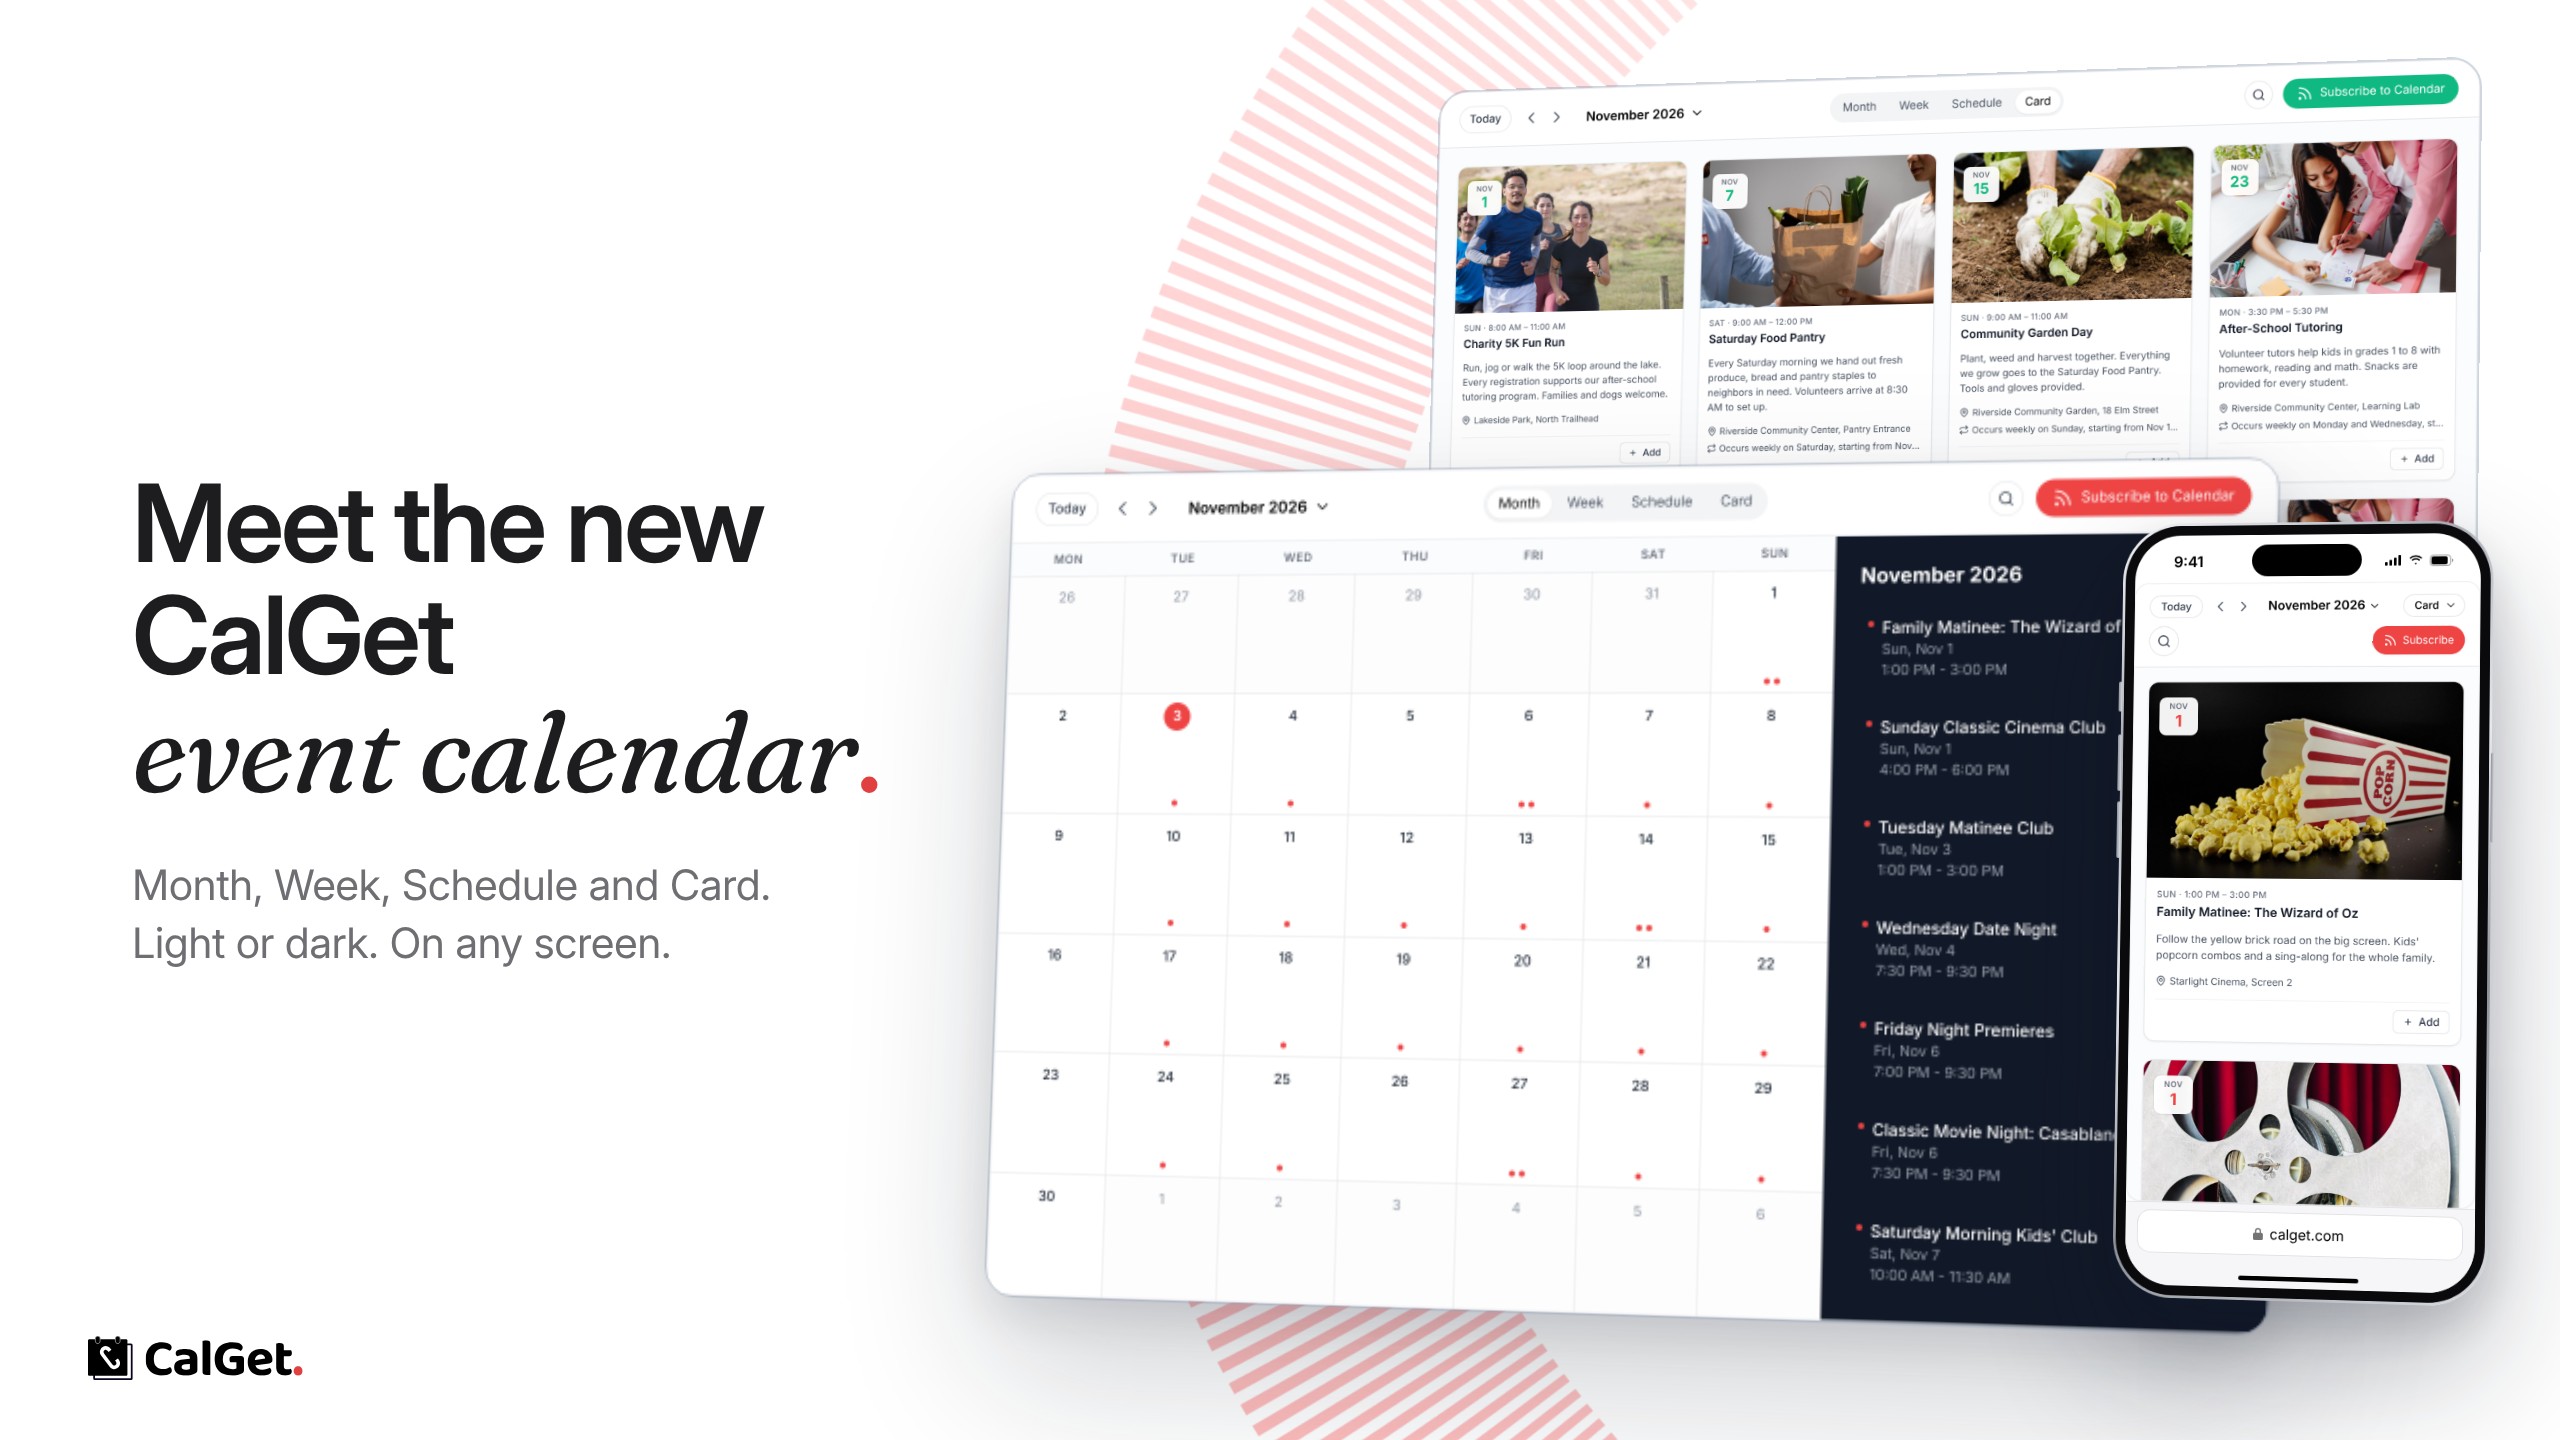
The embeddable calendar is rebuilt with Month, Week, Schedule and Card views, light and dark mode, your colors, and a layout that fits any screen.

Rebuilt Embeddable Event Calendar: 4 Views, Dark Mode and Full Styling

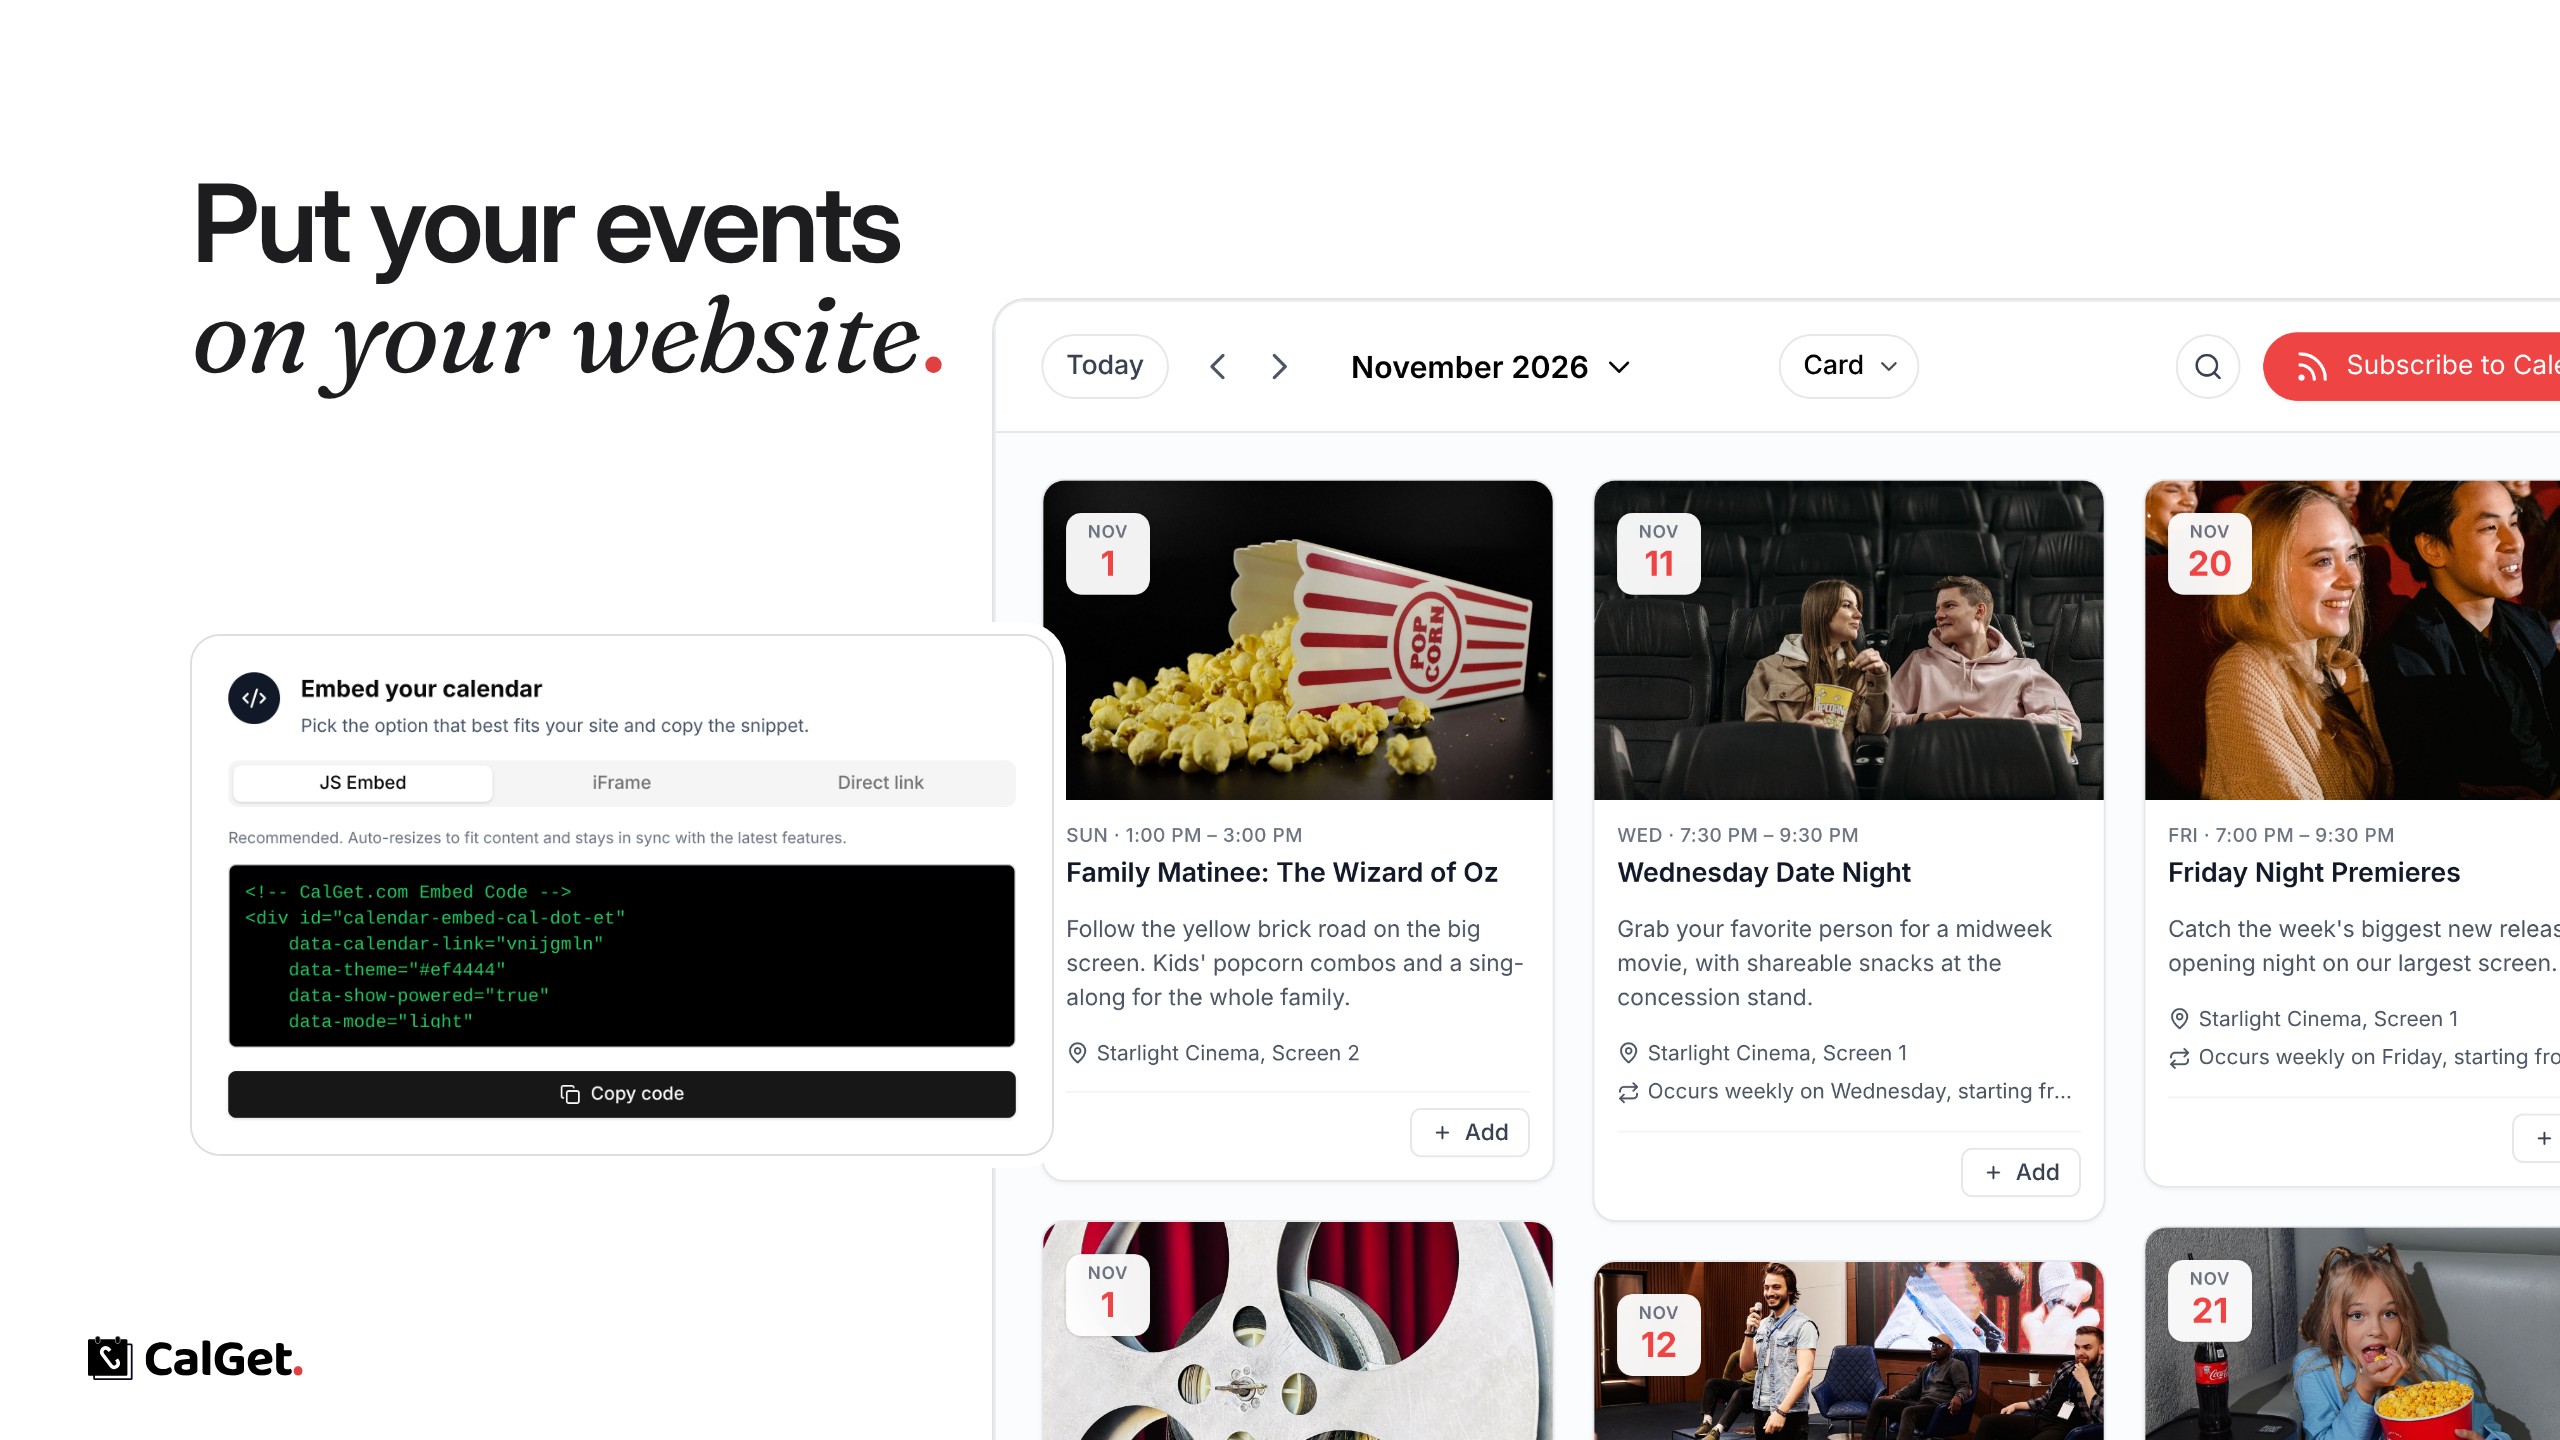
We rebuilt the CalGet embeddable event calendar from scratch. You add it to any website with one embed code, and it always shows your current CalGet events: add or change an event and the calendar on your site updates by itself.

Four views – Month, Week, Schedule and Card. Card view shows every event with its photo. Visitors can switch between views, or you can keep it to one.

Month layout – A single month grid, or the grid with a side panel that lists the month's events.

Your colors and mode – Set your brand color, and pick light mode, dark mode, or auto, which follows the visitor's device setting.

Language, week and time zone – Choose the language and the first day of the week. Times show in the visitor's time zone, and visitors can change it.

Only what you need – Hide the date navigation, the view switcher, search, the subscribe button or the time zone picker, or the whole top bar.

What visitors can do – Search your events, open any event for its details, add it to Google, Apple, Outlook or Yahoo Calendar or download it as an .ics file, and subscribe to the whole calendar so new events reach them automatically.

Every screen – The layout adapts to desktop, tablet and mobile.

Set it up under Embeddable Calendar in your CalGet dashboard: Embeddable Event Calendar

Sync Google, Apple and Outlook Calendars into CalGet

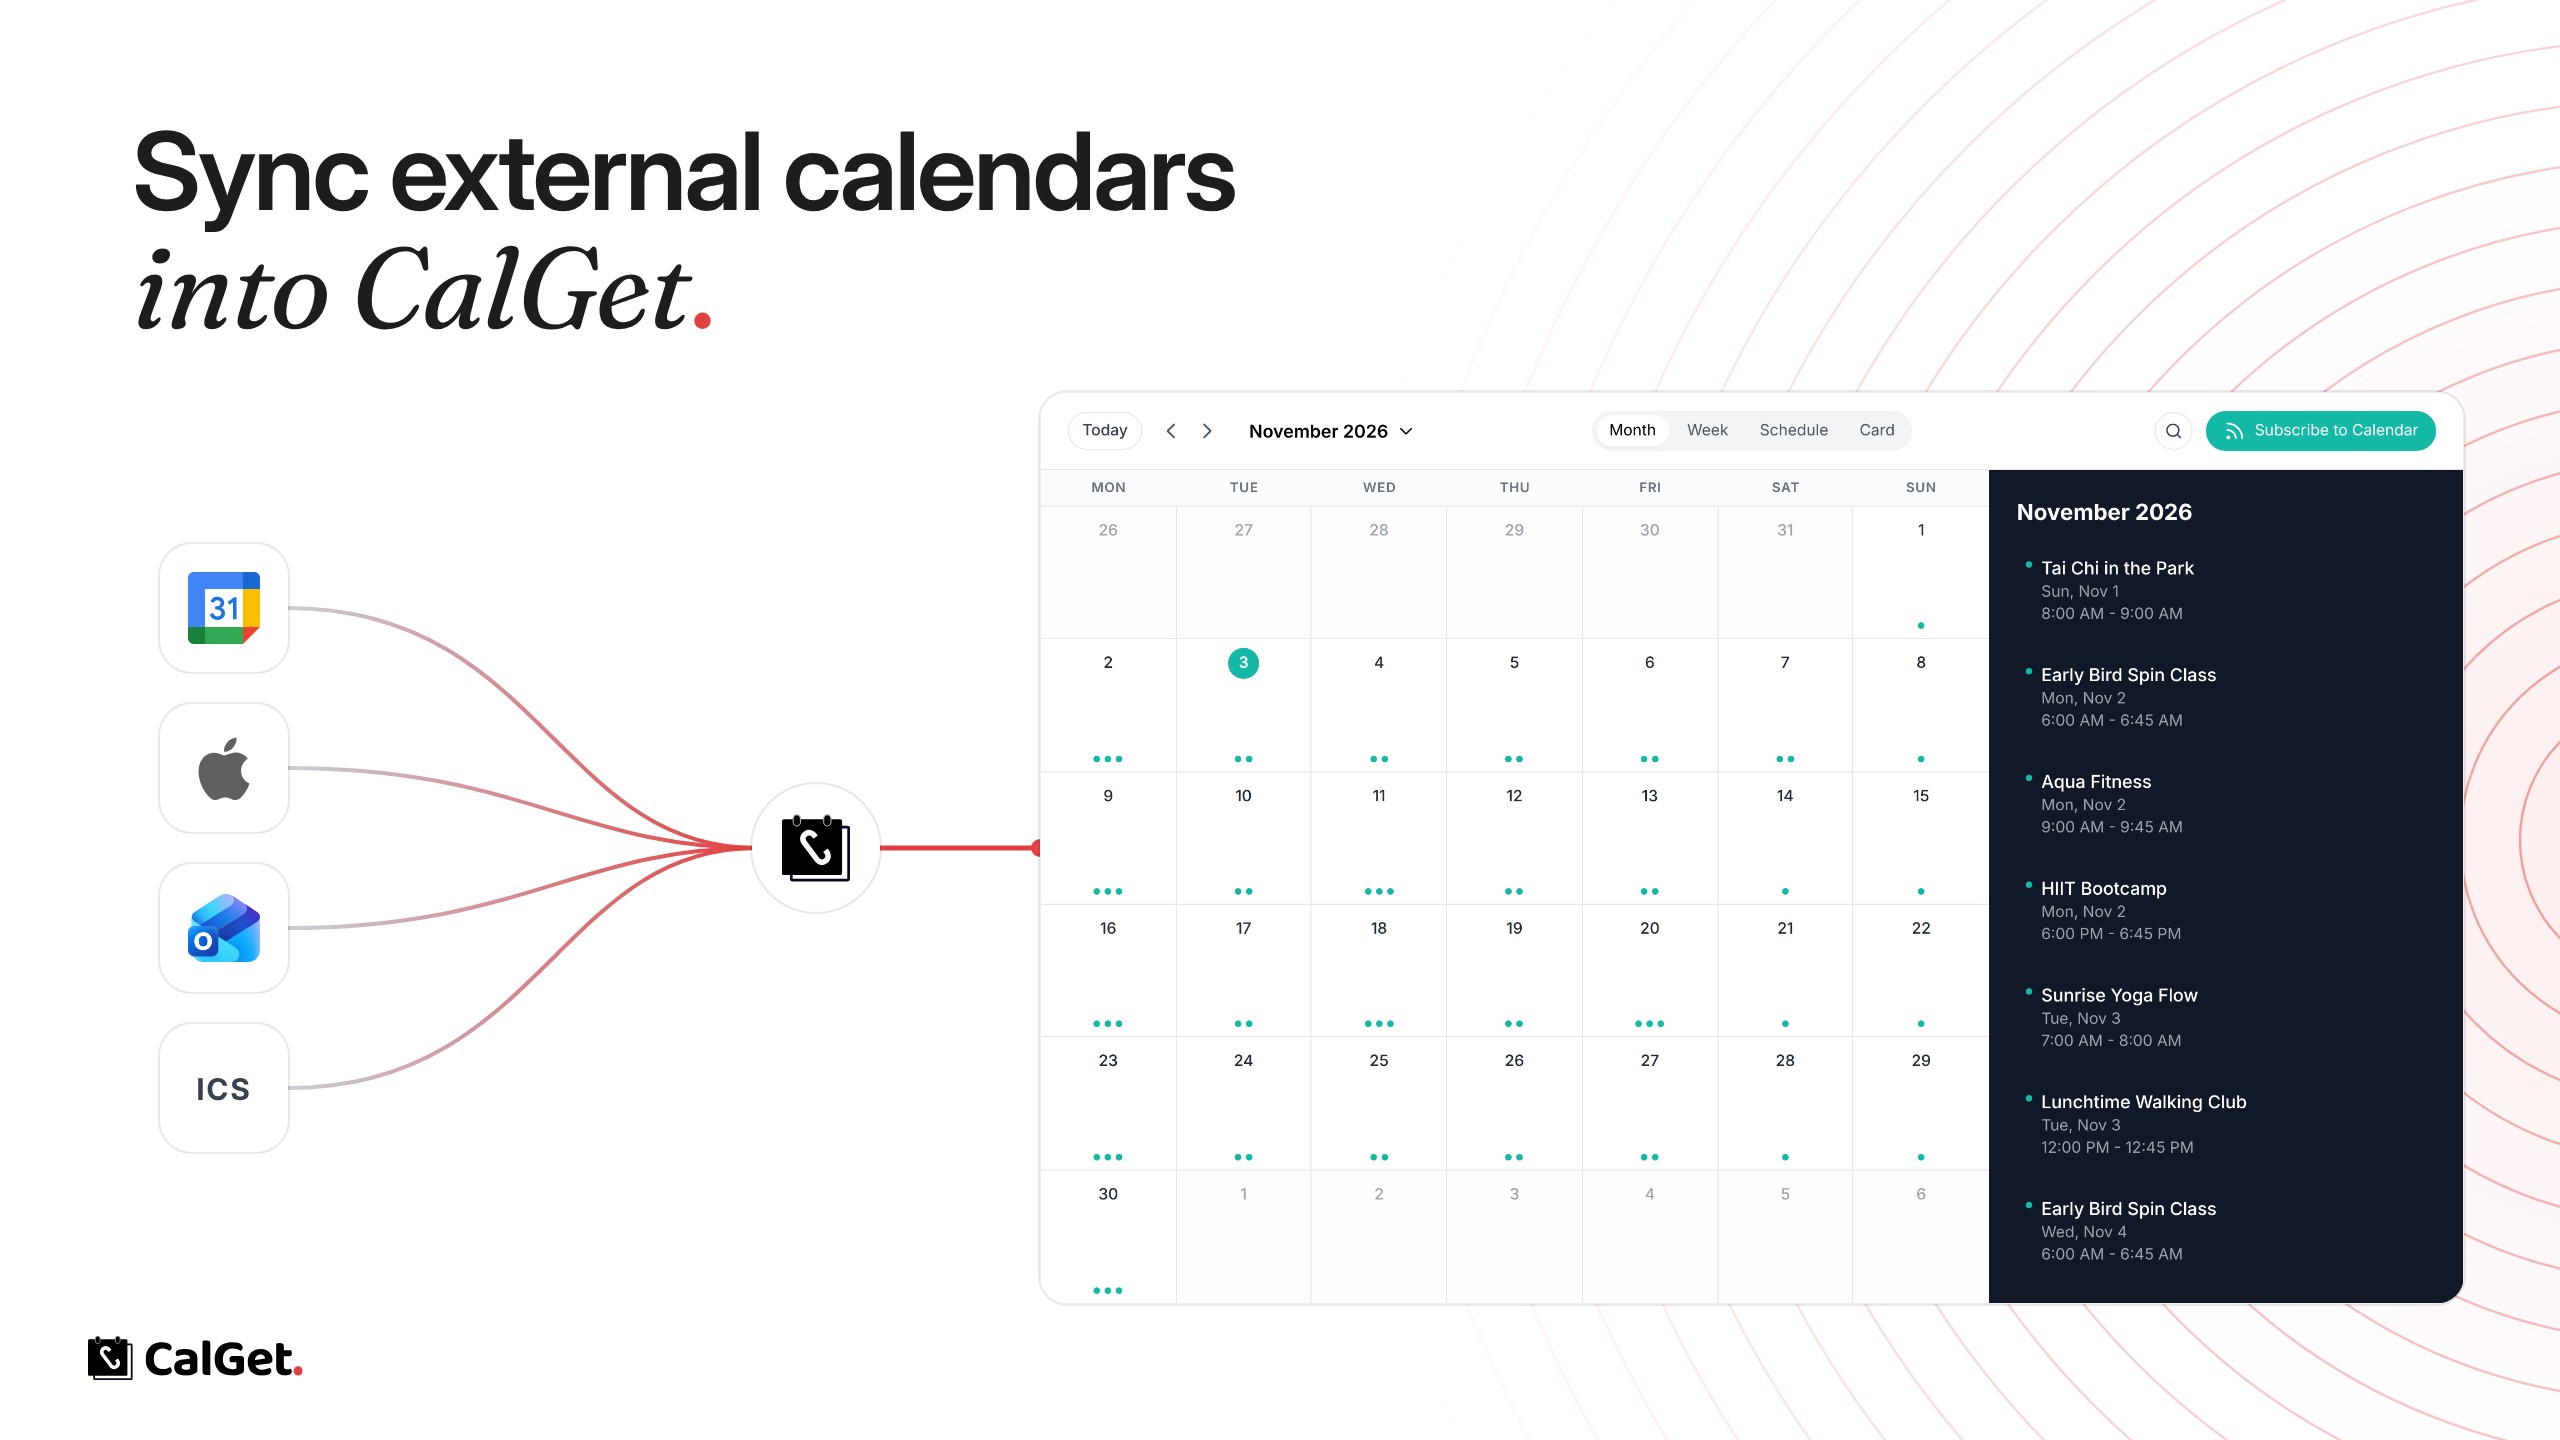
Paste an ICS feed URL from Google, Apple or Outlook, and its events show up in your CalGet calendar. The feed syncs every 12 hours.

Sync Google, Apple and Outlook Calendars into CalGet

You can now bring events from another calendar into a CalGet calendar. Paste that calendar's ICS feed URL, and its events show up next to your CalGet events.

Any ICS feed – Google Calendar, Apple Calendar, Outlook, or any other calendar that publishes an ICS link.

Stays in sync – CalGet syncs the feed every 12 hours, and you can sync it manually anytime.

Works across CalGet – Synced events appear in your embeddable calendar and your subscription calendar, and visitors can add them to their own calendar like any of your events.

Read-only – Synced events can't be edited or deleted in CalGet. Change them in the original calendar, and the next sync brings the update.

To set it up, open a calendar, go to External Calendars, click Add External Calendar and paste the ICS feed URL.

Add a Background Image to Your Event Pages

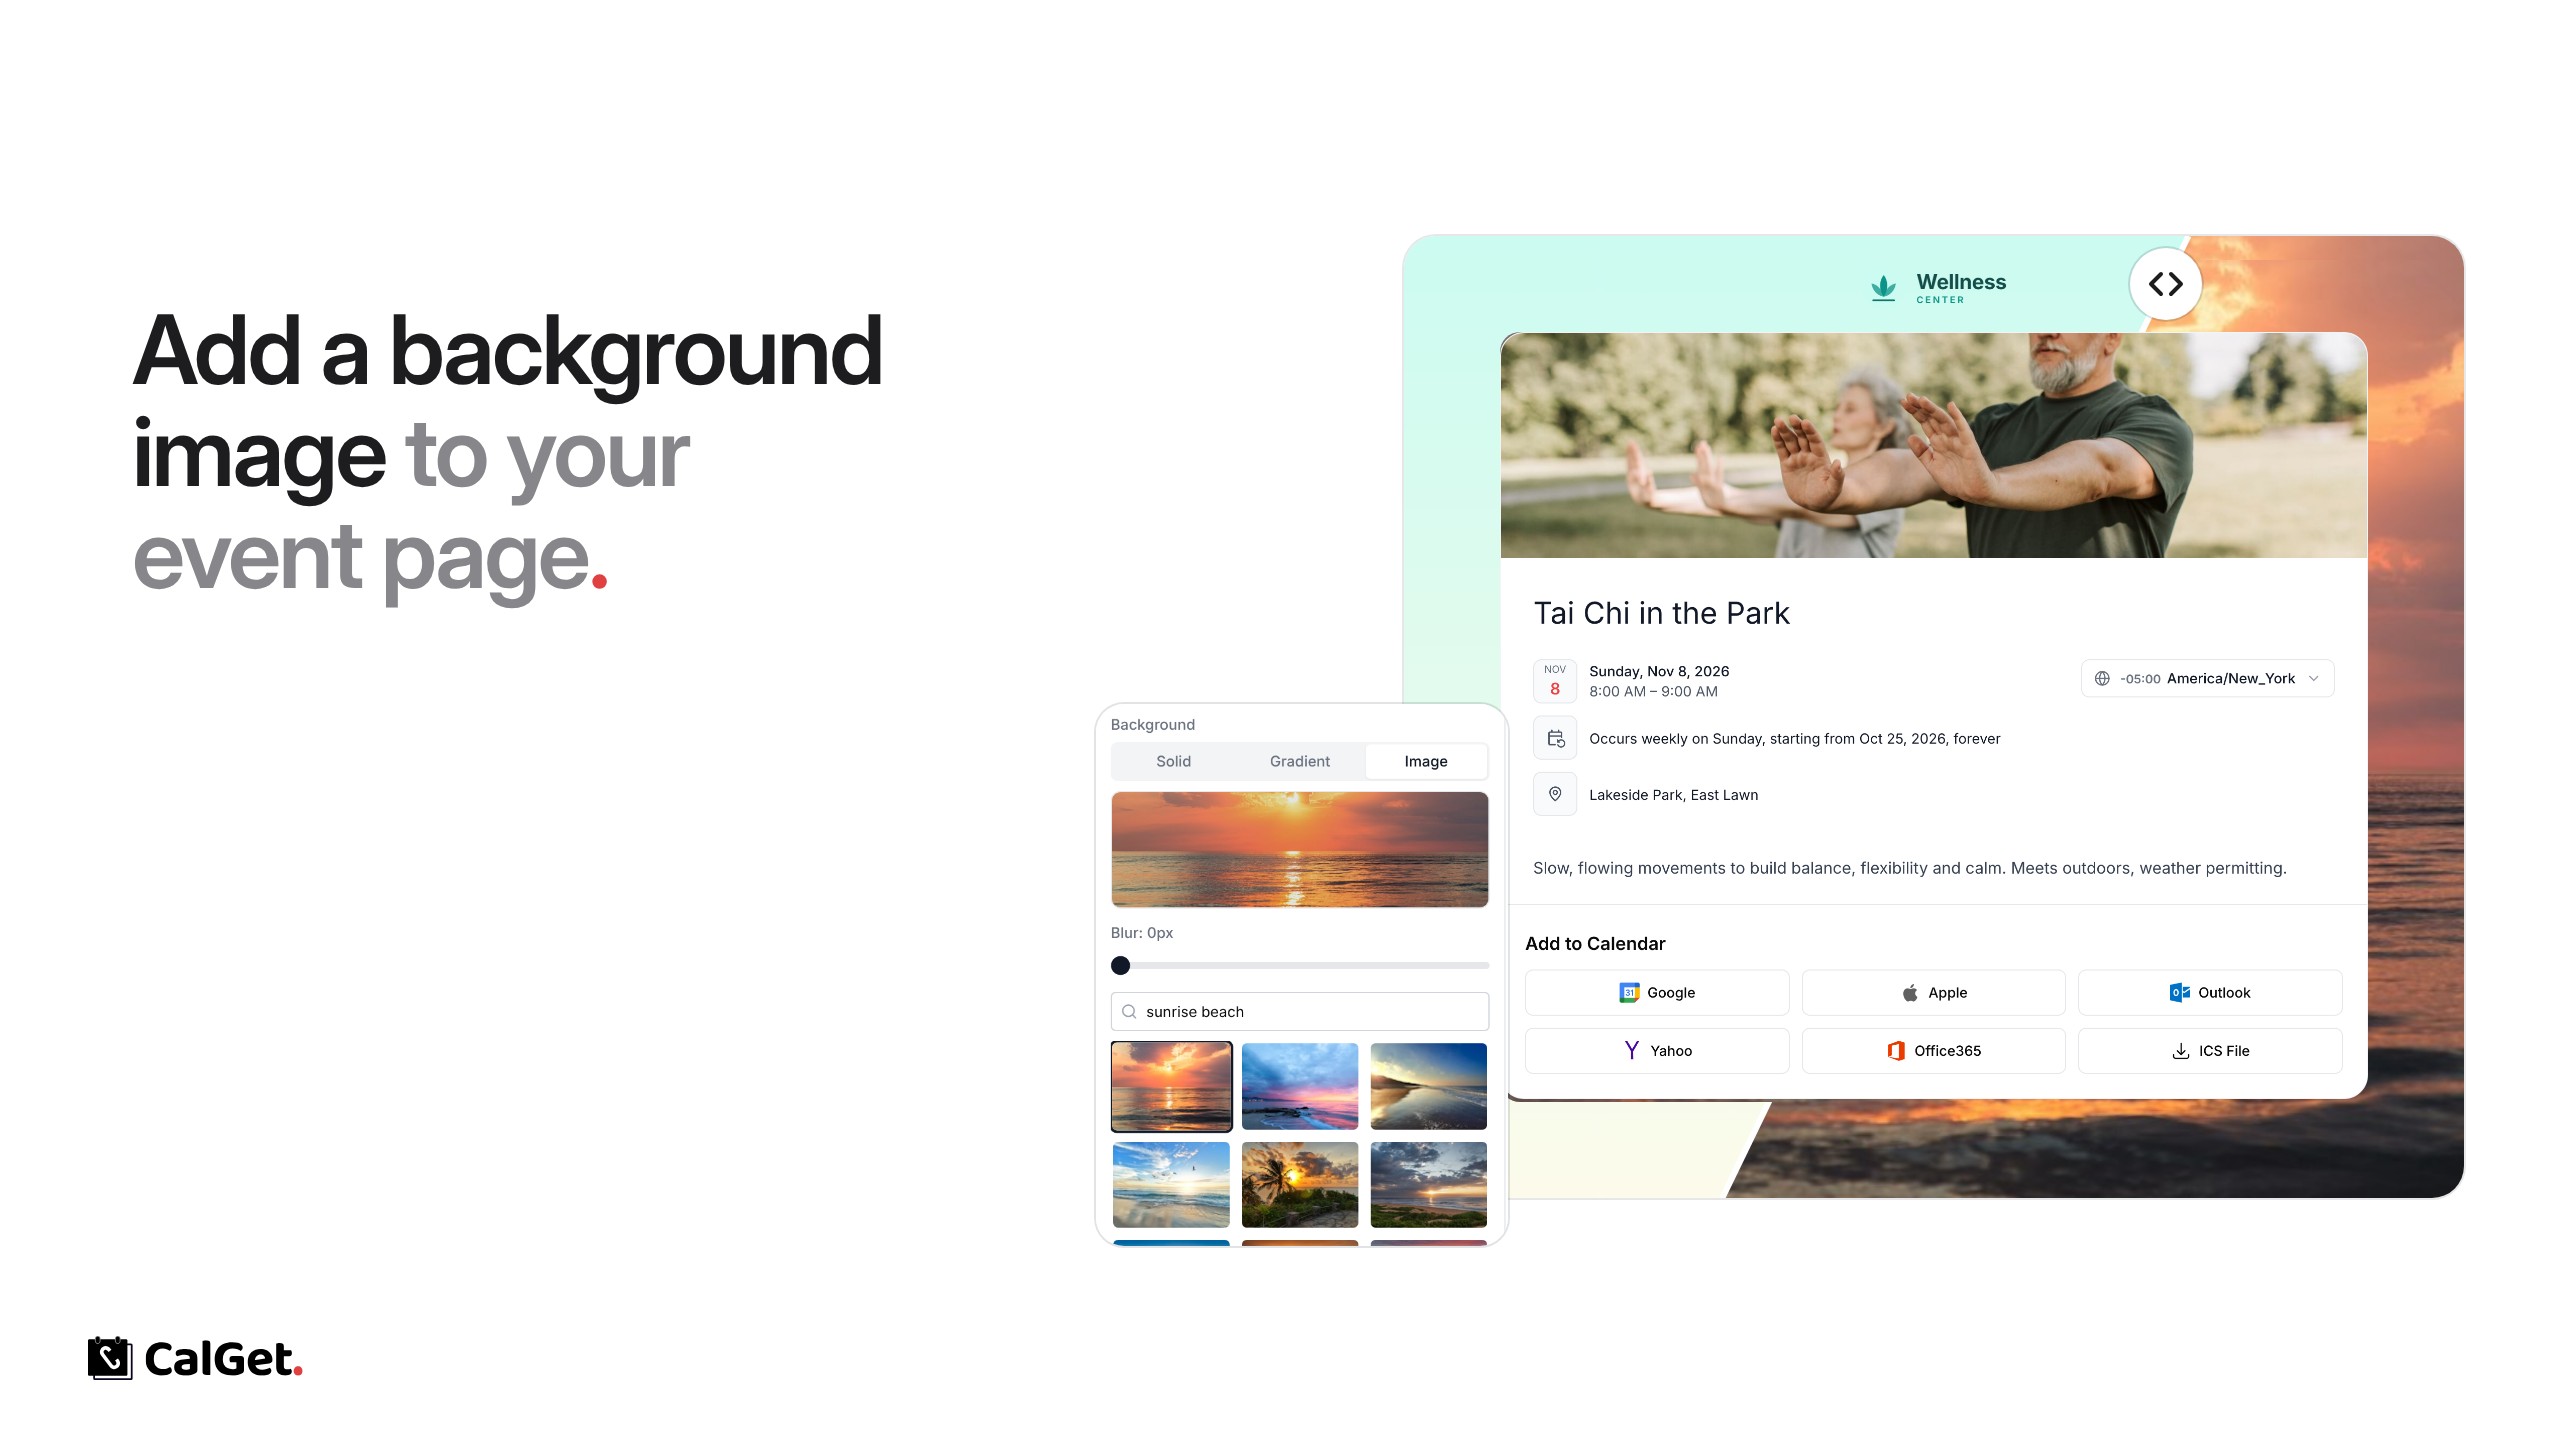
Give your event pages a background photo. Search Unsplash inside CalGet, adjust the blur, and save it in a theme you can reuse.

Add a Background Image to Your Event Pages

Event pages can now have a background image. Pick a photo, and your event card sits on top of it.

Search a photo library – Search Unsplash photos right inside CalGet and click one to use it.

Blur – Soften the photo with the blur slider so your event details stay easy to read.

Solid, gradient or image – The background can also be a solid color or a gradient.

Reusable – The background is part of a theme, so you can use it on as many events as you like.

To set it up, go to Themes, create or edit a theme, and under Page Settings → Background choose Image. Then pick that theme on your event under Edit → Theme.

Track UTM Campaigns on Your Event Pages

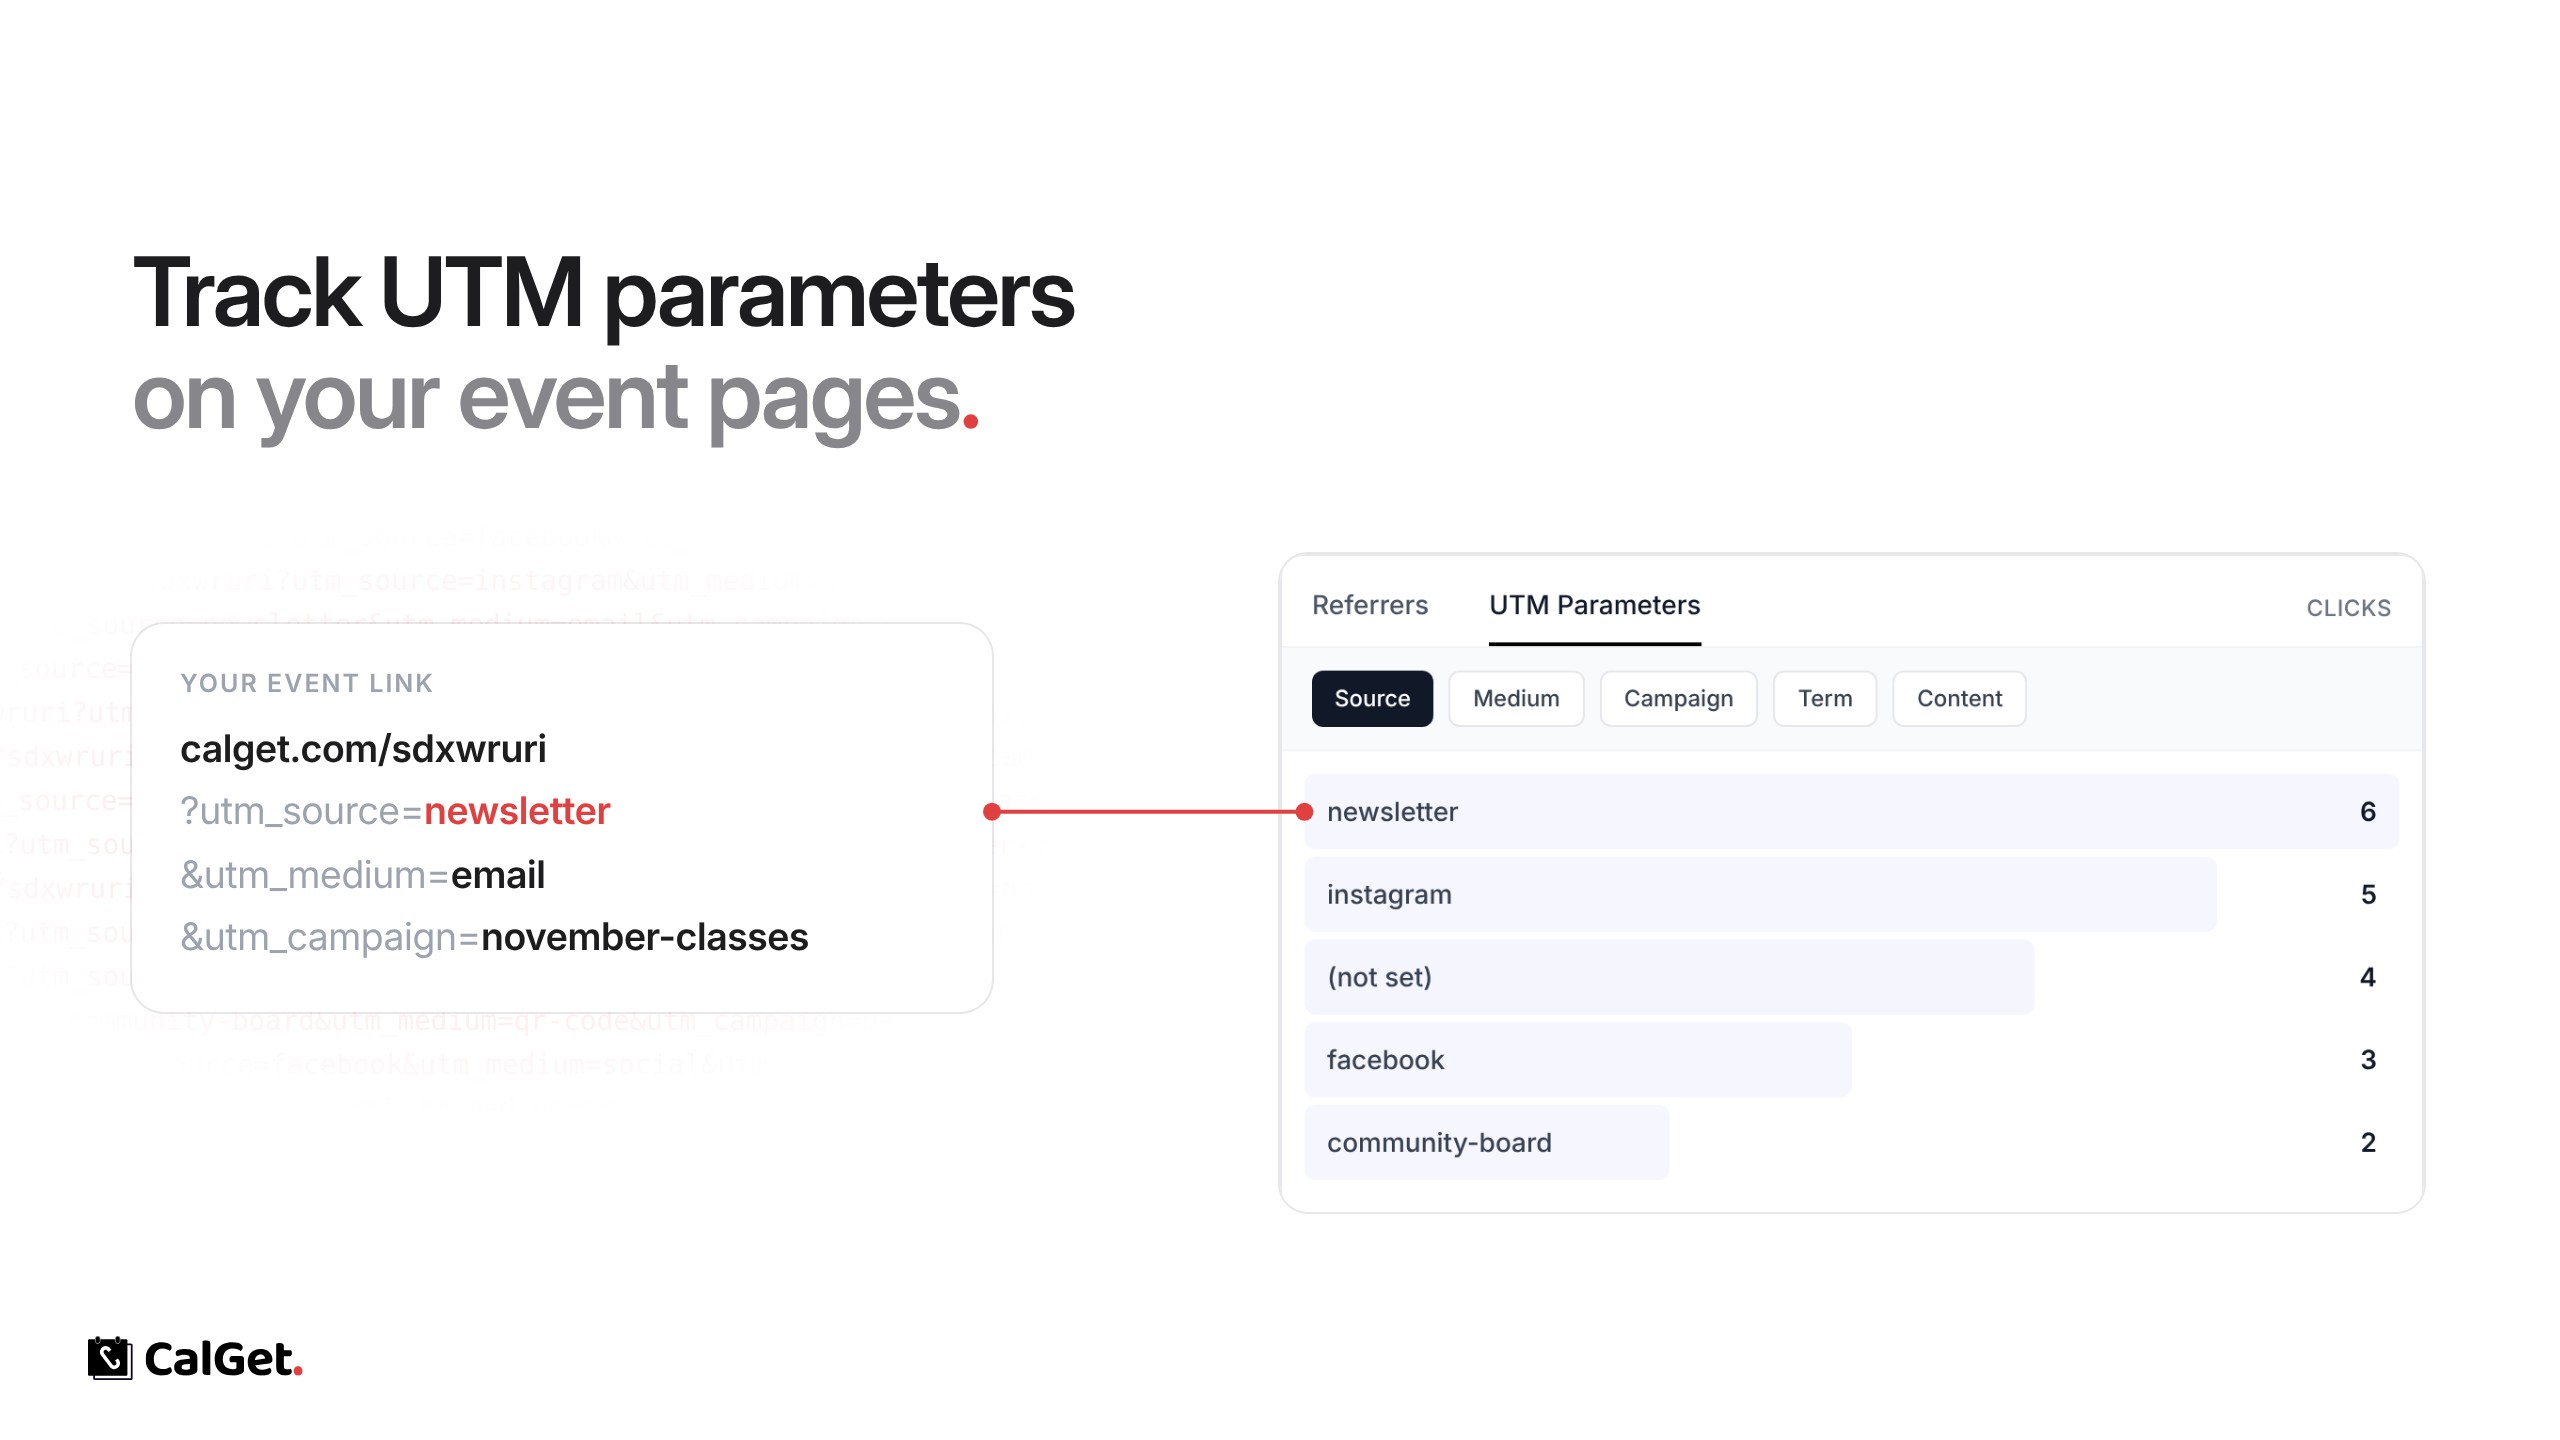
Add UTM tags to your event links and see which sources, mediums and campaigns bring visitors, right in your event analytics.

Track UTM Campaigns on Your Event Pages

Event page analytics now read UTM parameters. Add UTM tags to your event link, and CalGet shows how many visits each source, medium and campaign brought in.

All five UTM fields – Source, Medium, Campaign, Term and Content, each with its own view.

Next to your referrers – Open your event's Analytics tab and switch to UTM Parameters. Your team's Analytics page shows them across all events.

Untagged visits – Visits without UTM tags show as “(not set)”.

Tracking started on November 21, 2025, so visits from before that date have no UTM data.

Google Calendar Subscription Workaround

When Google Calendar couldn’t add subscriptions by link, we added a three-step guide so subscribers can add your calendar by URL.

Google Calendar Subscription Workaround

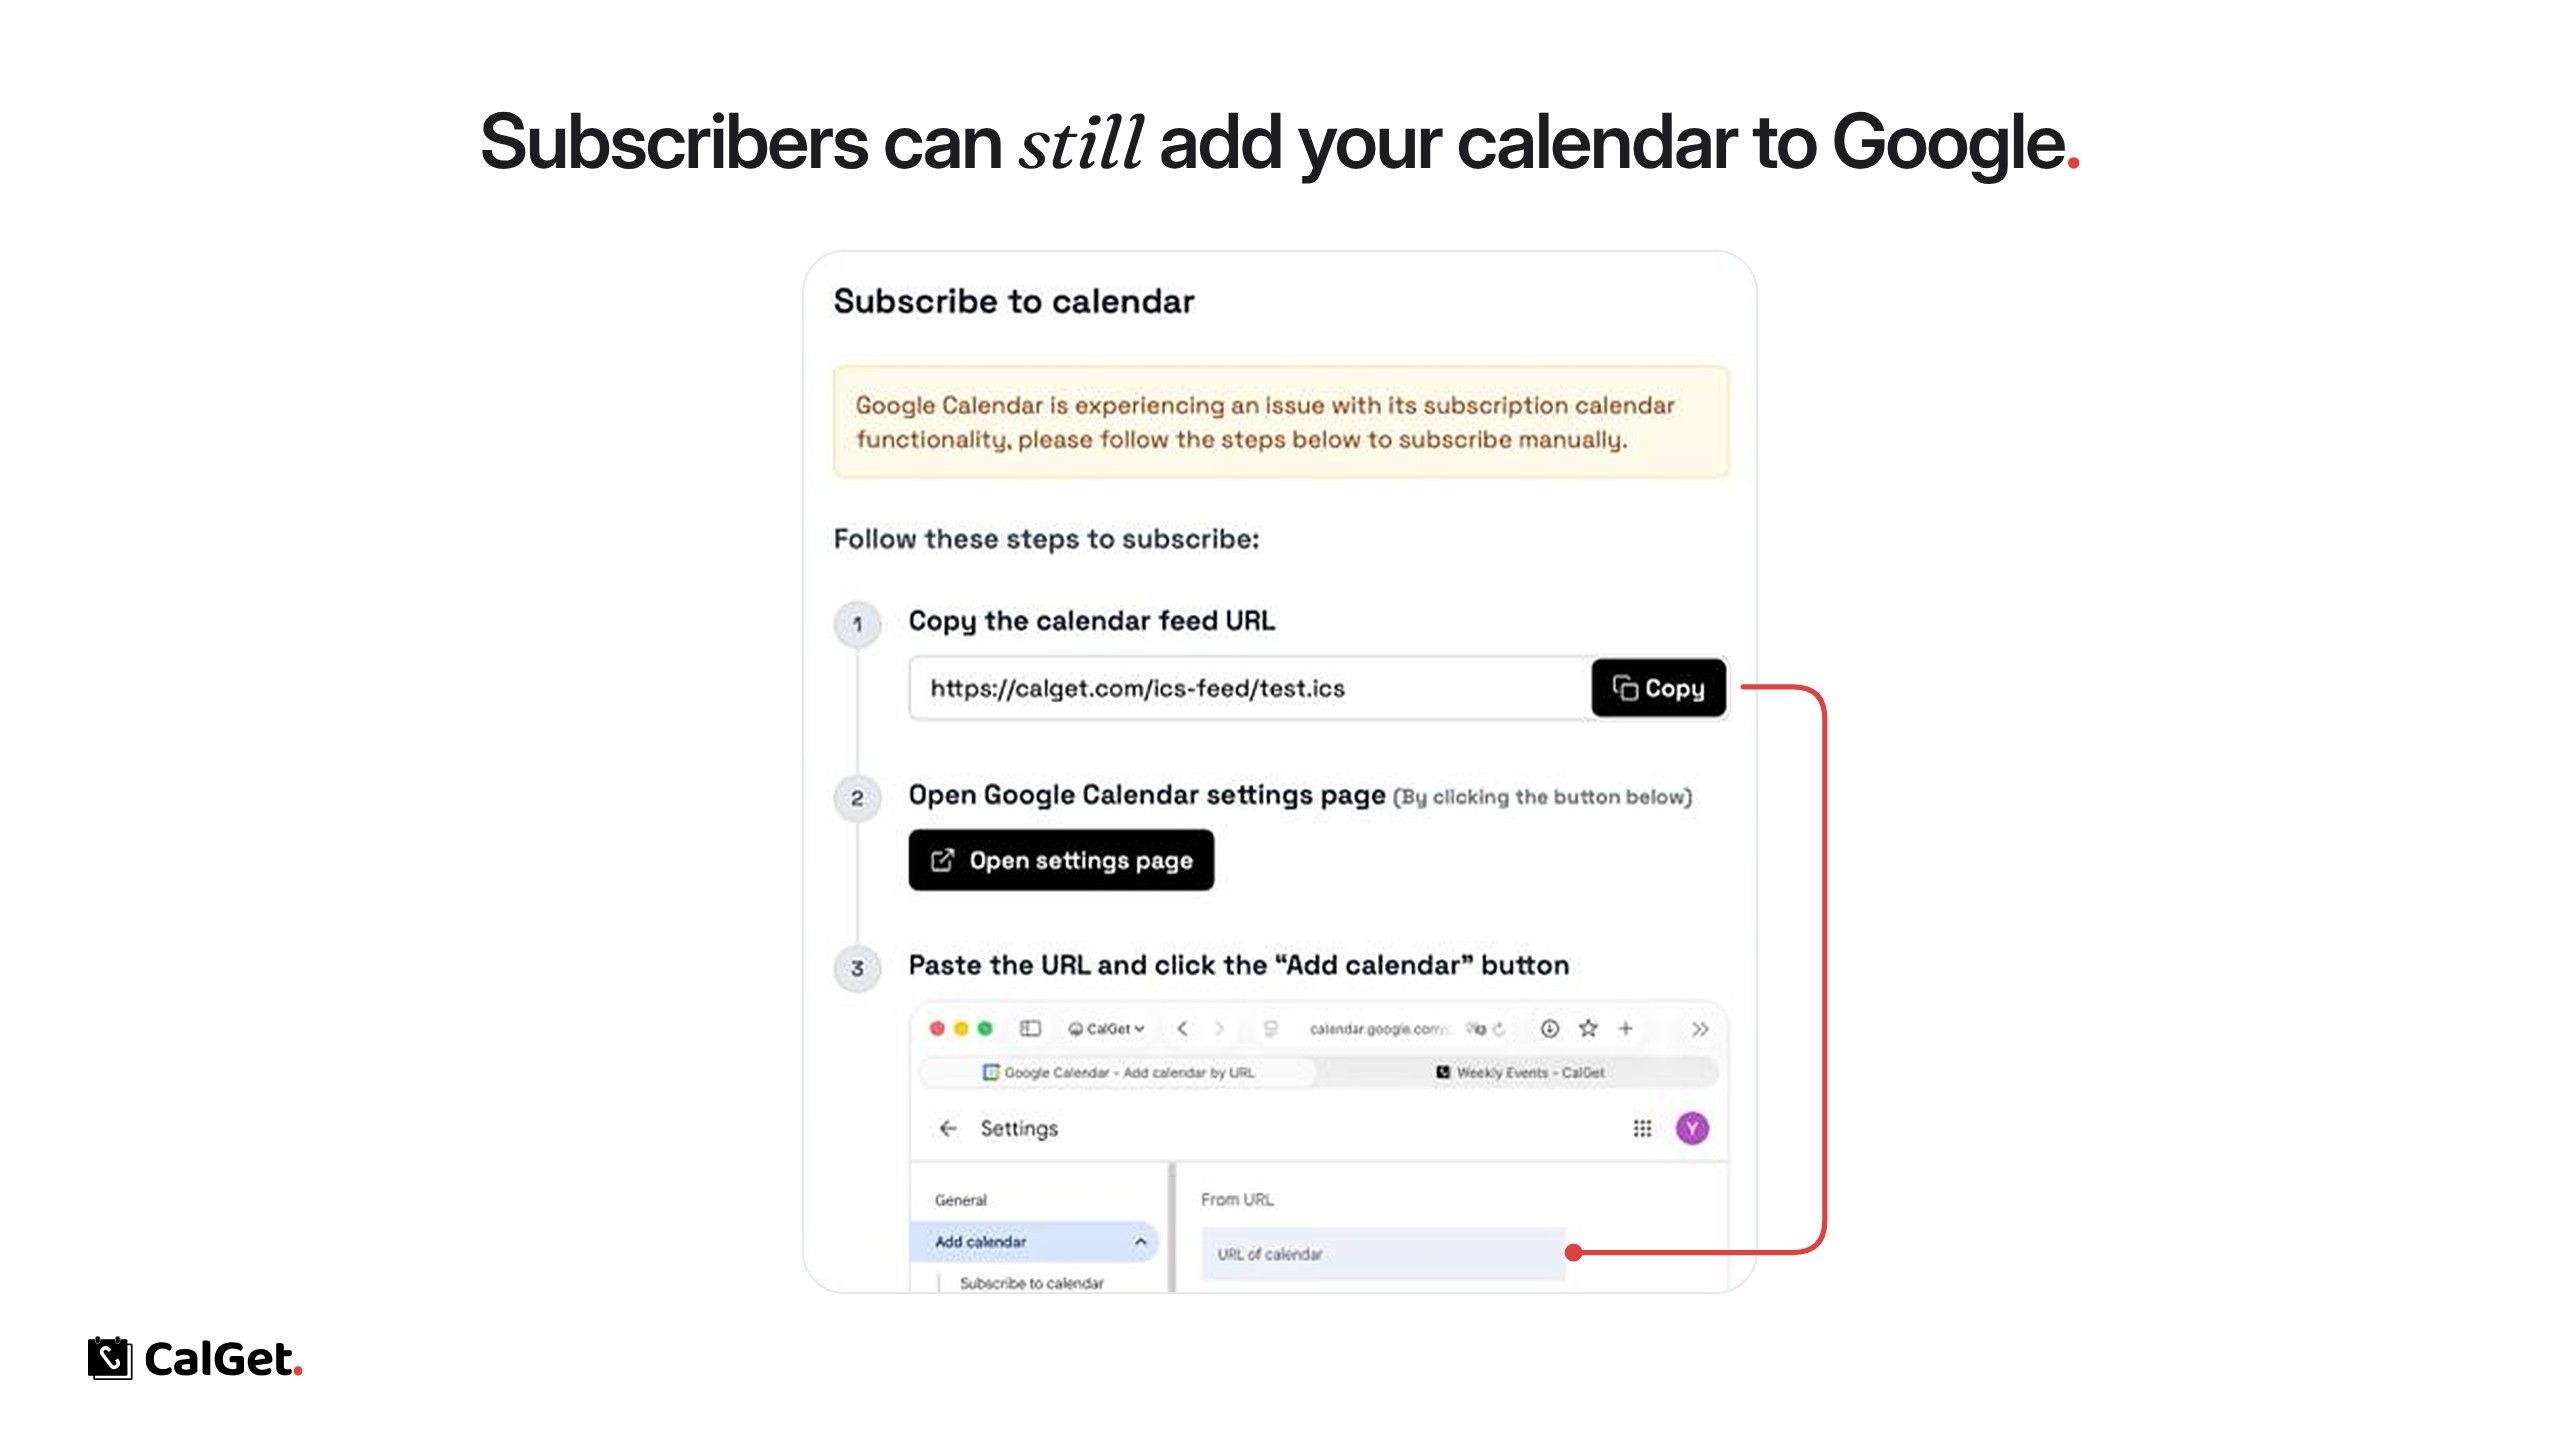
Google Calendar had an issue that stopped new subscribers from adding a calendar by link. As a workaround, we added a short guide to the Subscribe to calendar window so Google Calendar users can add your calendar by hand.

1. Copy the calendar feed URL – One click on Copy.

2. Open Google Calendar settings – Open settings page goes straight to Google’s “Add calendar from URL” page.

3. Paste the URL – Paste it into URL of calendar and click Add calendar.

Subscribers using Apple Calendar, Outlook and other apps aren’t affected.

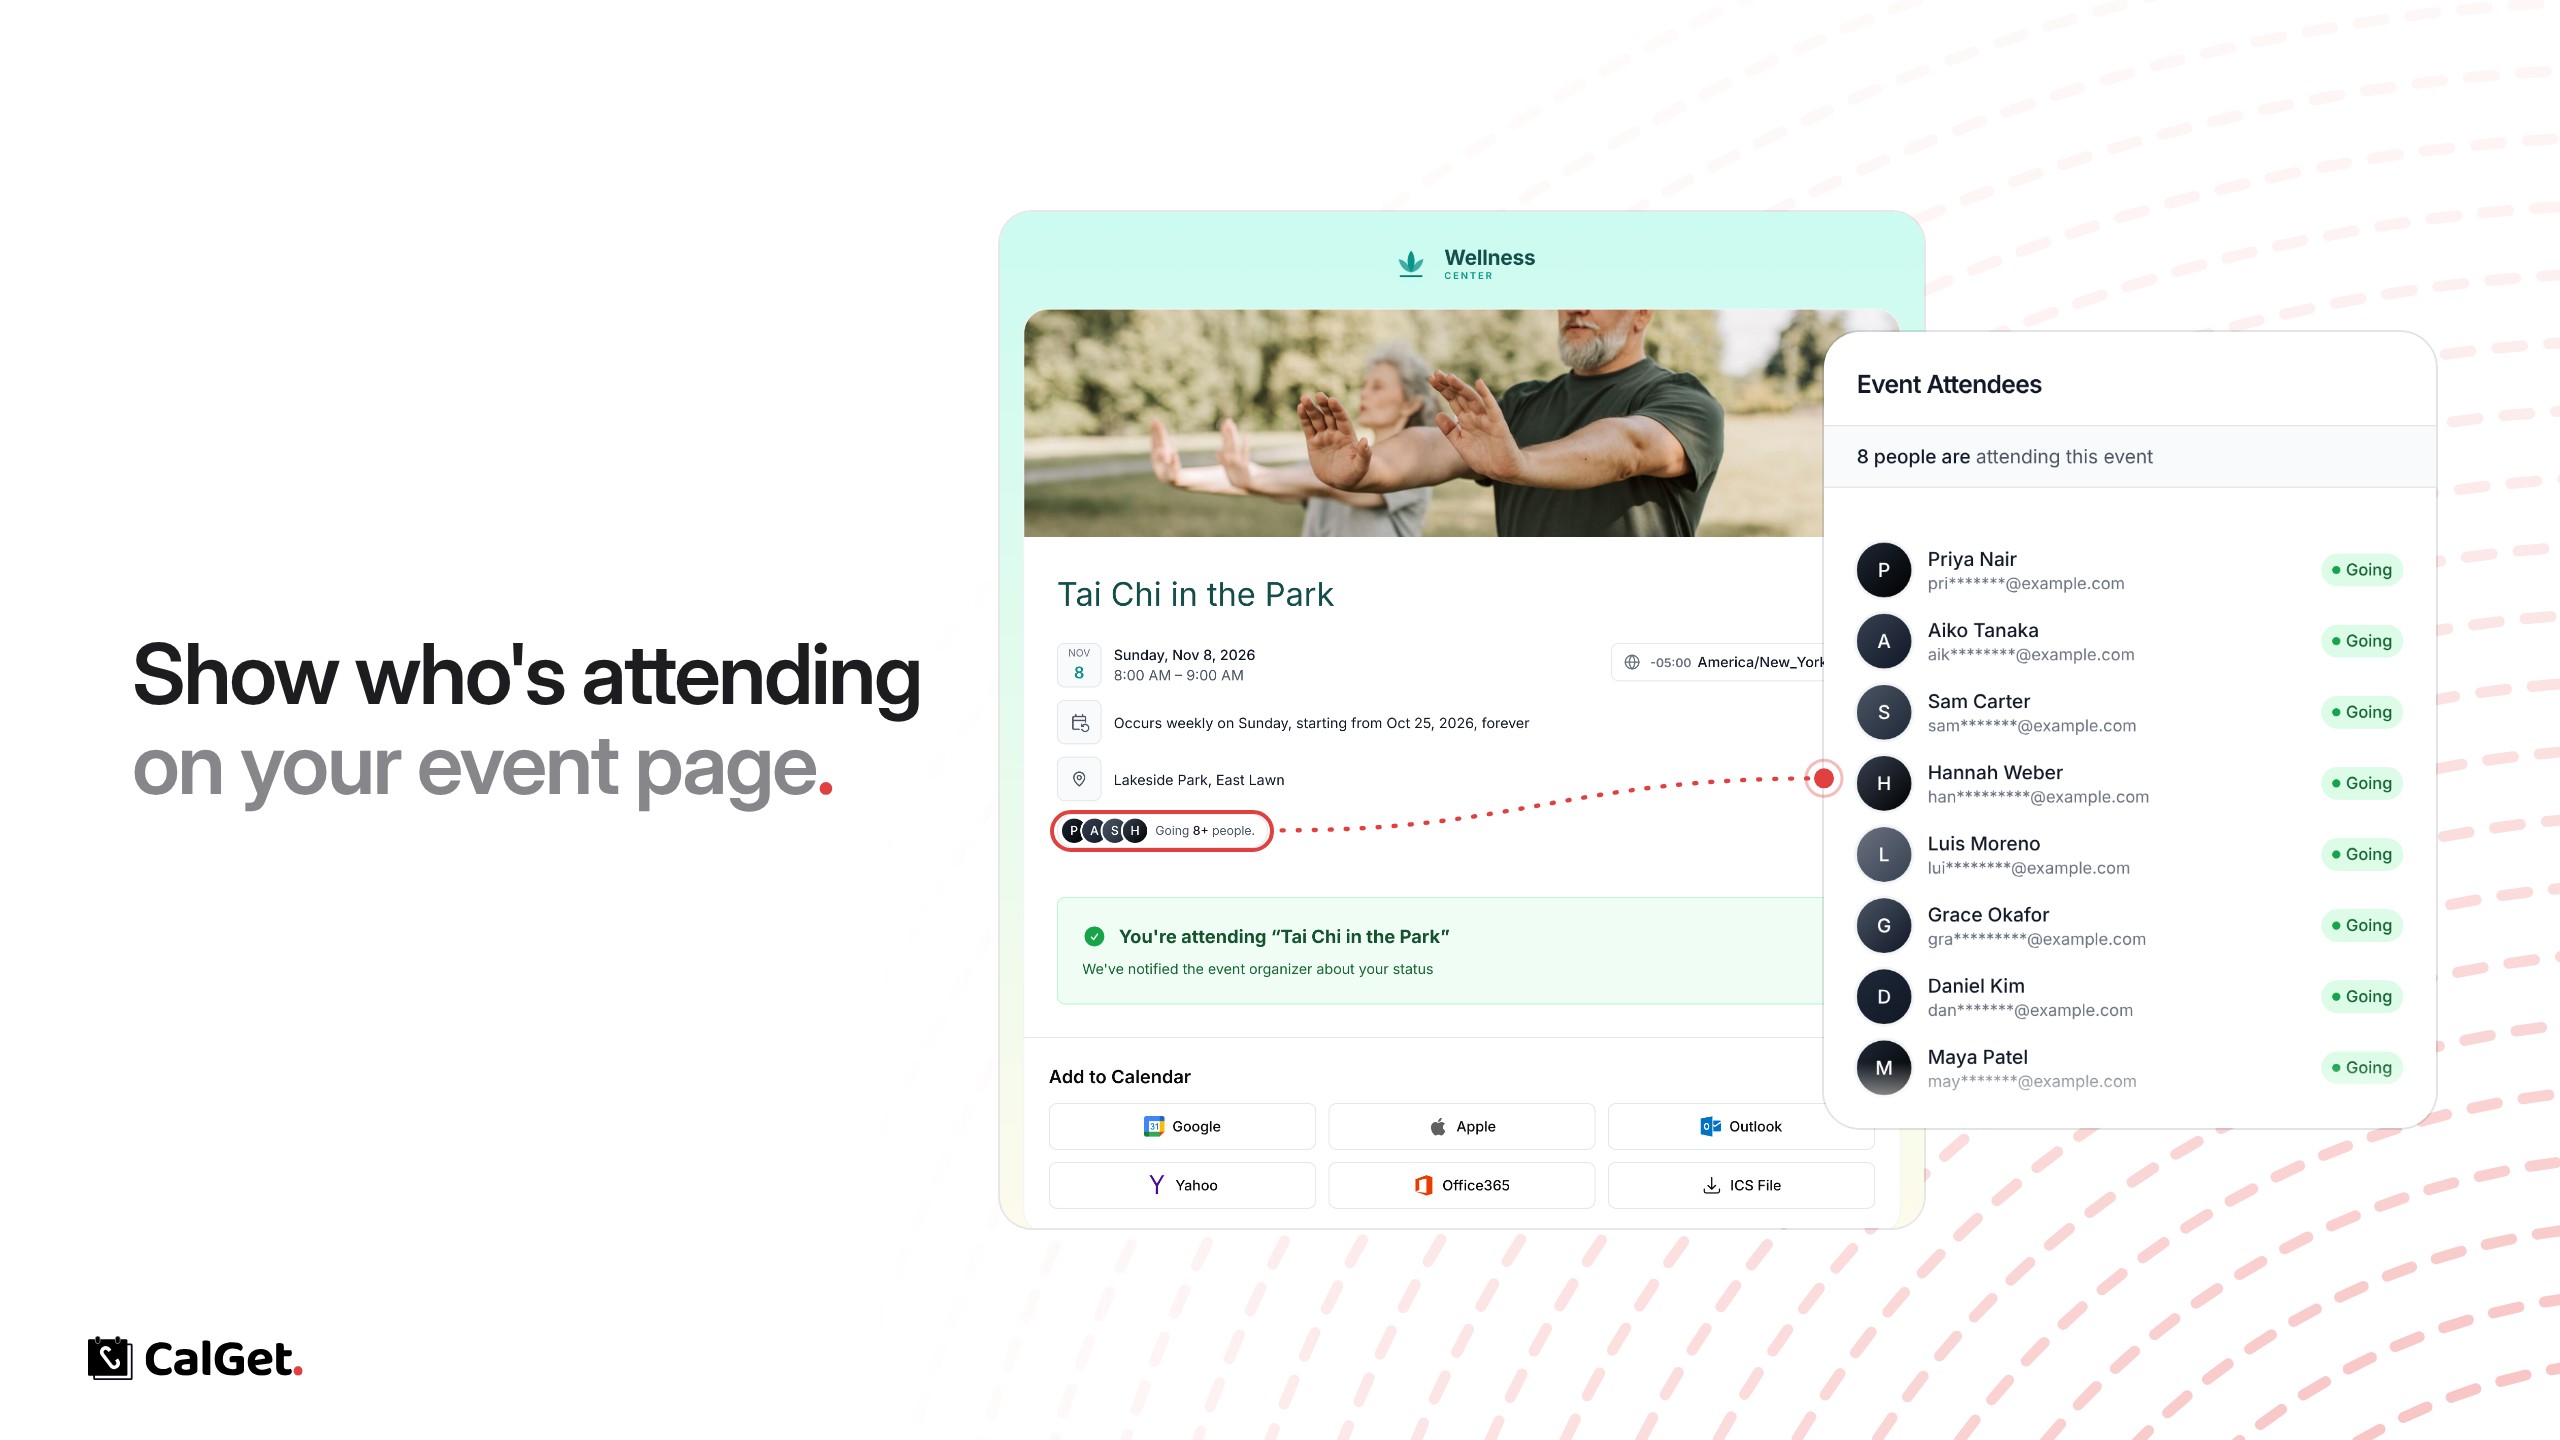
Show Who's Attending on Your Event Page

Show a “Going” count on your event page. Guests who RSVP can see who else is coming, with email addresses masked.

Show Who's Attending on Your Event Page

Your public event page can now show who's coming. Turn it on, and the page shows a “Going” count with your attendees' initials.

Full list for attendees – People who RSVP can open the list and see who else is going. Everyone else sees the count and is asked to RSVP first.

Private by default – Names appear as given in the RSVP. Email addresses are masked, like pri*******@example.com.

To turn it on, open your event, go to RSVPs and check Display attendee list on public event page.

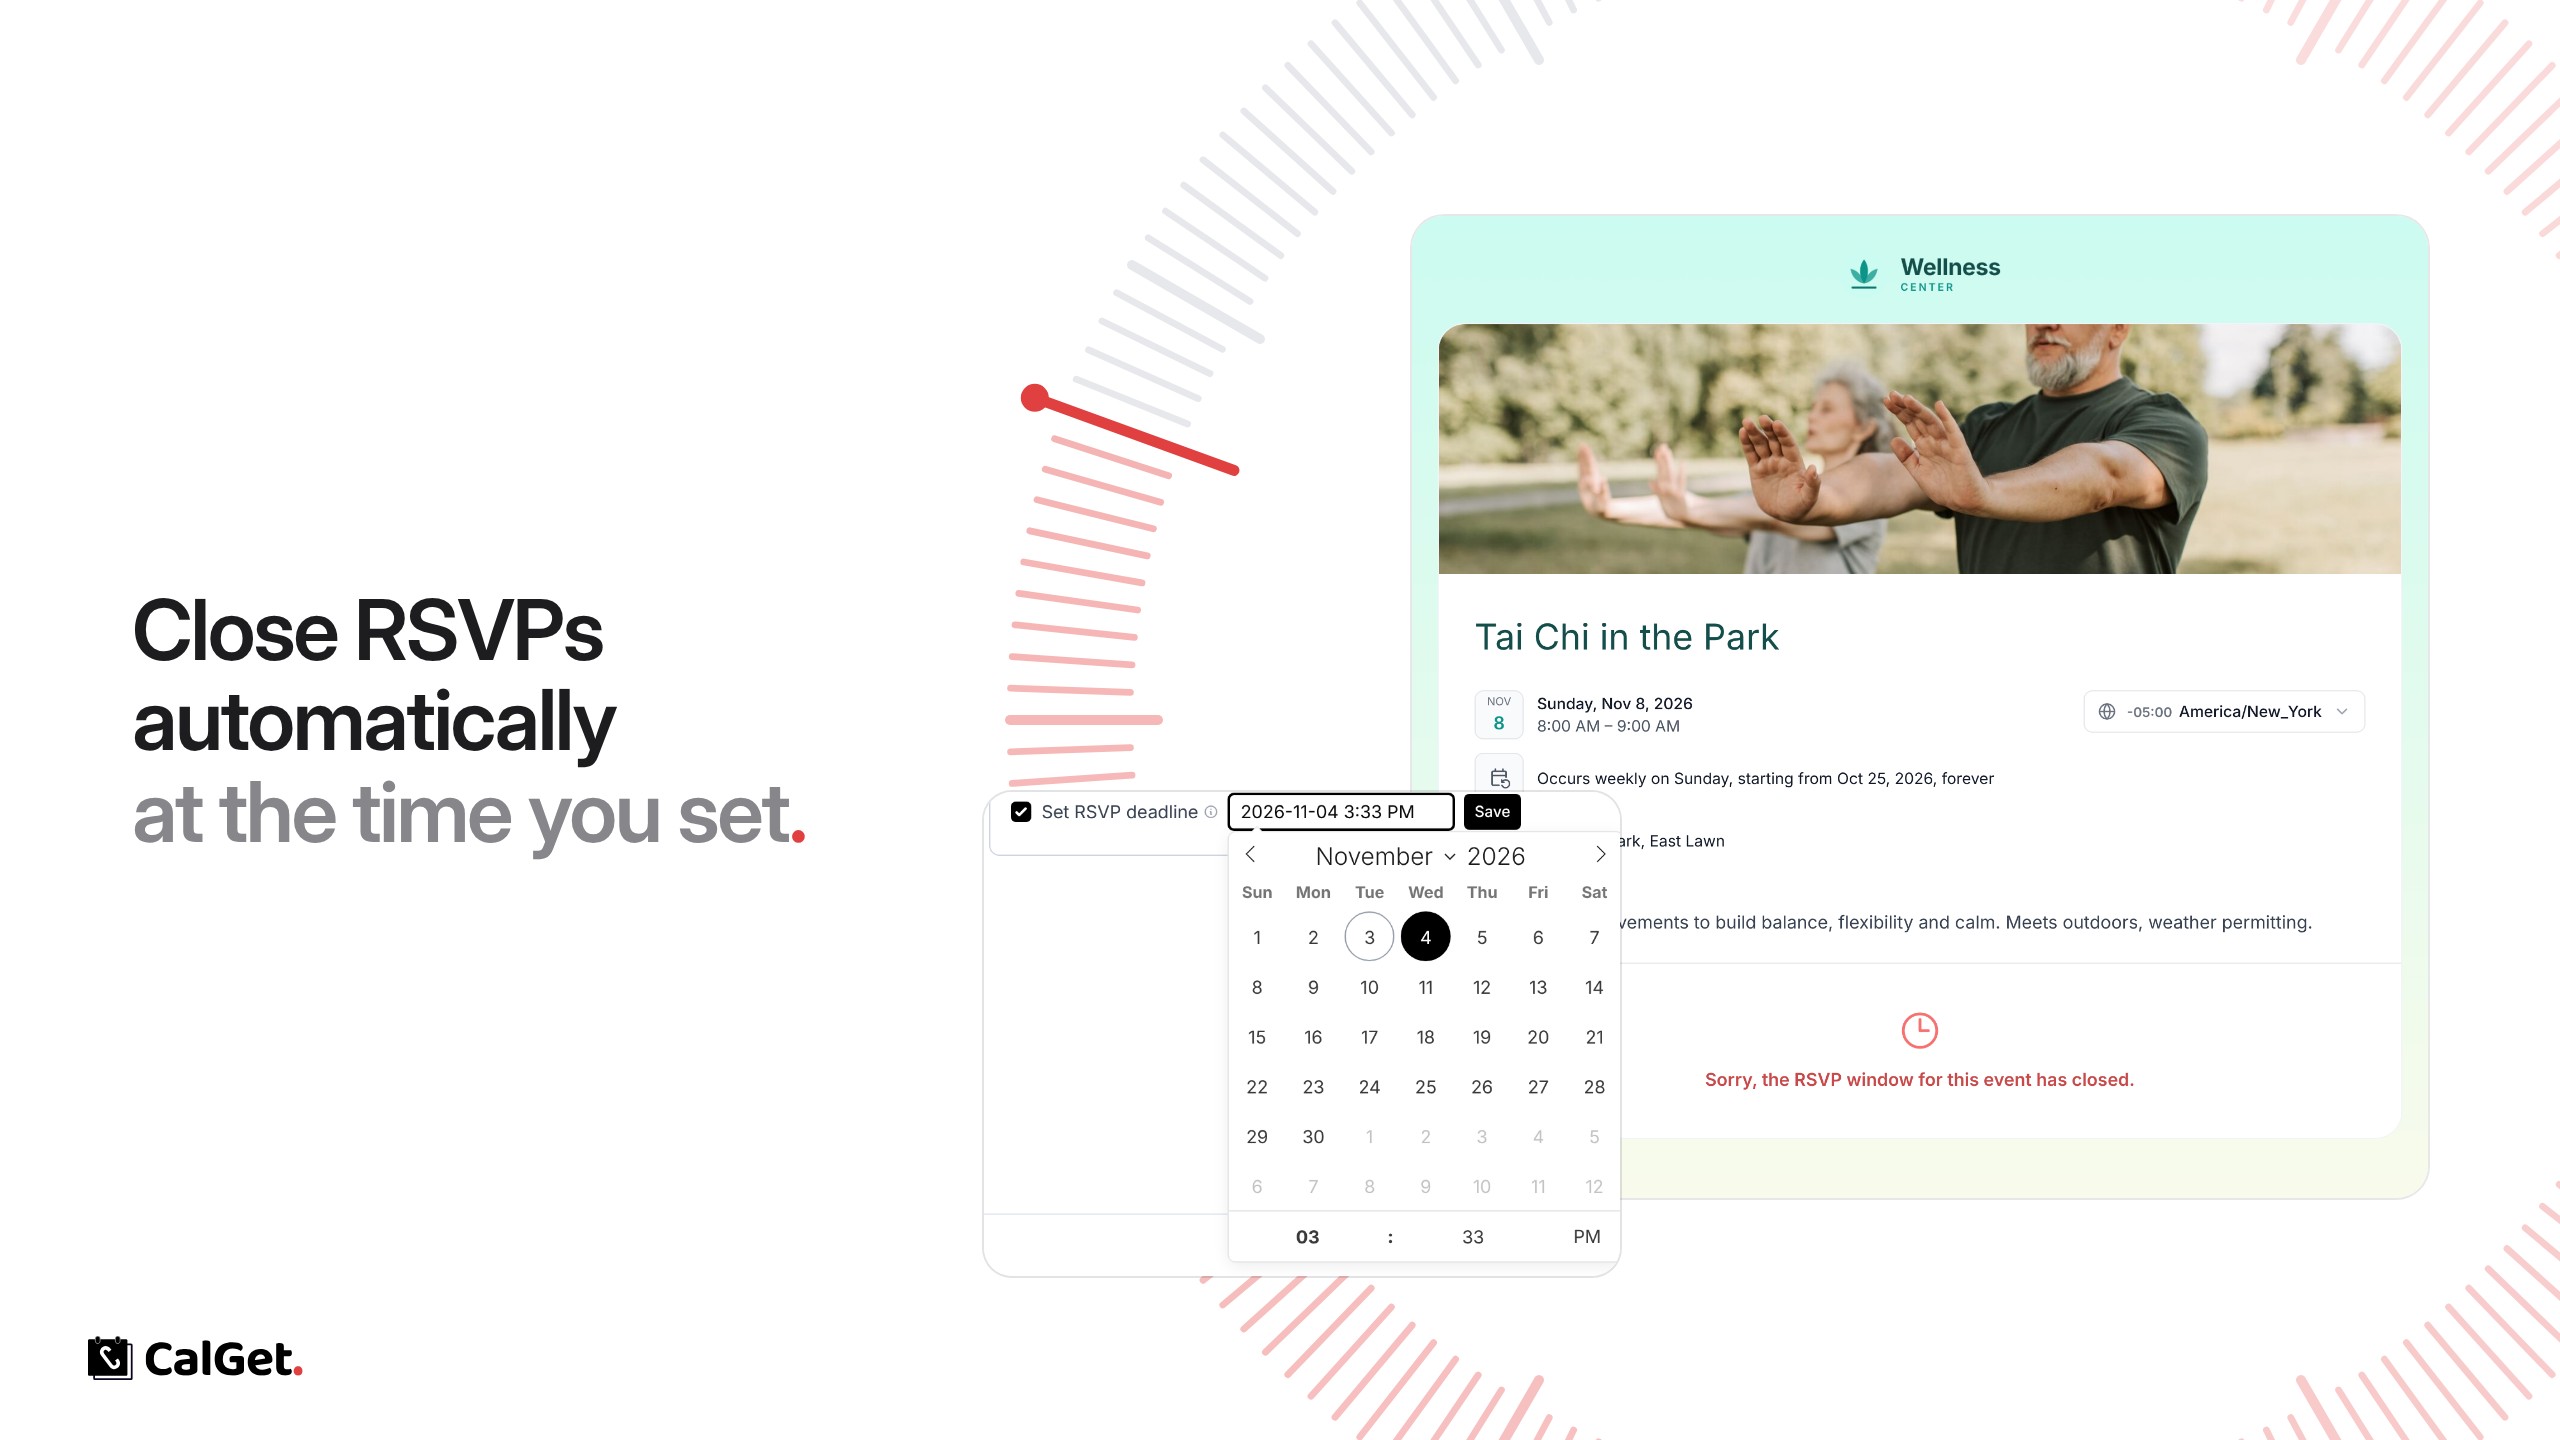
Set an RSVP Deadline for Your Event

Pick a date and time, and your event page stops taking RSVPs on its own once it passes.

Set an RSVP Deadline for Your Event

You can now set a deadline for RSVPs. When the time you set passes, your event page stops taking RSVPs on its own.

Pick a date and time – Choose the exact day and time RSVPs close.

Closes by itself – After the deadline, the RSVP form on your event page is replaced with a short note: “Sorry, the RSVP window for this event has closed.”

Change it anytime – Move the deadline, or untick it to take RSVPs again.

To set it, open your event, go to RSVPs, check Set RSVP deadline, pick the date and time, and click Save.

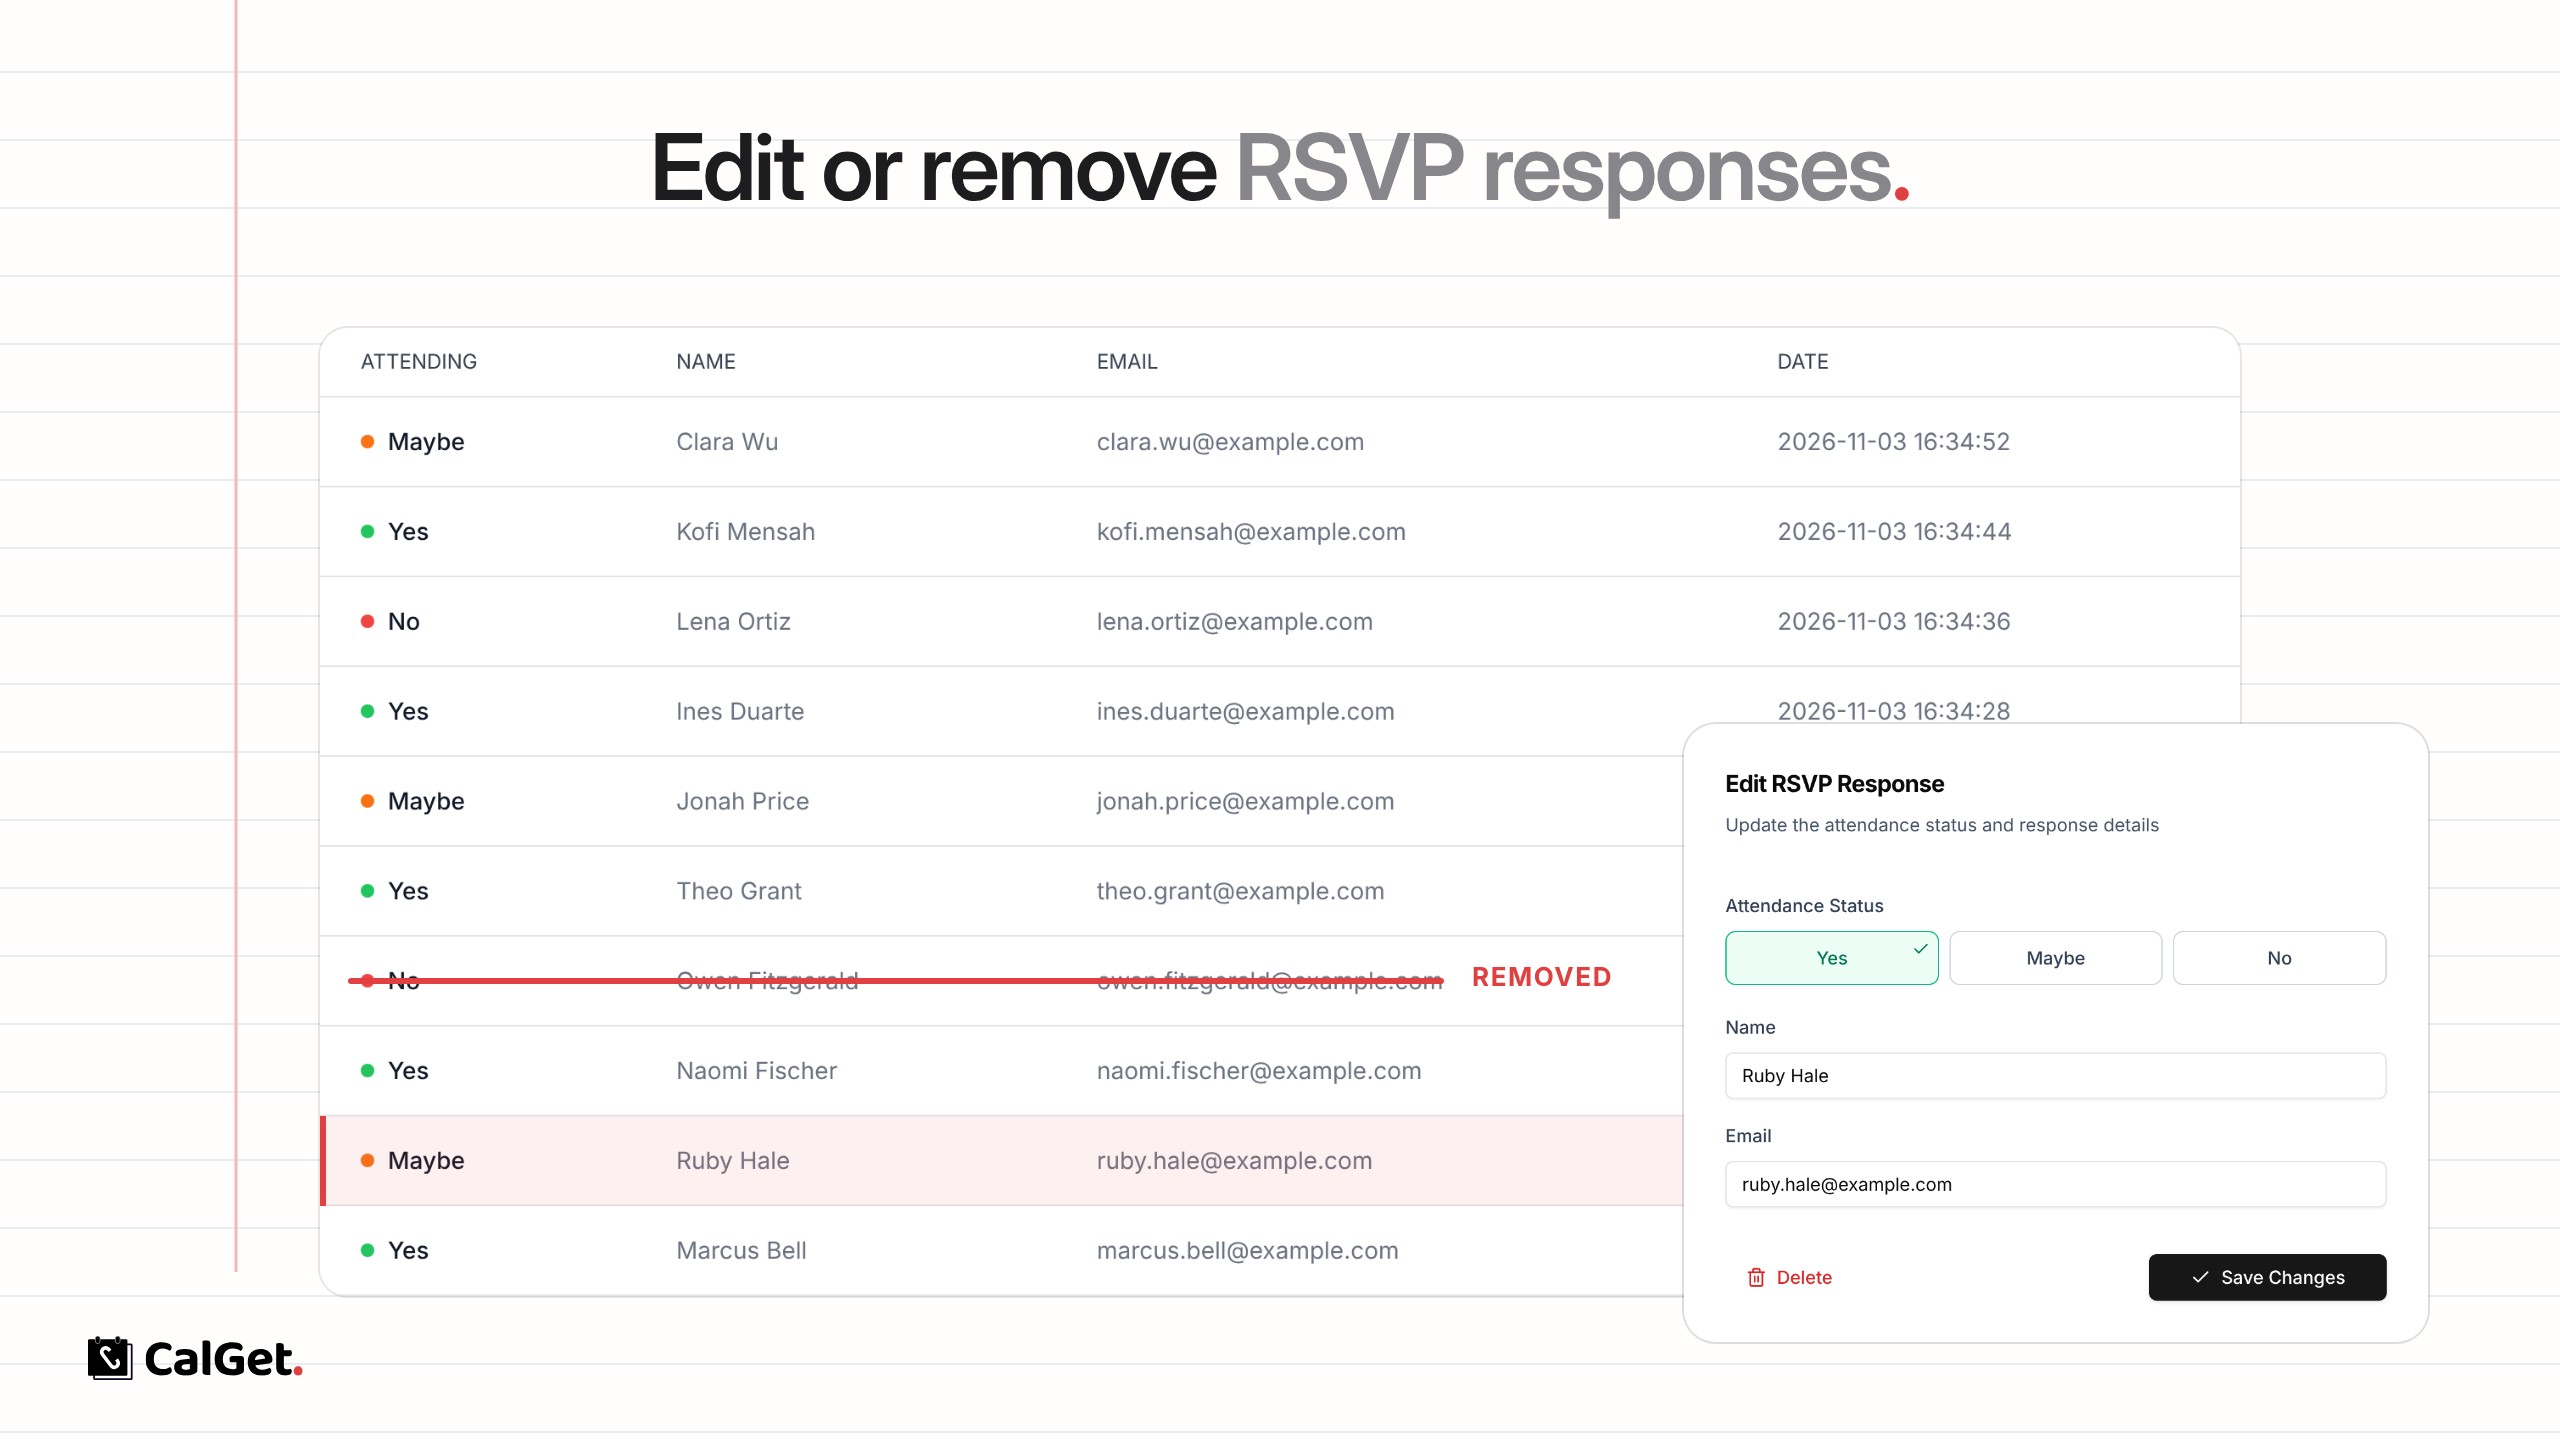
Edit or Remove RSVP Responses

Click any RSVP in your attendee list to change the answer, fix the name or email, or delete it.

Edit or Remove RSVP Responses

You can now change or delete RSVP responses after they come in. Fix a typo in a name, update a guest’s answer, or remove a response that shouldn’t be there.

Edit a response – Switch the attendance status between Yes, Maybe and No, and correct the name, email or any other answer from your RSVP form.

Remove a response – Delete it, and it’s gone from your attendee list and RSVP counts.

To do it, open your event, go to RSVPs, click a response in the attendee list, then choose Save Changes or Delete.

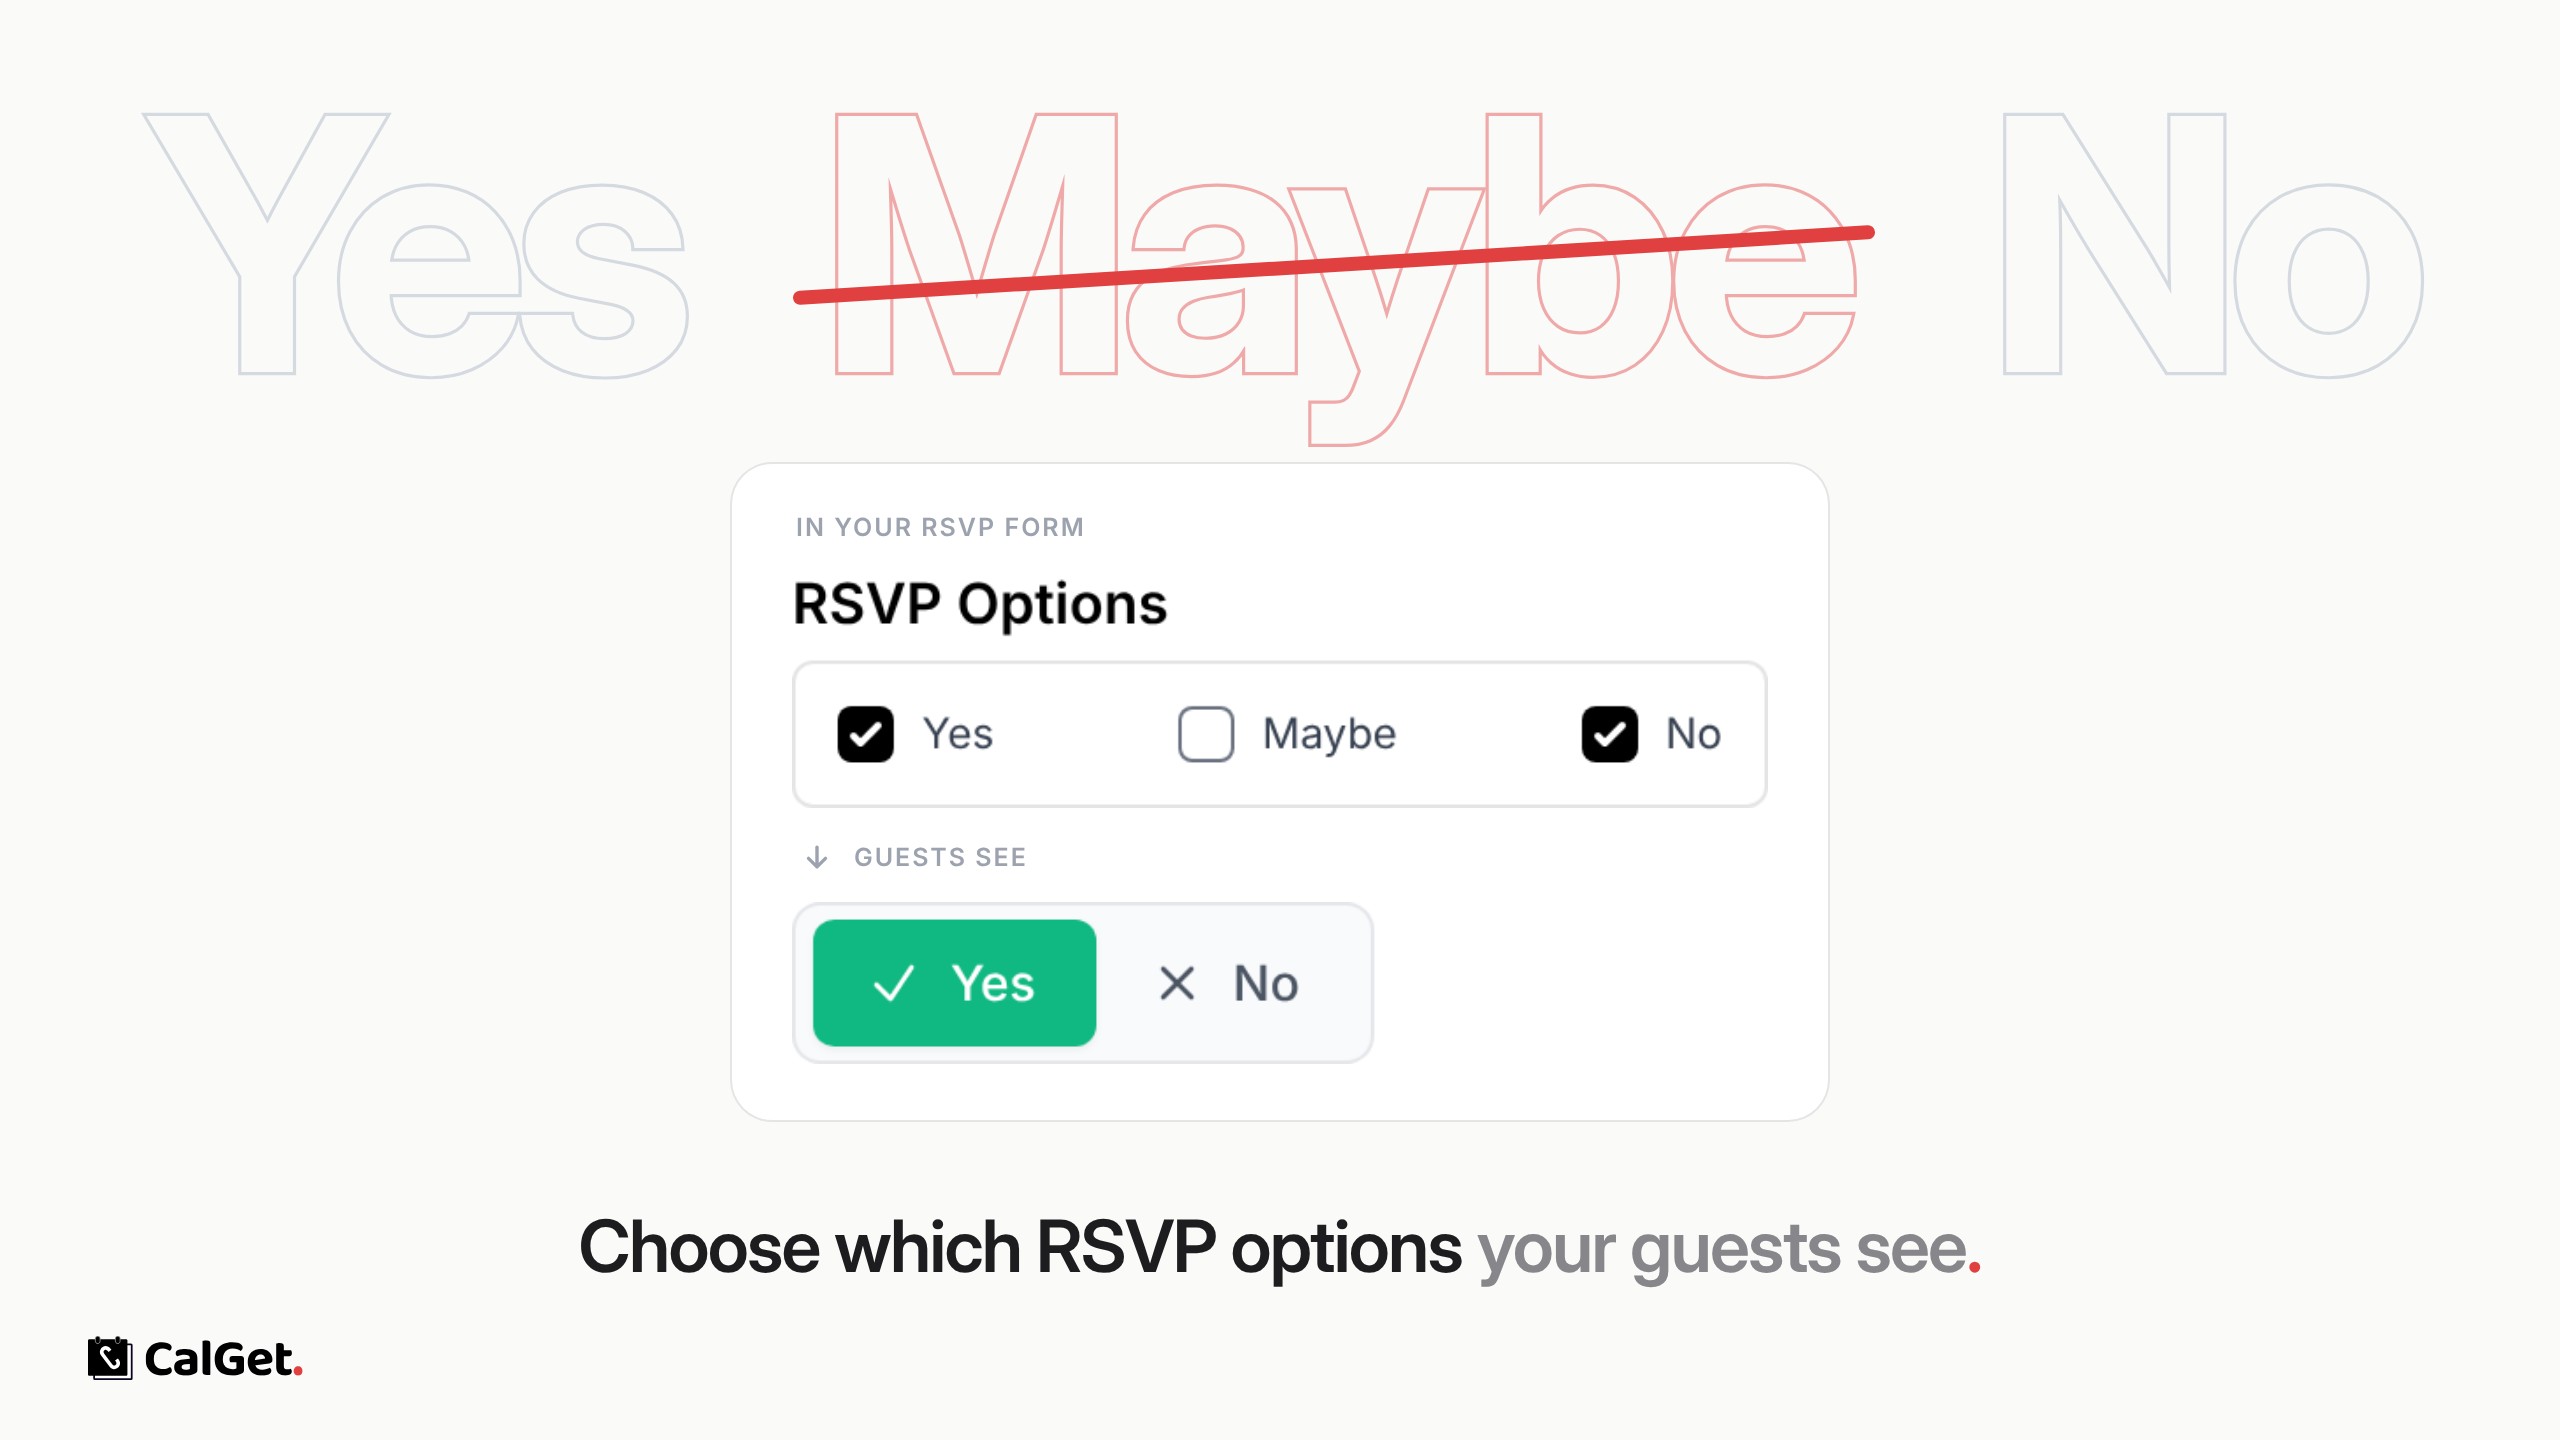
Choose Which RSVP Options Guests See

Show Yes, Maybe and No on your RSVP form, or only the answers you want, like just Yes and No.

Choose Which RSVP Options Guests See

You can now choose which RSVP options appear on your event pages. Show Yes, Maybe and No, or keep it to just Yes and No.

Pick the answers – Tick or untick Yes, Maybe and No in your RSVP form. Only the ticked ones show on the event page.

Set once per form – The choice is saved with the RSVP form, so every event that uses that form shows the same options.

To set it, go to RSVP Forms, open a form, tick the answers you want under RSVP Options, and click Update.

Add to Calendar Button Plugin for Framer

Insert an Add to Calendar button on your Framer site with the CalGet plugin. Pick an event, and visitors can save it to their calendar.

Add to Calendar Button Plugin for Framer

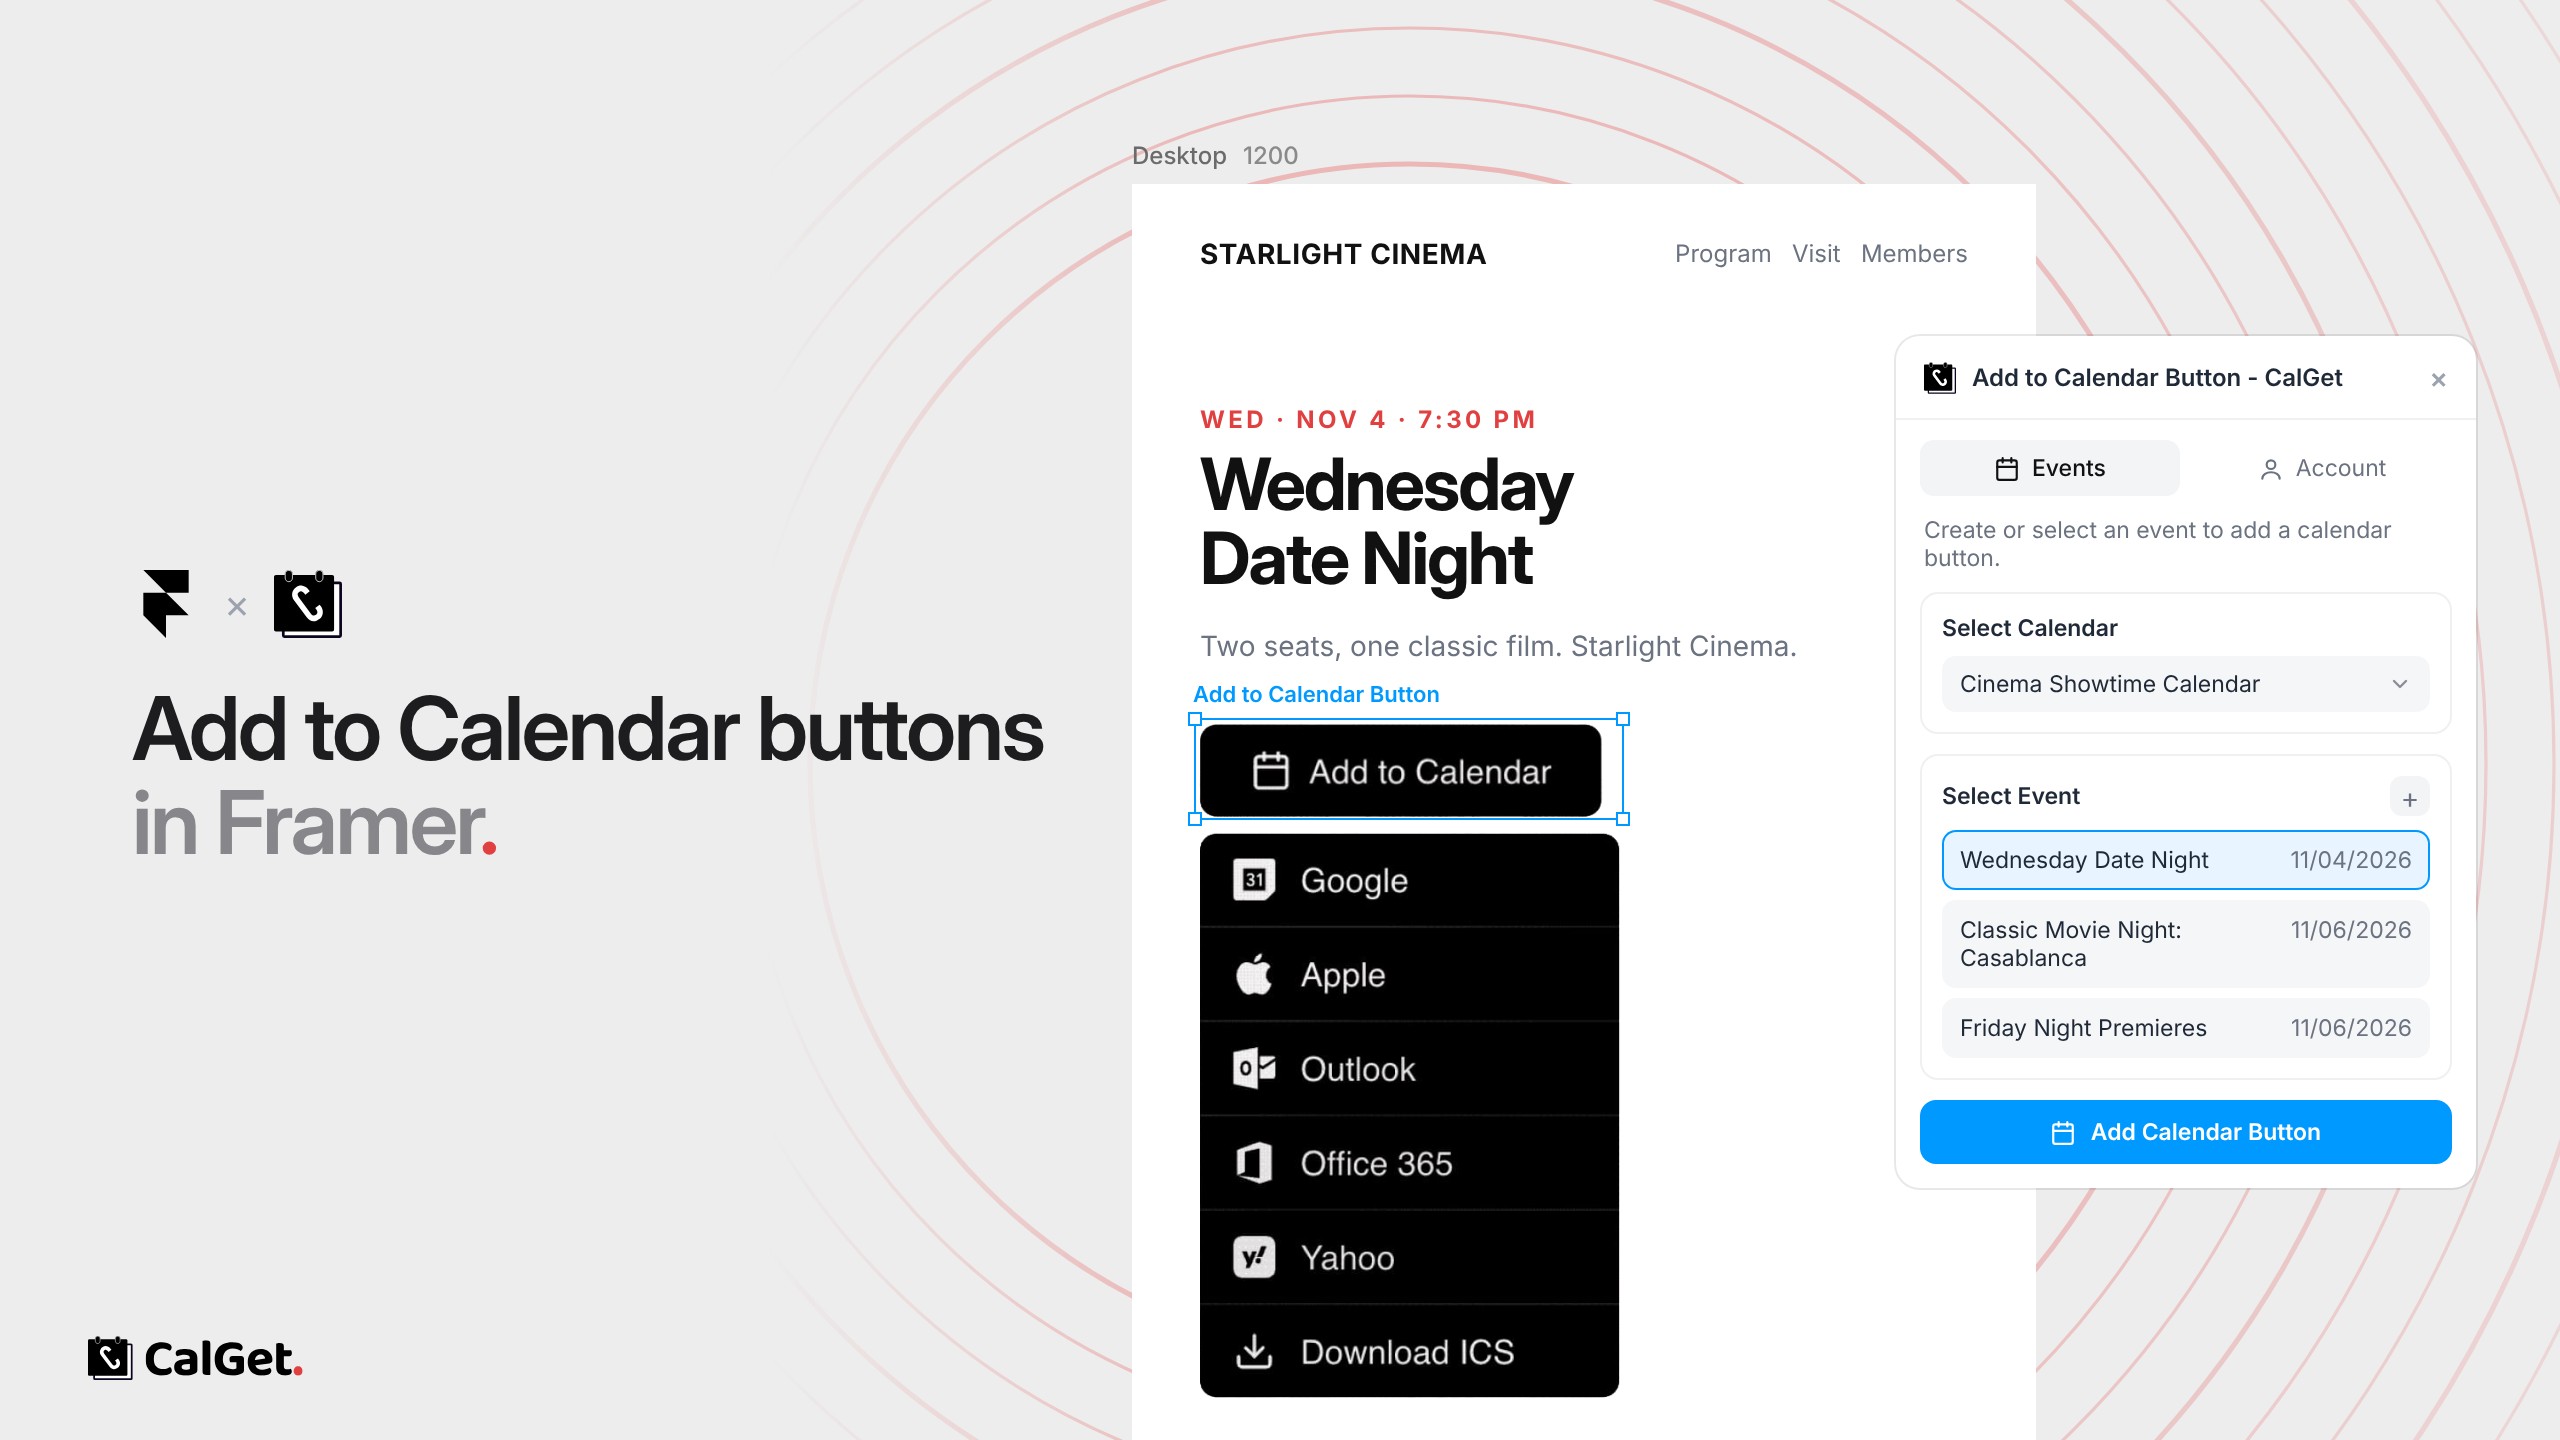
The CalGet plugin for Framer adds an “Add to Calendar” button to your Framer site. Pick one of your CalGet events in the plugin and insert the button onto your canvas.

Every major calendar – Visitors can save the event to Google Calendar, Apple Calendar, Outlook, Office 365 or Yahoo, or download an .ics file.

Styled in Framer – Adjust the button’s size, colors and corner radius in its properties, like any other component.

Get the Add to Calendar Button plugin from the Framer Marketplace. In Framer, open the plugin, connect your CalGet account under Account, choose a calendar and an event, and click Add Calendar Button.

Add to Calendar Button Plugin for WordPress

Add the Add to Calendar Button block to any WordPress post or page, pick a CalGet event, and set the button color and roundness.

Add to Calendar Button Plugin for WordPress

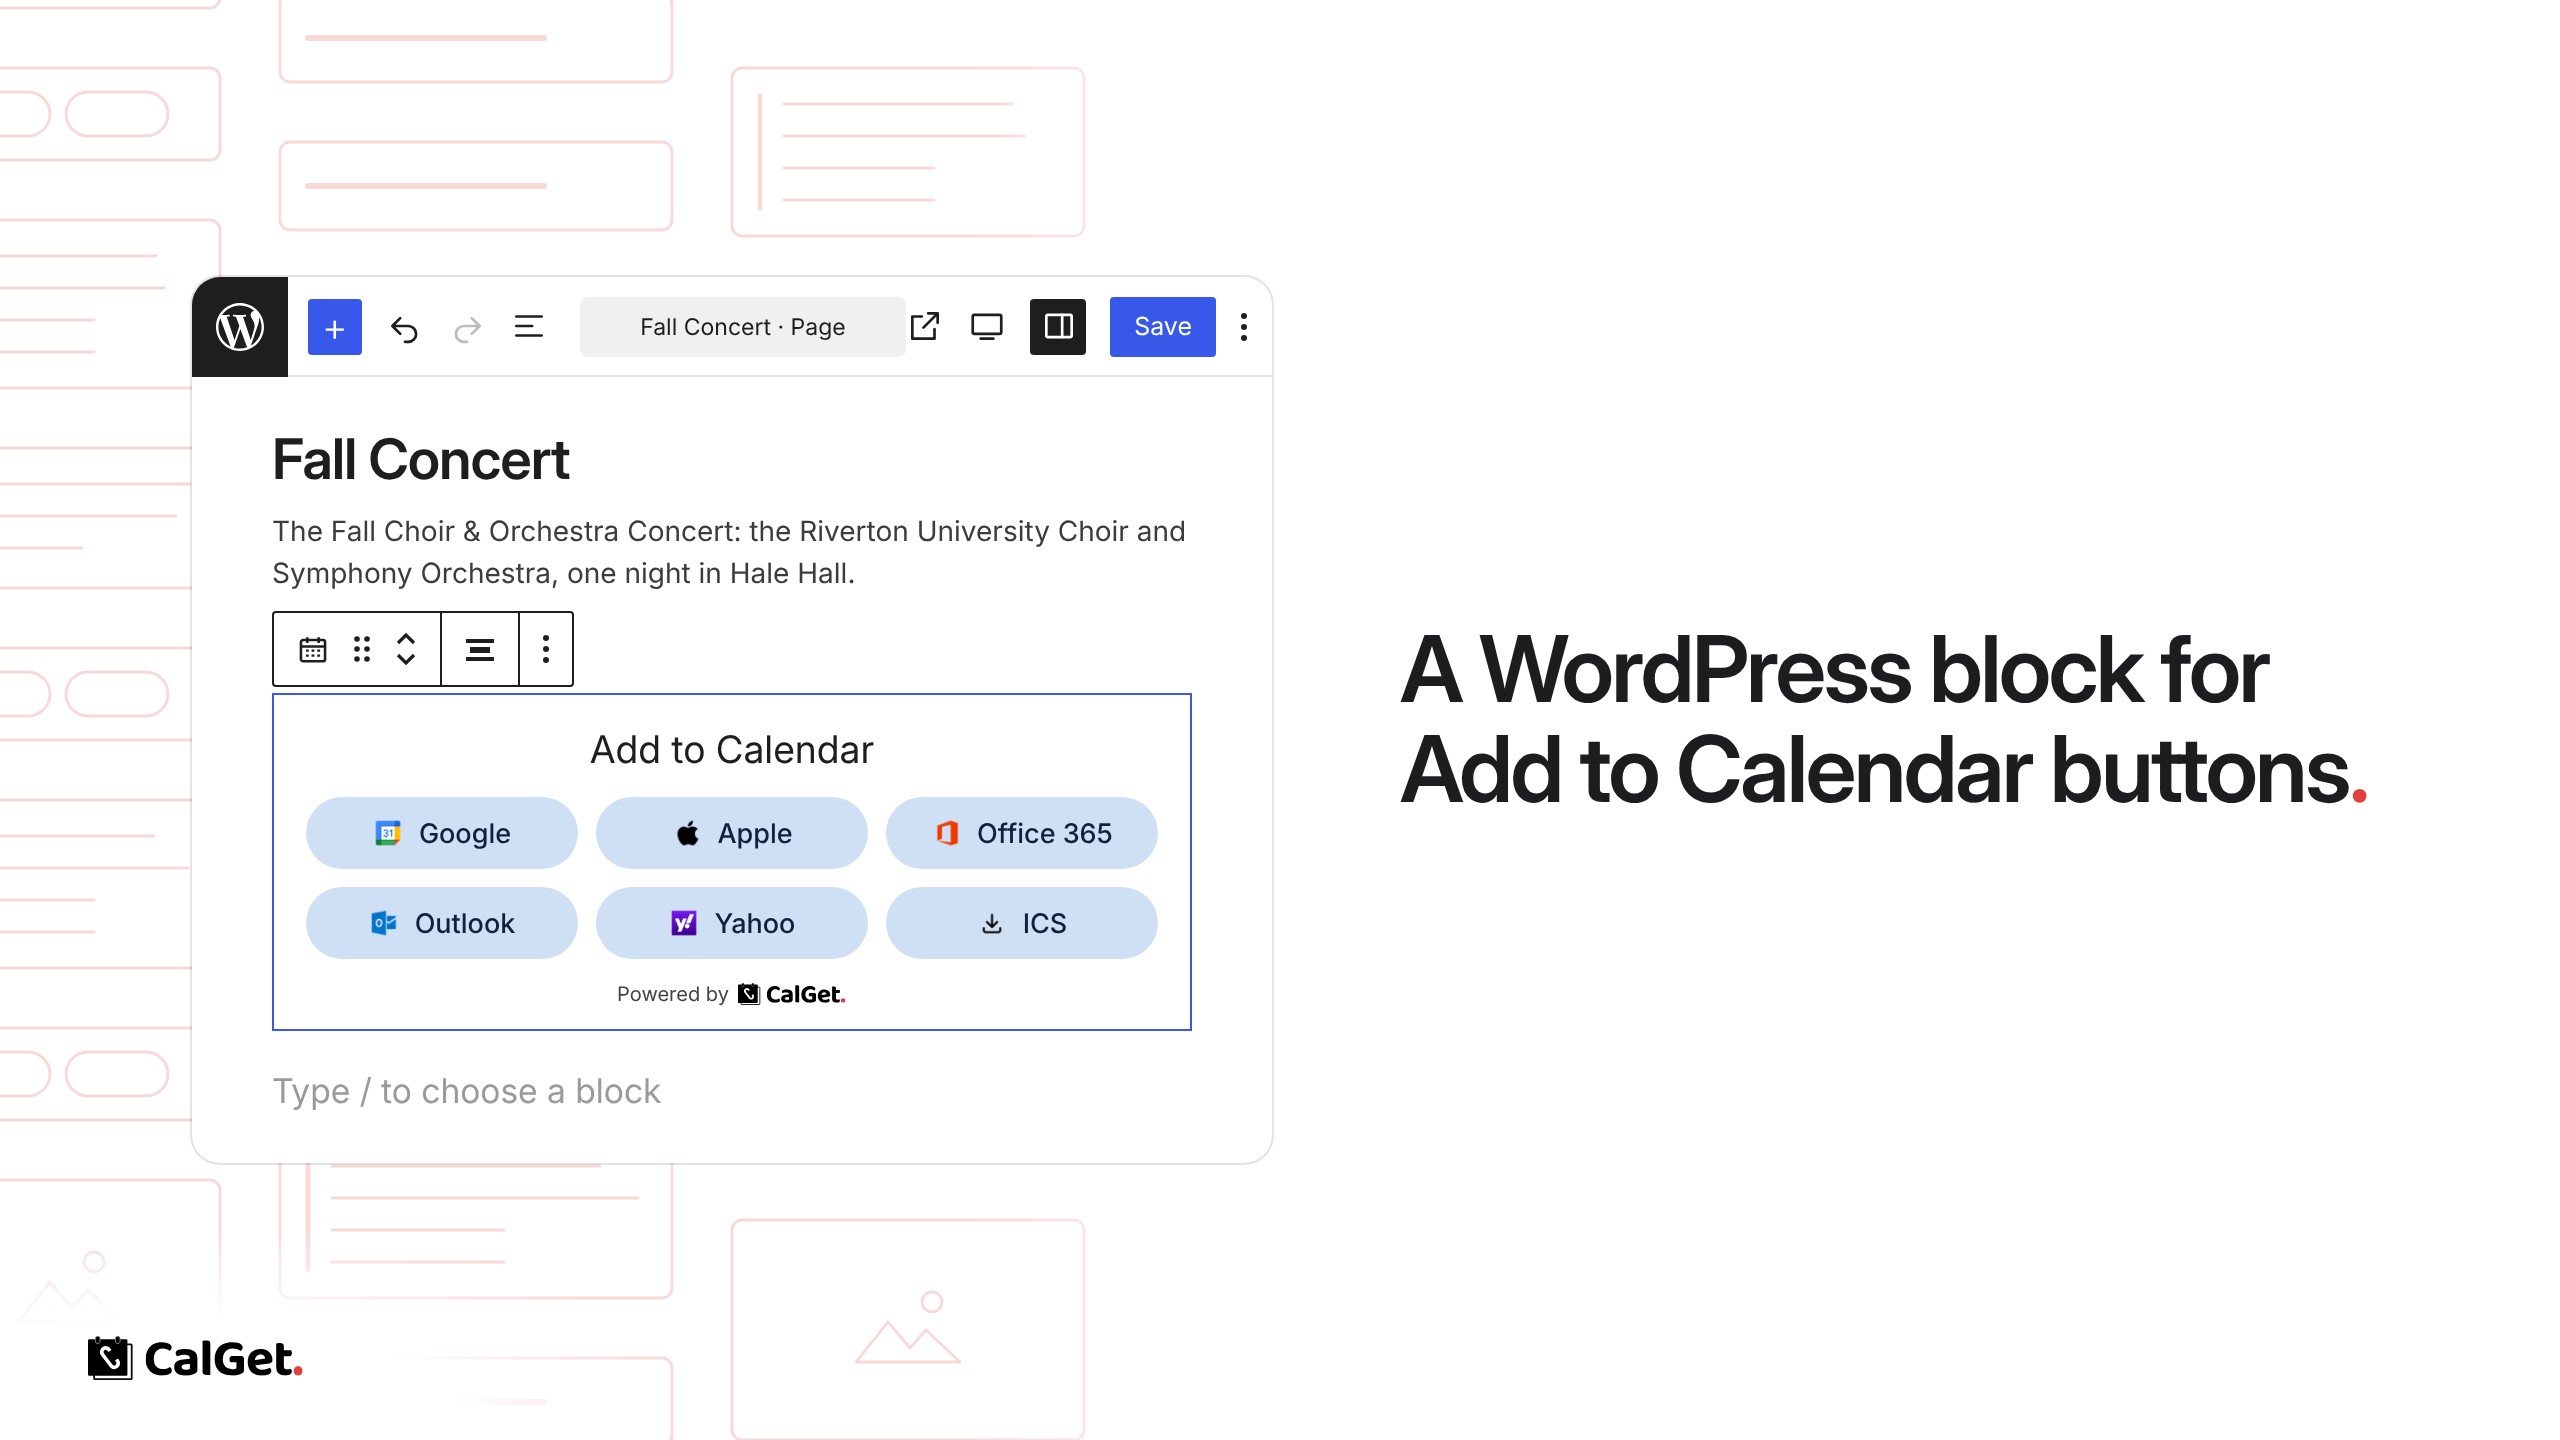
CalGet is now a WordPress plugin. It adds an Add to Calendar Button block to the block editor, so you can put calendar buttons on any post or page.

Pick an event – Choose an event from your CalGet calendars, or create a new one from the block.

Choose the calendars – Show any of Google, Apple, Office 365, Outlook, Yahoo and an ICS download.

Match your site – Set the button color and corner roundness, and show or hide the icons.

To set it up, install Add to Calendar Button – CalGet from the WordPress plugin directory, open Settings → Add to Calendar : CalGet and paste your CalGet API key. Then add the Add to Calendar Button block to a page and pick your event.

Customize the Color and Corners of Add to Calendar Buttons

Choose a design for the buttons you copy from an event, or set your own color and corner radius, from square to fully rounded.

Customize the Color and Corners of Add to Calendar Buttons

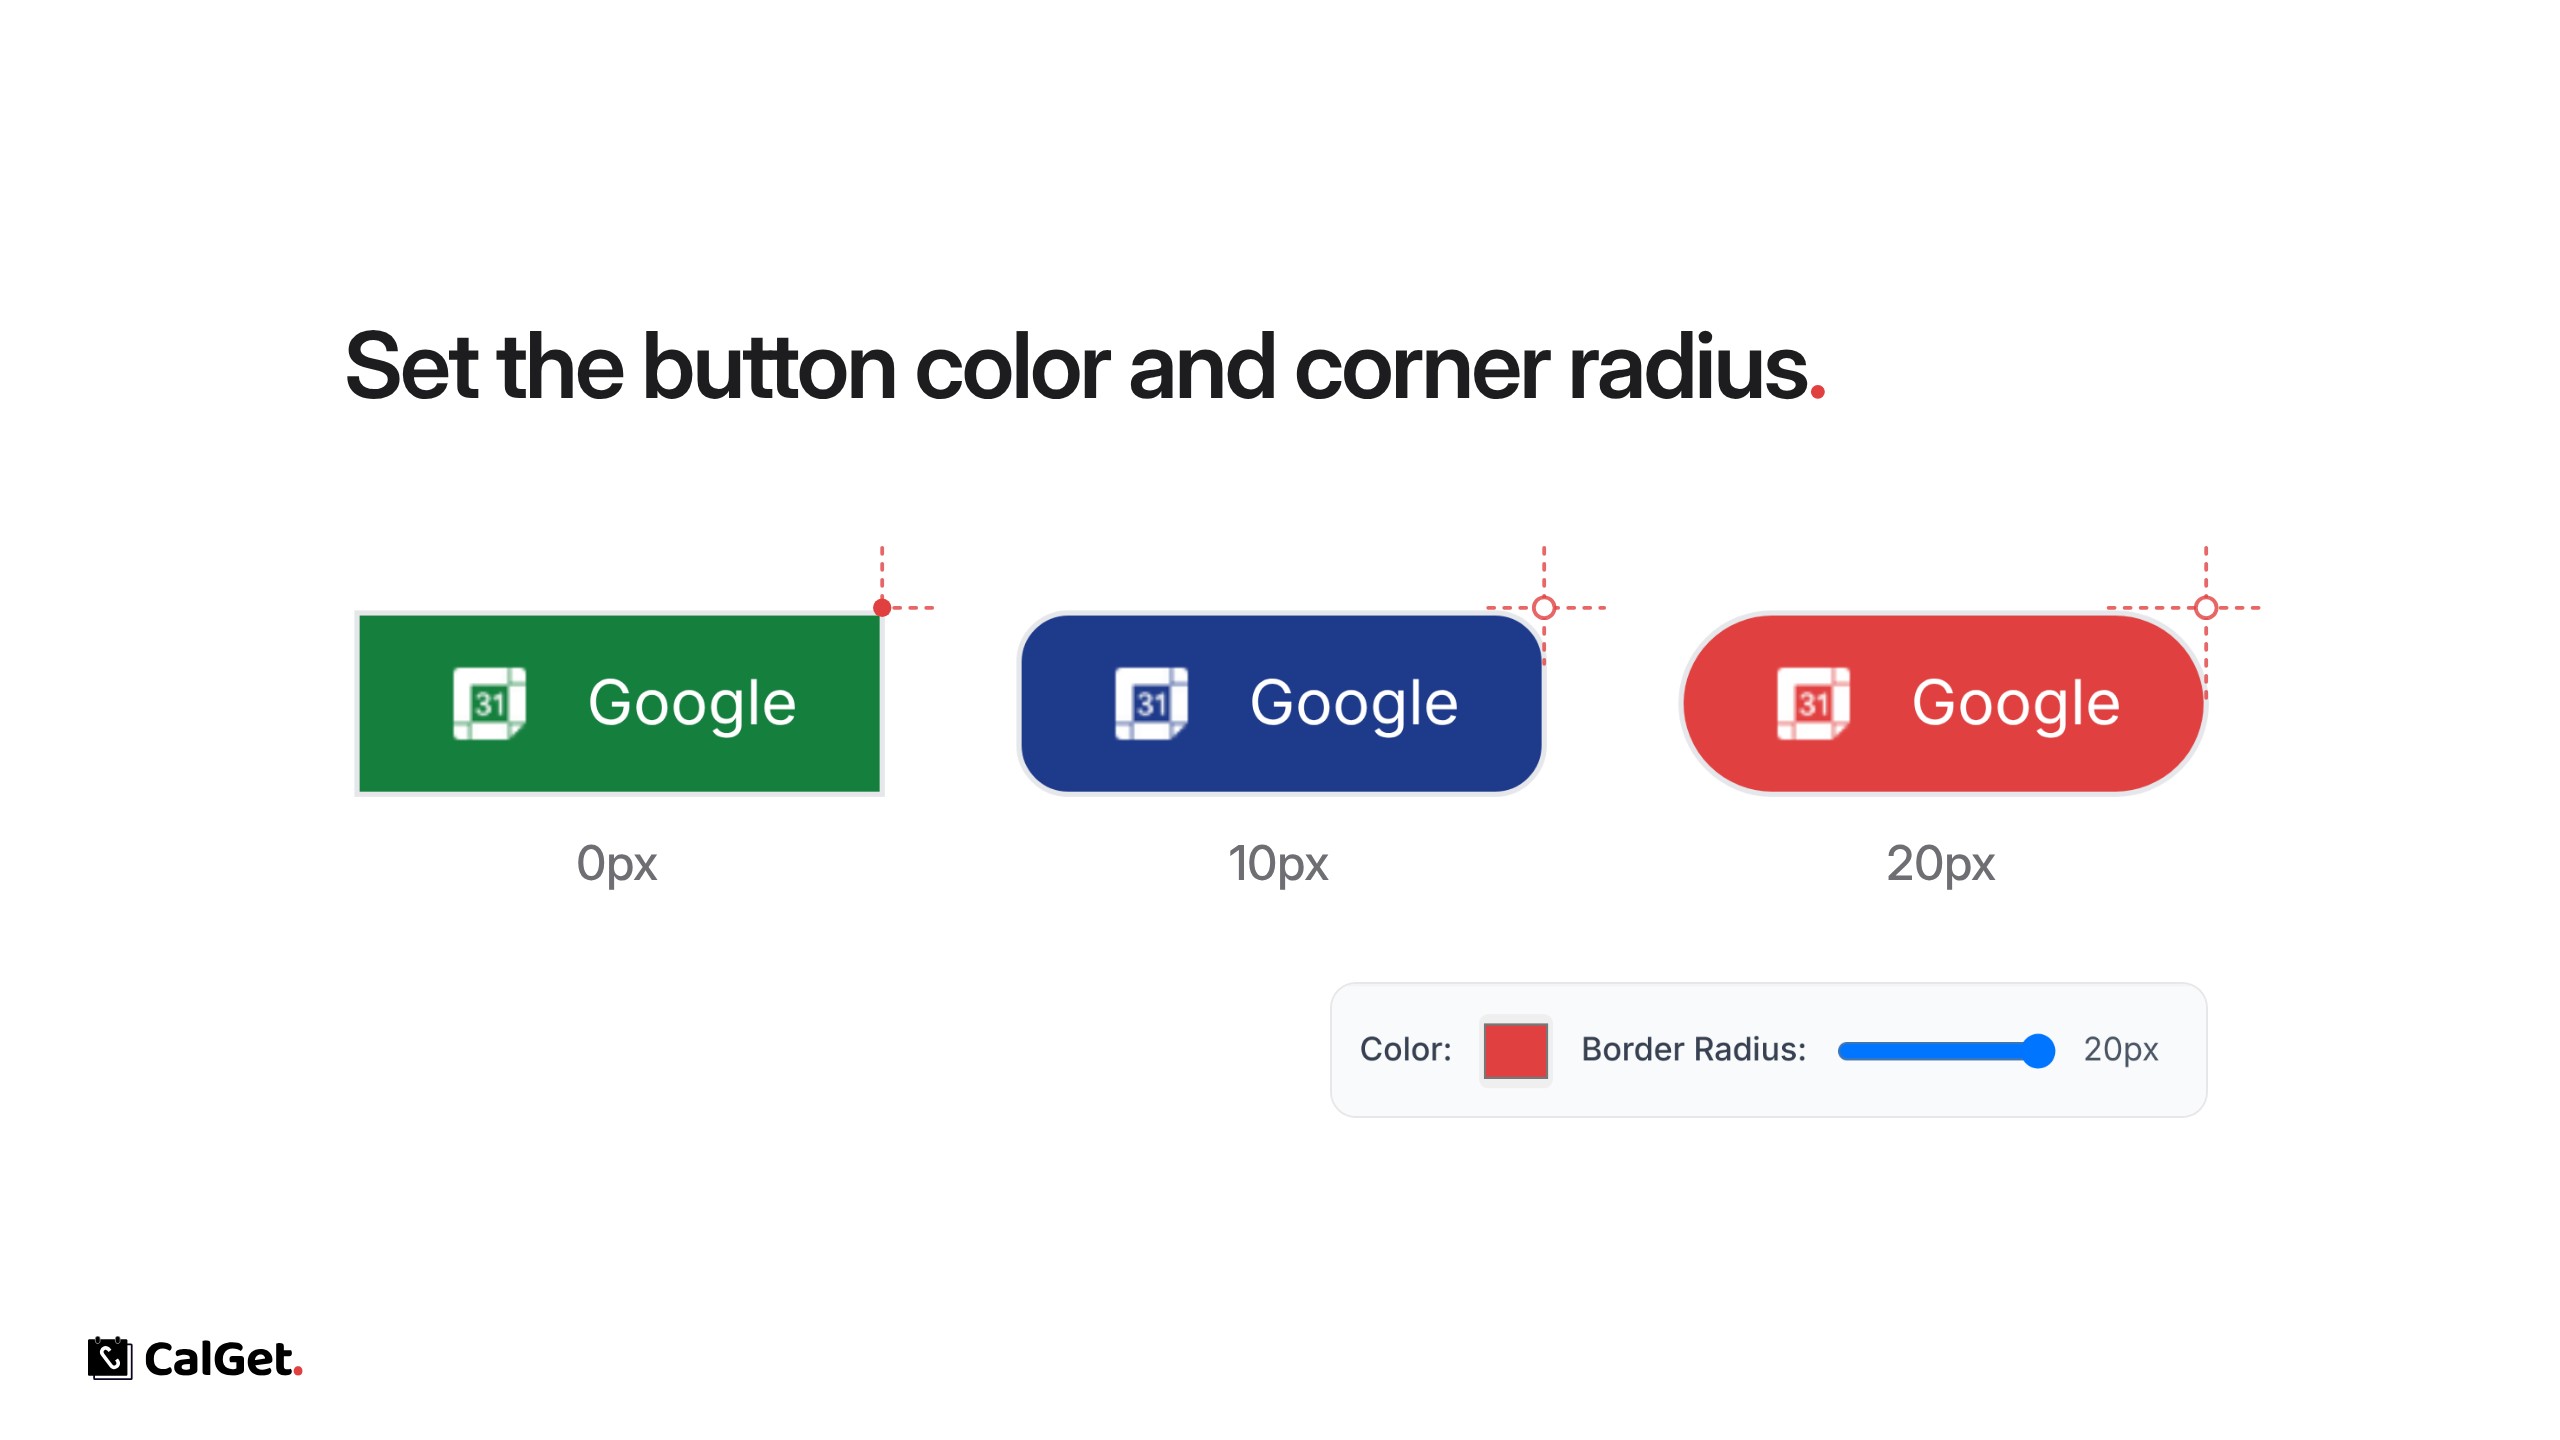
You can now style the Add to Calendar buttons you copy from an event, for your website, emails or anywhere else. The default buttons also got a cleaner design.

Pick a design – Modern, Classic, Text Only or Custom.

Set the color – With Custom, choose one color for all buttons to match your brand or event.

Set the corner radius – Slide from 0px for square corners to 20px for fully rounded buttons.

To use it, open your event, go to Event Details → HTML Code, choose Custom under Select Design, set Color and Border Radius, then copy the buttons as HTML or Content.

Invite Teammates as Owner, Admin, Member or Viewer

Invite people to your team and choose what each person can do: Owner, Admin, Member or Viewer.

Invite Teammates as Owner, Admin, Member or Viewer

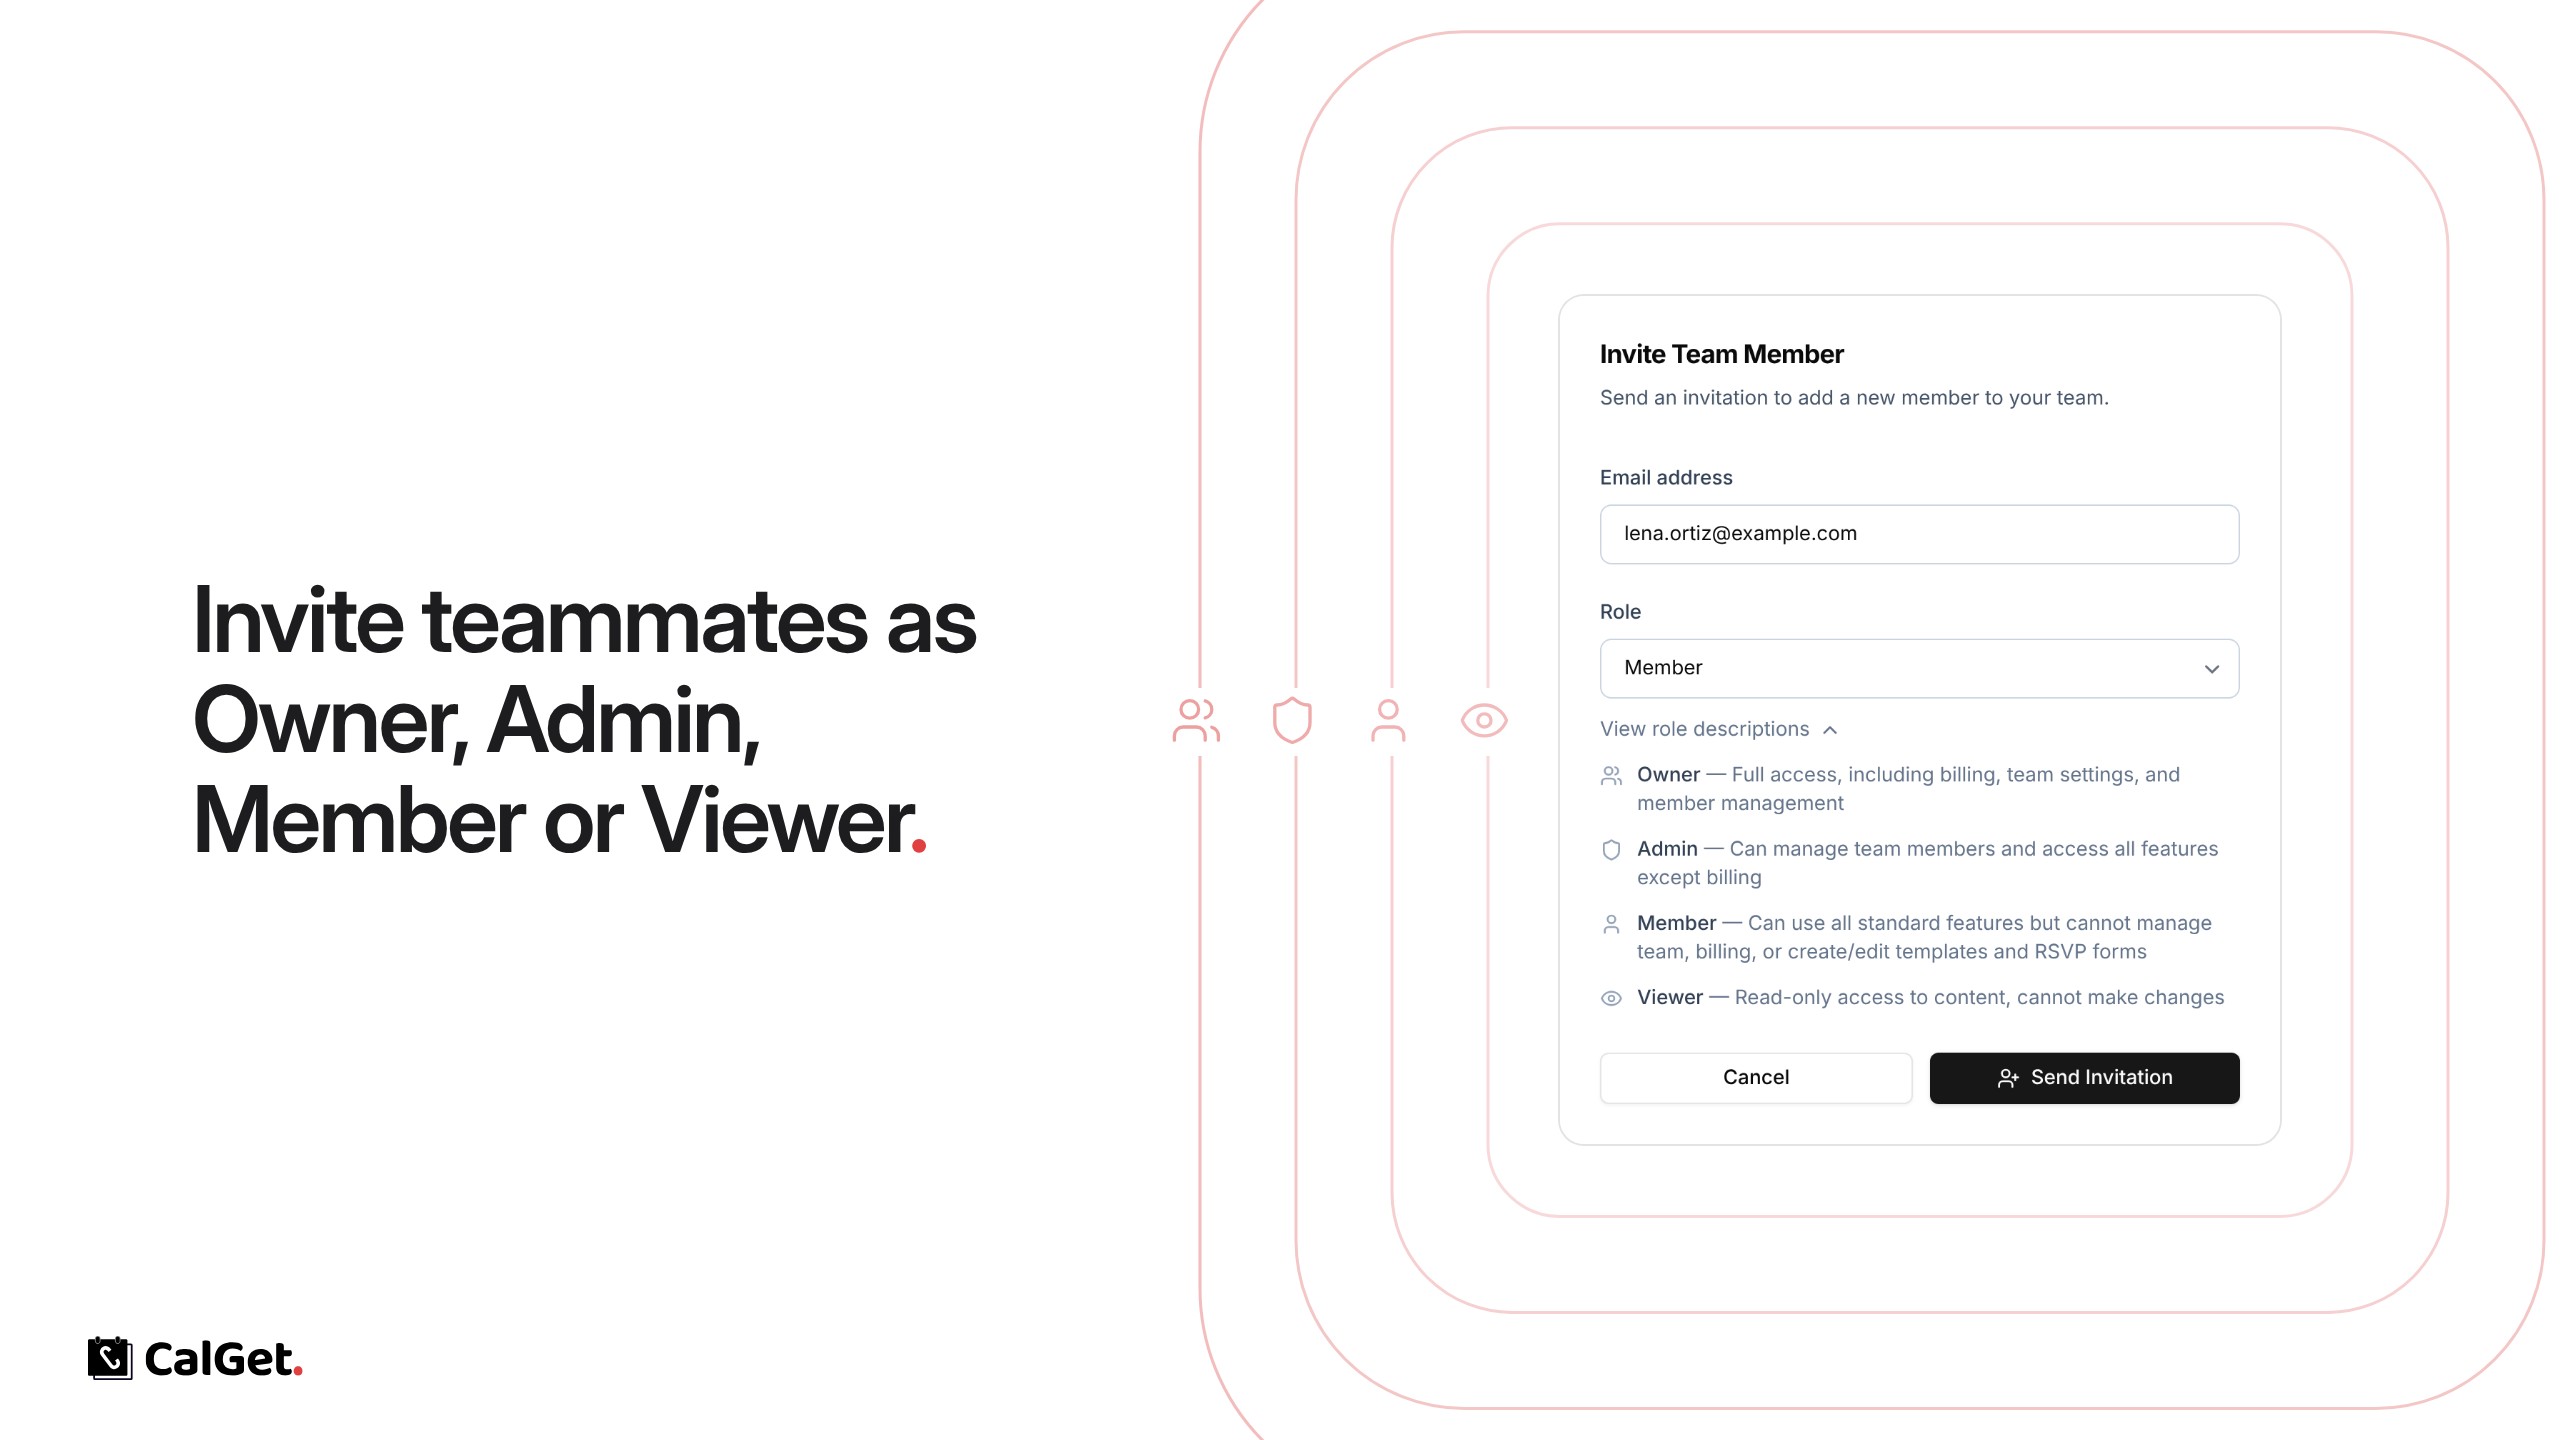
You can now work on your events with other people. Invite them to your team and give each person a role.

Owner – Full access, including billing, team settings and member management.

Admin – Can manage team members and use every feature except billing.

Member – Can use all standard features, but can’t manage the team or billing, or create and edit templates and RSVP forms.

Viewer – Can see content but can’t make changes.

To invite someone, open the team menu at the top of the sidebar, choose Manage Team and click Invite Member. Enter their email, pick a role and click Send Invitation. Until they accept, the invite waits under Pending Invitations.

Protect an Event Page with a Passcode

Add a passcode to an event, and guests have to enter it before they can see the event details.

Protect an Event Page with a Passcode

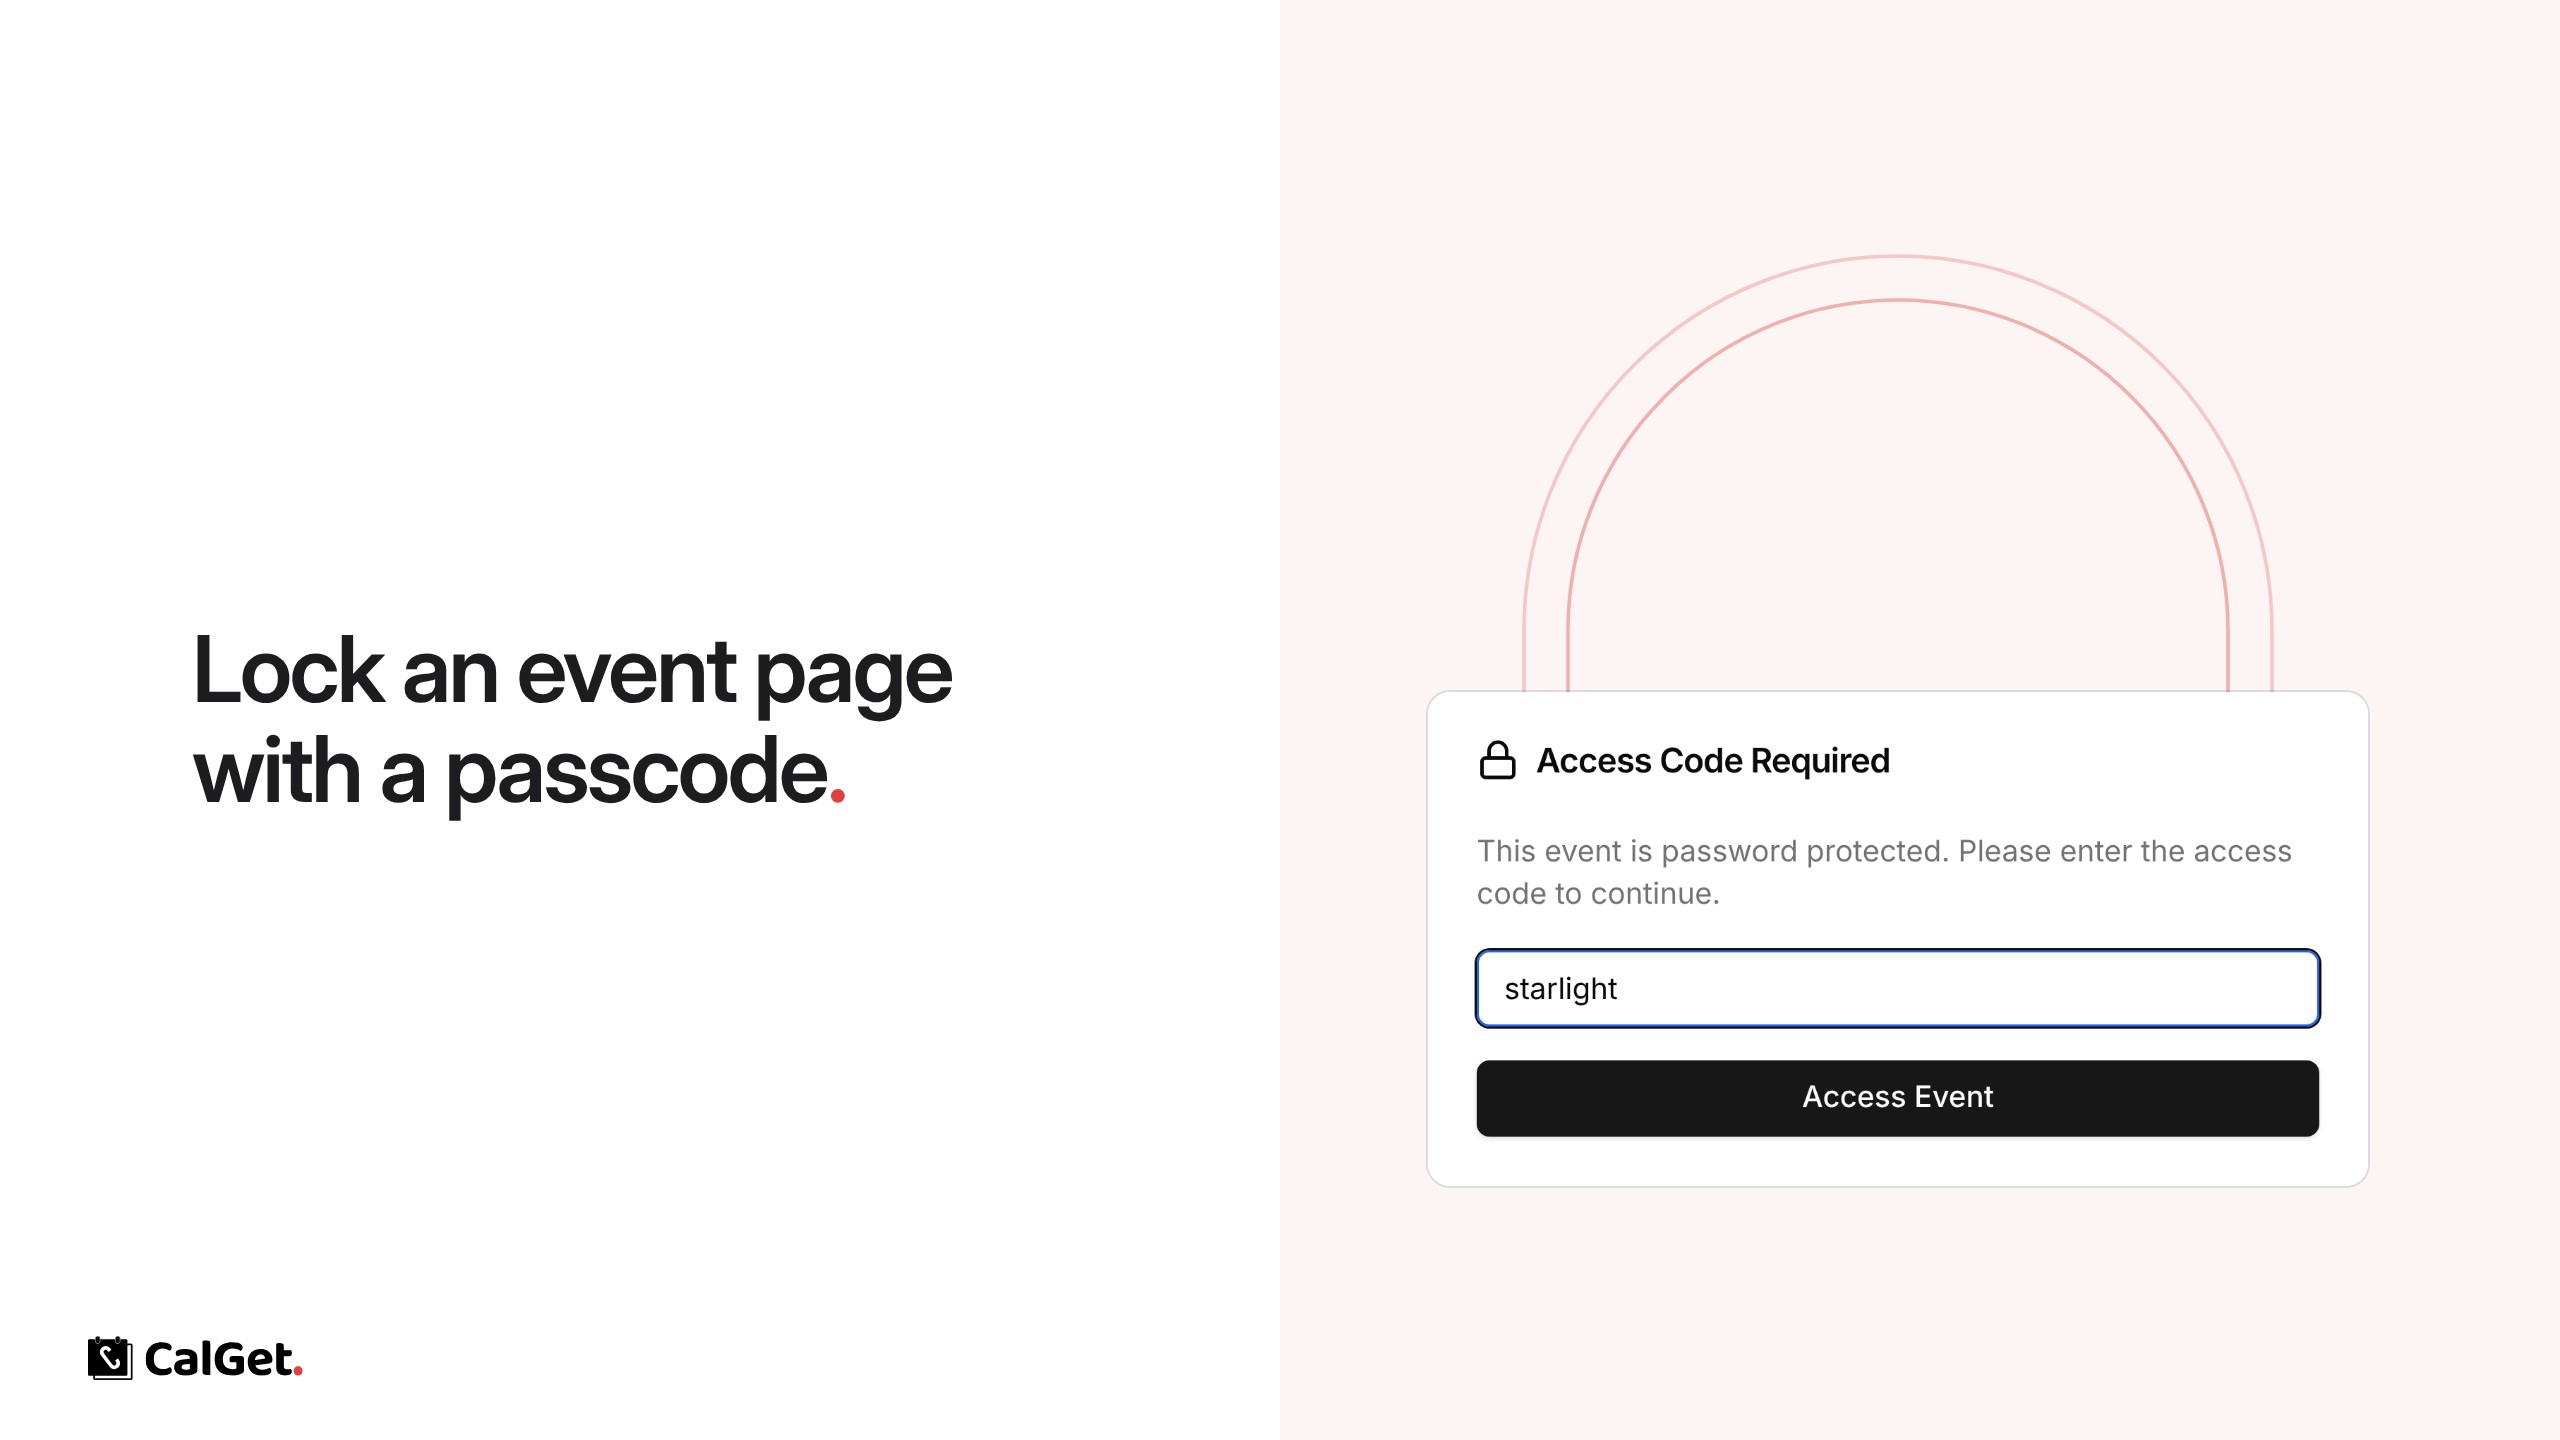
You can now lock an event page with a passcode. Guests see an Access Code Required screen and have to enter the passcode before the event details appear.

Set a passcode – Any passcode of at least 4 characters.

Share it with your guests – Send the passcode along with the event link.

Turn it off – Clear the passcode and save, and the page is open to everyone again.

To set it, open your event, go to Edit, click Password Protection, enter a passcode and click Save.

Get Email Notifications When Guests RSVP

Choose how you hear about new RSVPs: an email for each one, a daily summary, both, or none.

Get Email Notifications When Guests RSVP

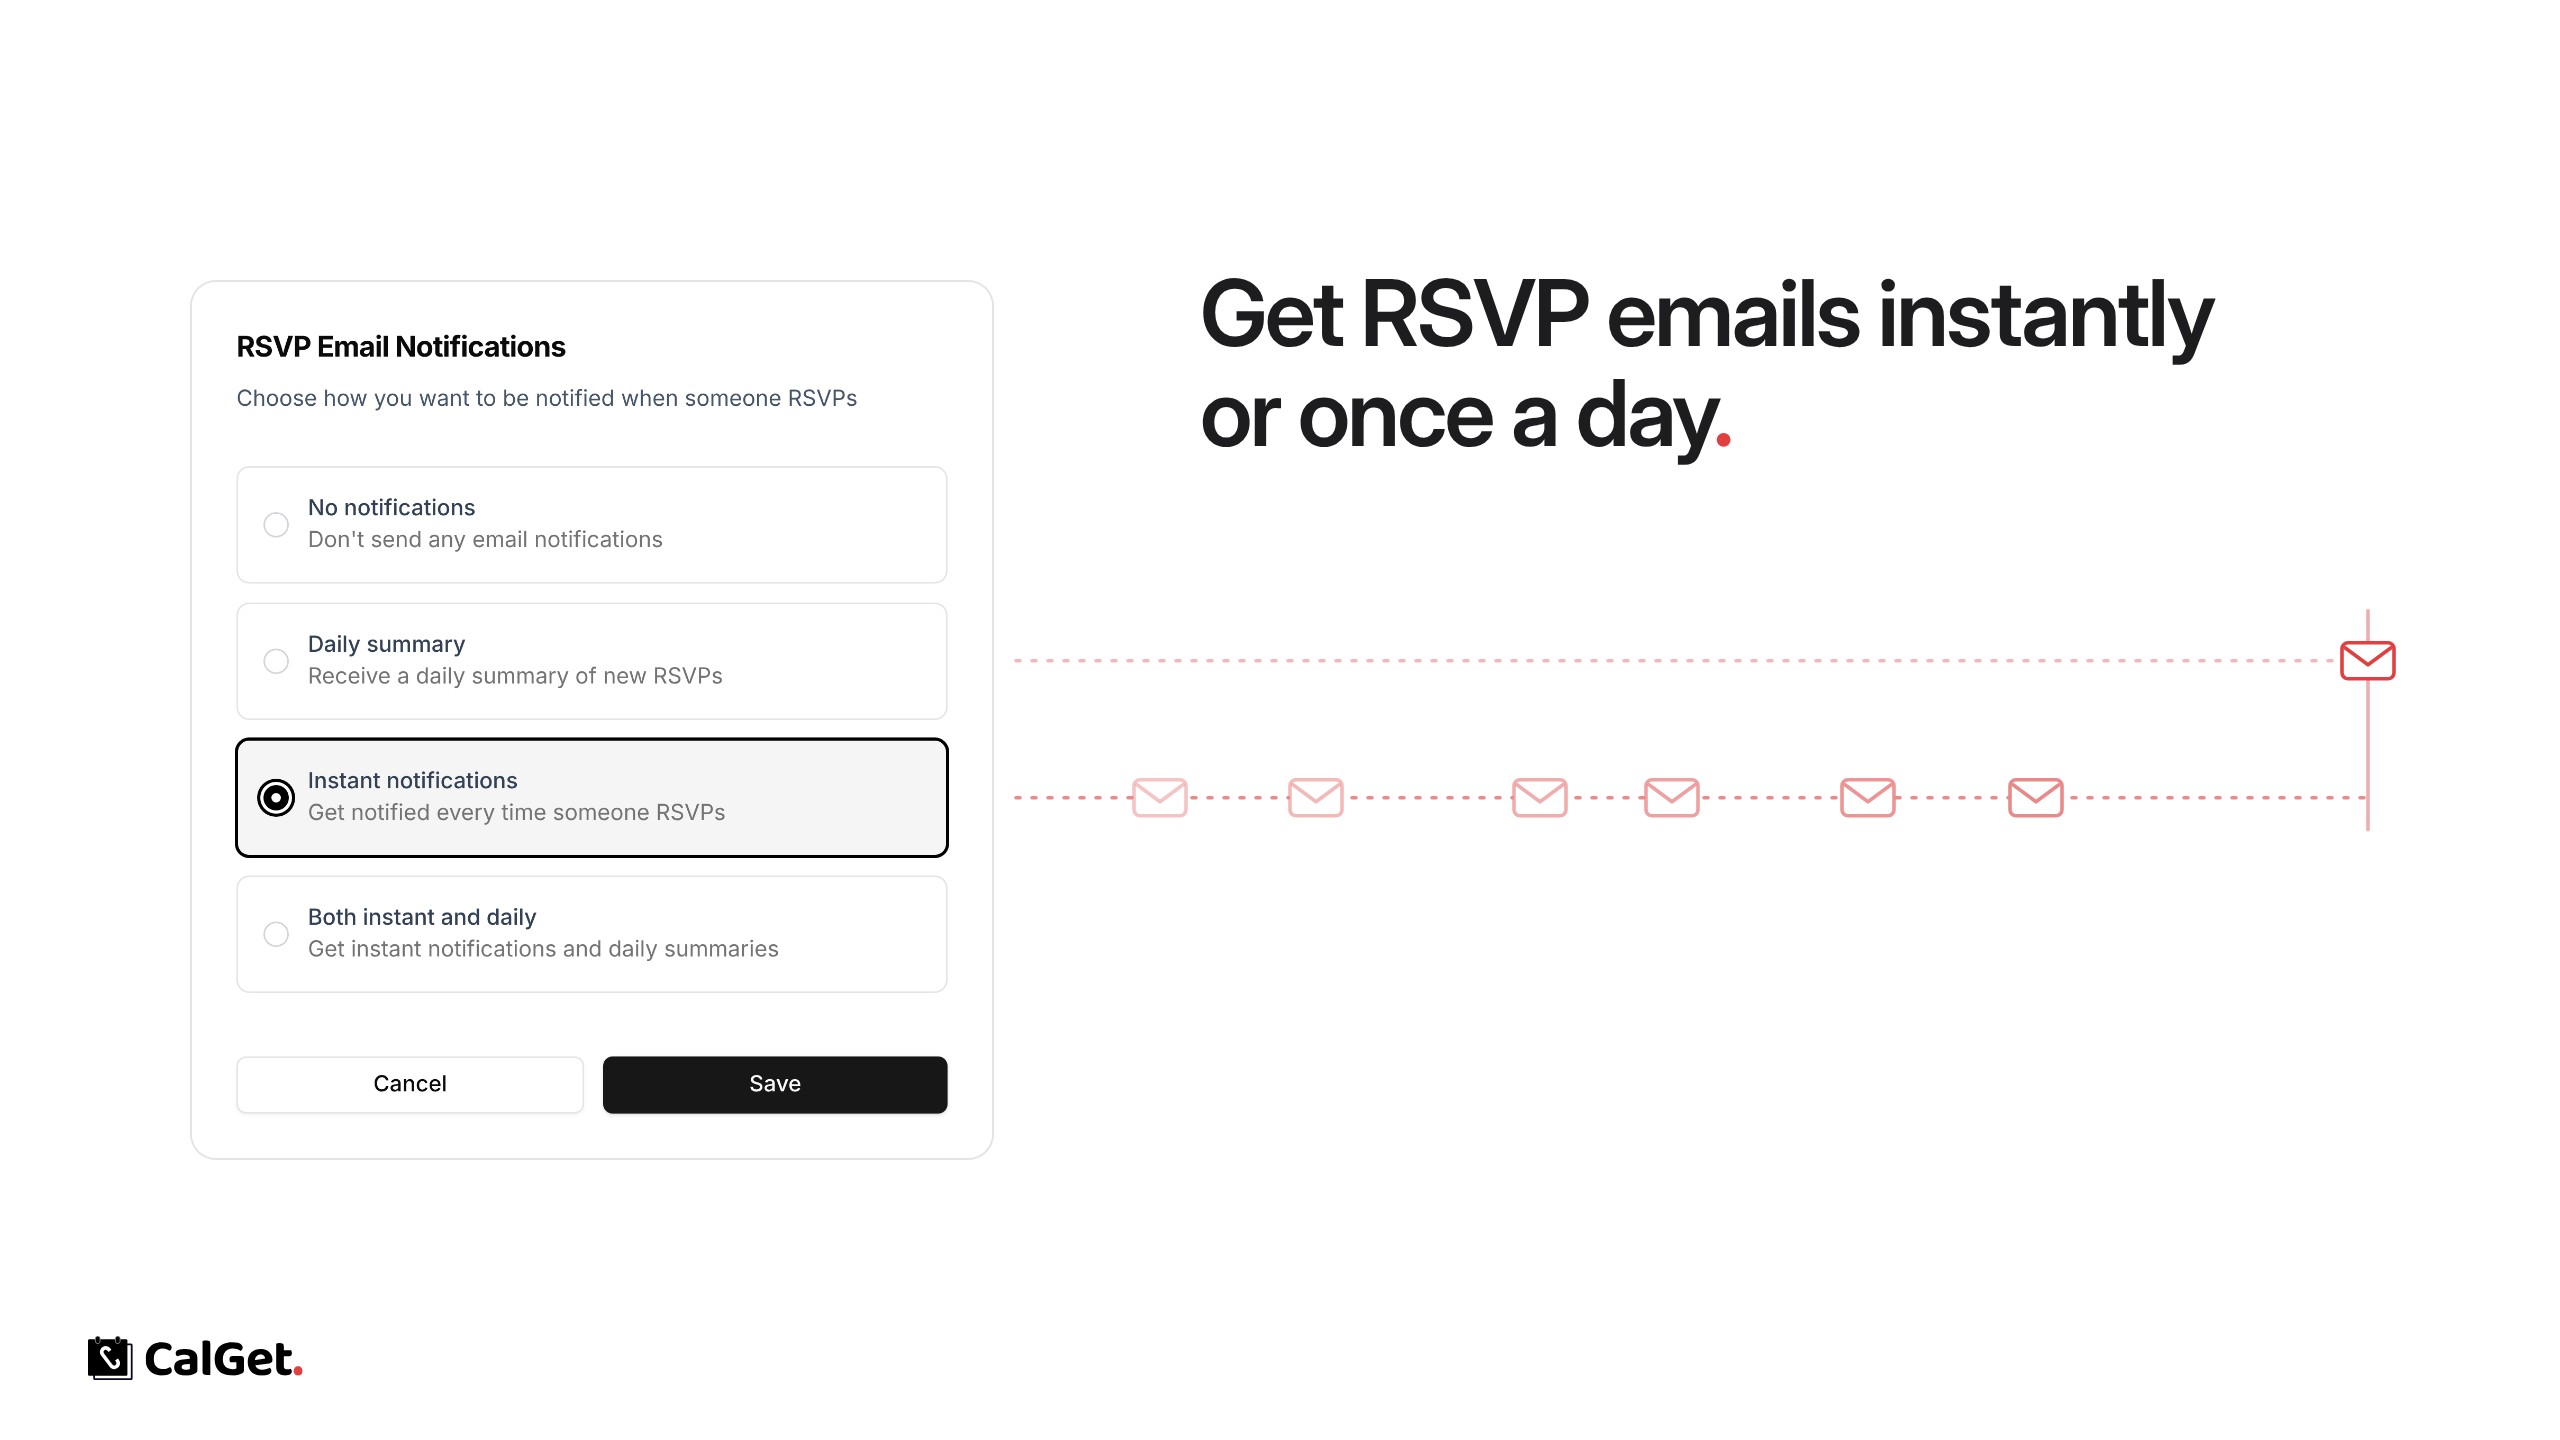
You can now get an email when someone RSVPs to your event. Choose what works for each event:

No notifications – No emails. This is the default.

Daily summary – One email a day with the new RSVPs.

Instant notifications – An email every time someone RSVPs.

Both instant and daily – Instant emails plus the daily summary.

To set it, open your event, go to RSVPs, click Configure next to Email notifications, pick an option and click Save.

Sort Your Events by Event Date or Created Date

Order your event list by nearest or farthest event date, or by the newest or oldest you created.

Sort Your Events by Event Date or Created Date

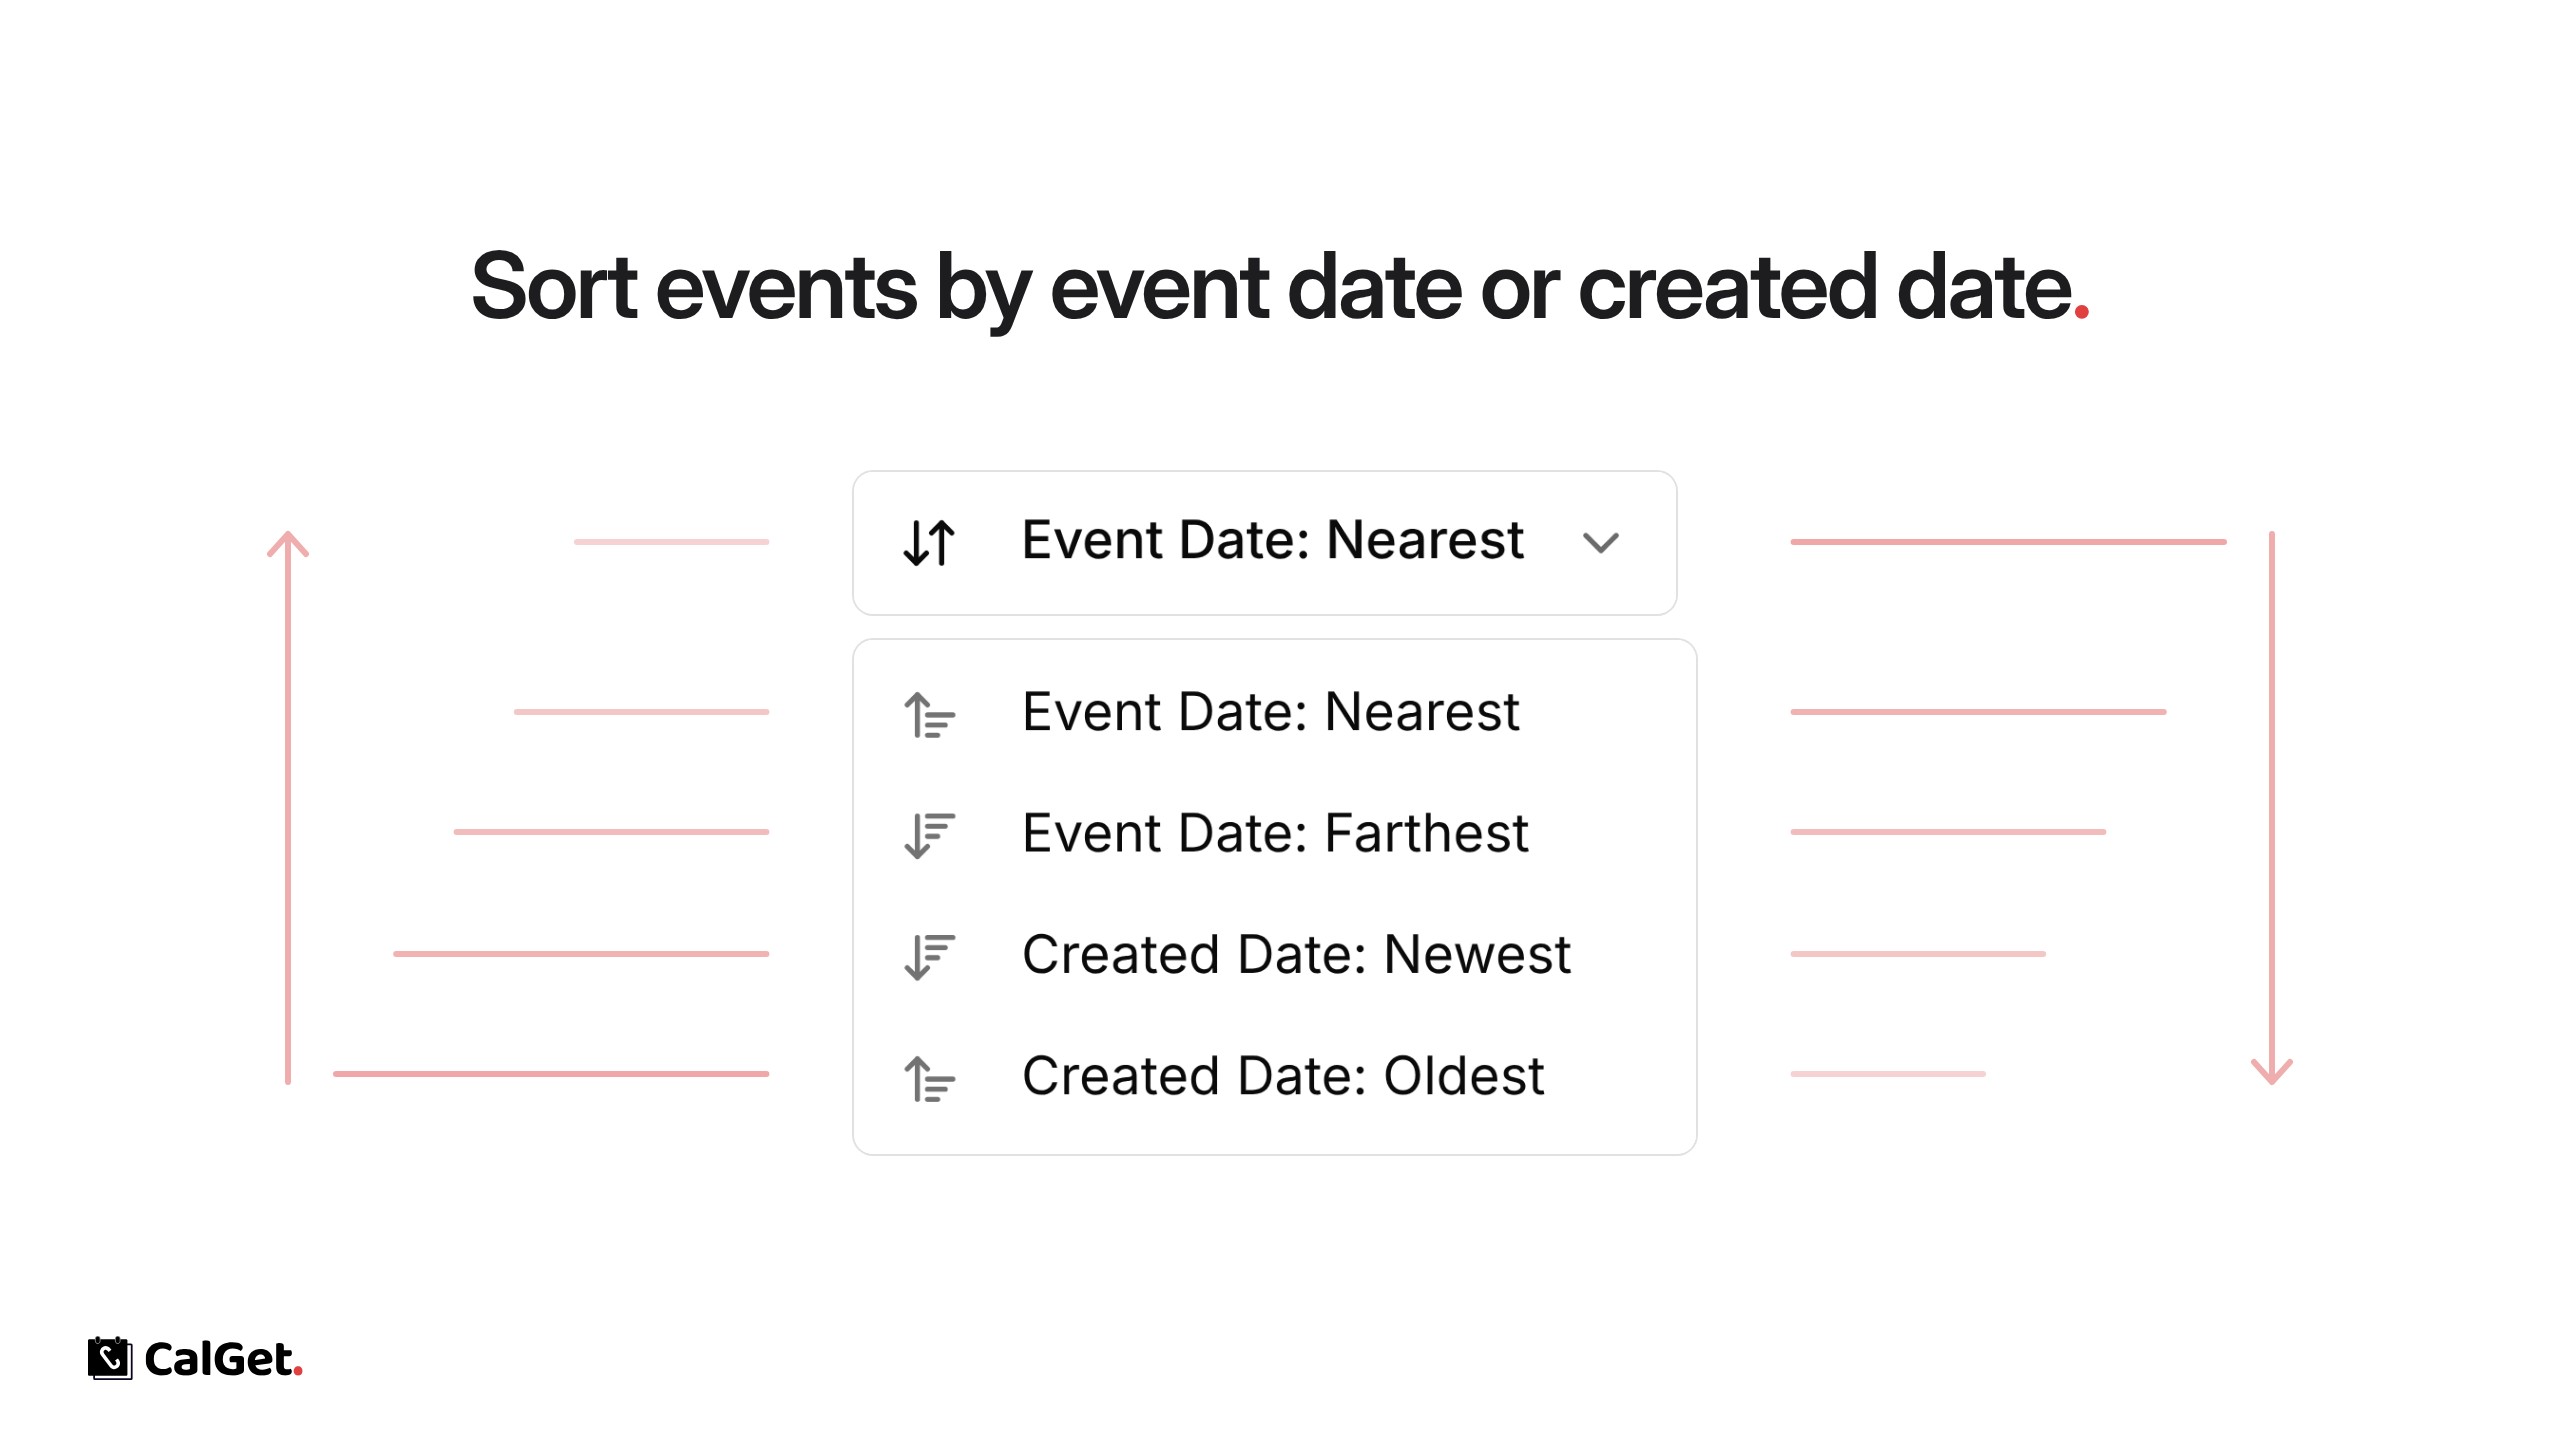
You can now sort the event list in your dashboard. There are four options:

Event Date: Nearest – Events happening soonest come first.

Event Date: Farthest – Events furthest away come first.

Created Date: Newest – The events you added most recently come first.

Created Date: Oldest – The events you added first come first.

Use the sort menu next to Search events at the top of My Events. On the All tab you can sort by created date; on Upcoming you also get the event date options.

Limit the Number of Attendees for an Event

Set how many people can RSVP. Once the seats are taken, the RSVP form closes on its own.

Limit the Number of Attendees for an Event

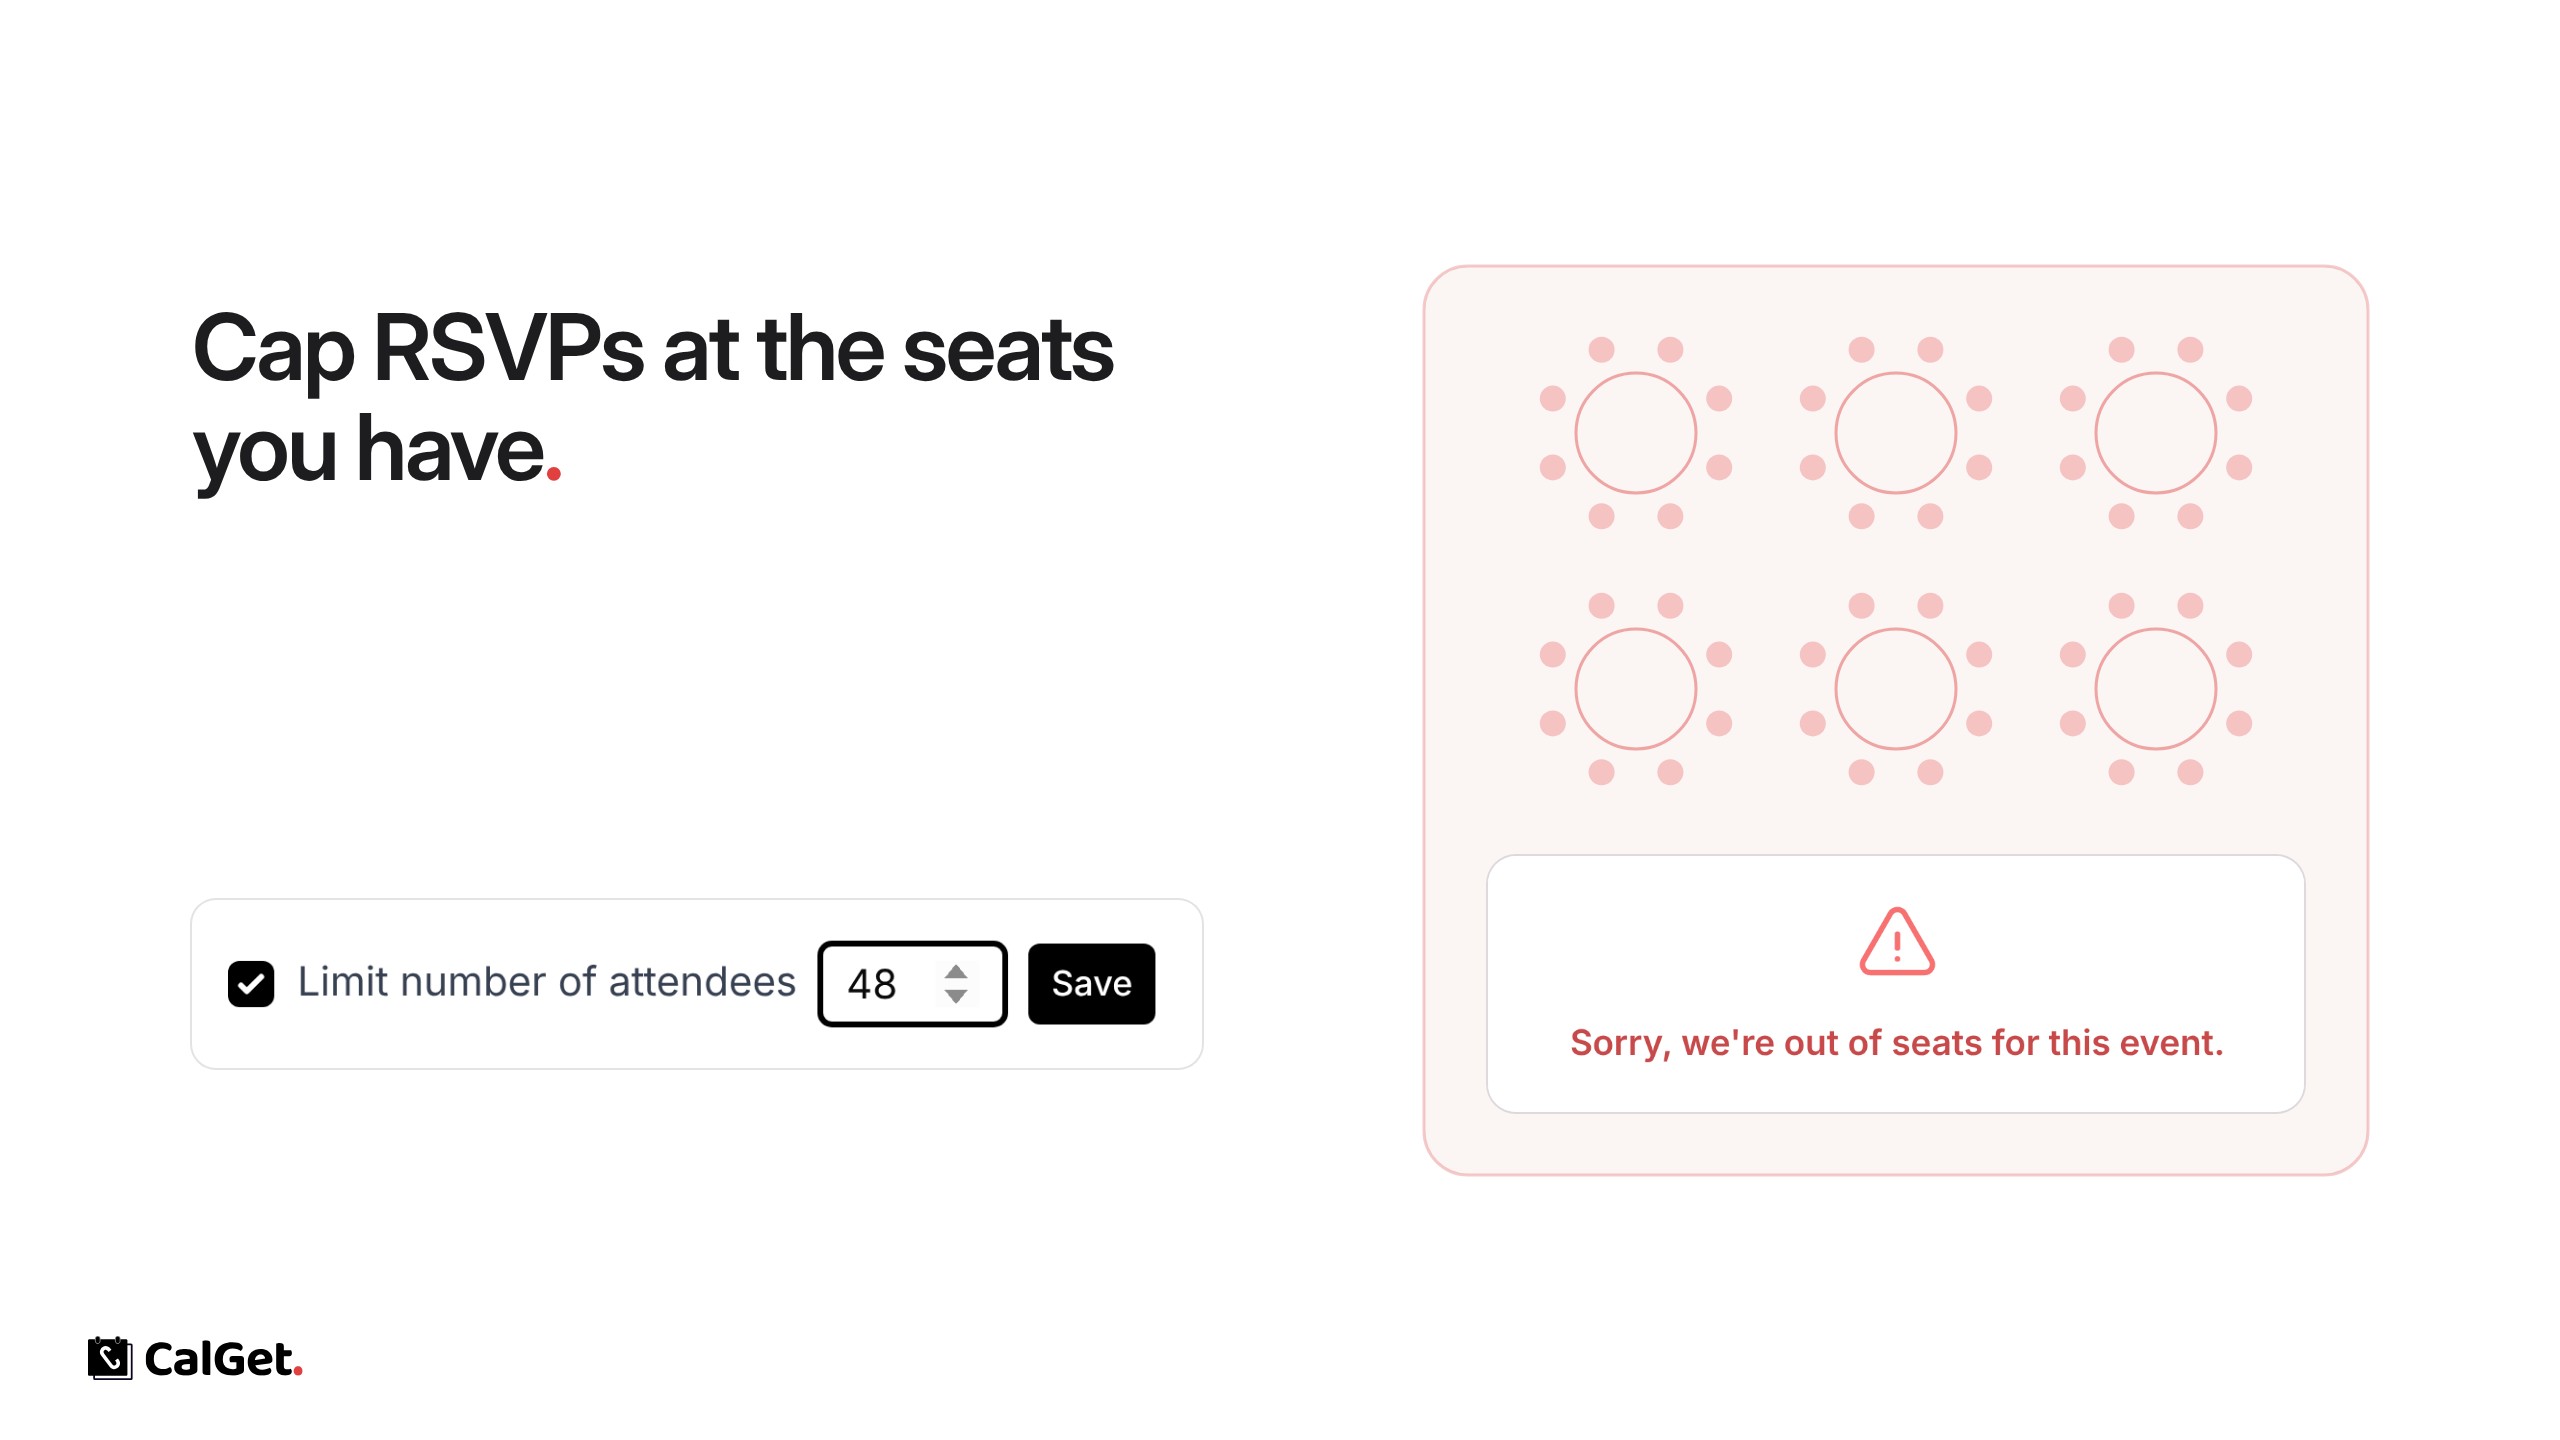
You can now set a seat limit for an event. When that many guests have said they’re going, the RSVP form closes and new visitors see “Sorry, we’re out of seats for this event.”

Set the number – Enter how many seats you have.

Closes by itself – No more RSVPs once the limit is reached.

Change it anytime – Raise the limit to open more seats, or untick it to remove the limit.

To set it, open your event, go to RSVPs, tick Limit number of attendees, enter the number and click Save.

RSVP Confirmation Emails for Your Guests

Guests who RSVP get an email with their response, a way to change it, and the event attached as an .ics file.

RSVP Confirmation Emails for Your Guests

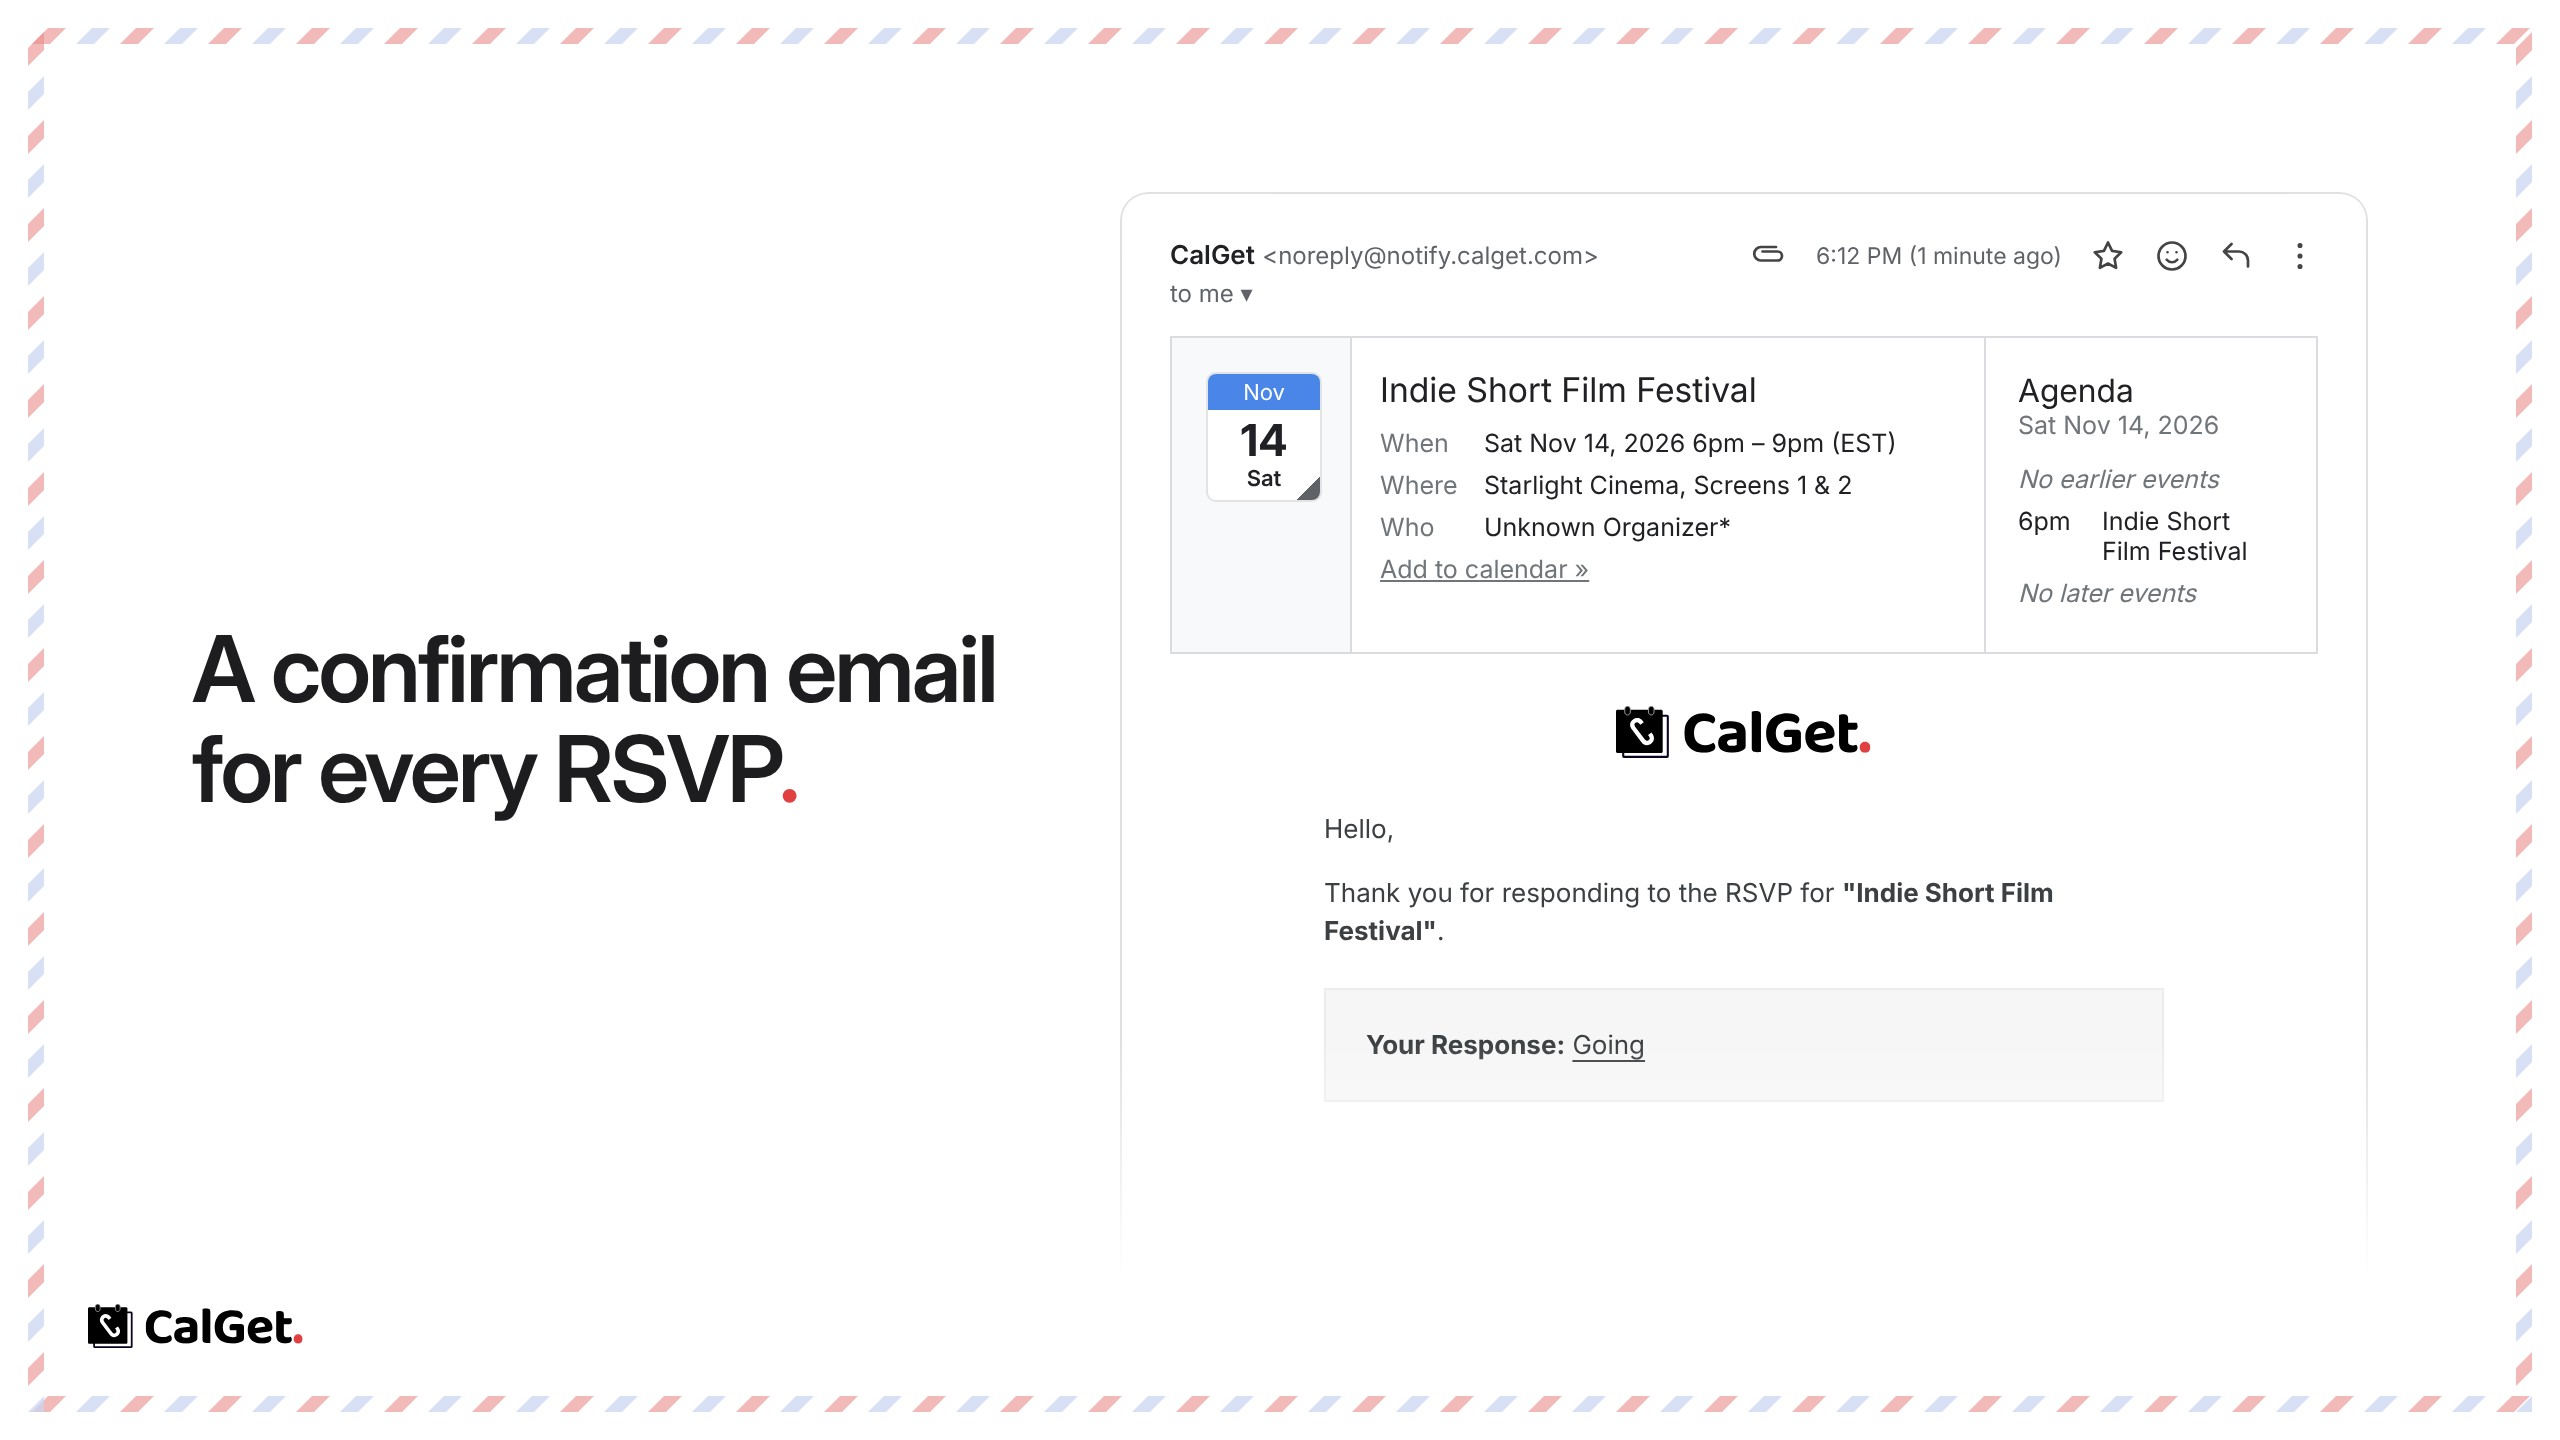
Guests now get a confirmation email when they RSVP to your event. The email includes:

Their response – The answer they gave (Going, Maybe or Not Going), with links to change it later in one click.

A calendar file – An .ics file is attached, so they can add the event to Google, Outlook, Apple or any other calendar app.

There is nothing to set up. The email goes out from CalGet every time someone RSVPs.

Collect Subscriber Details for Your Calendar

Ask people for their name, email and any other details before they subscribe, and see every answer in one list.

Collect Subscriber Details for Your Calendar

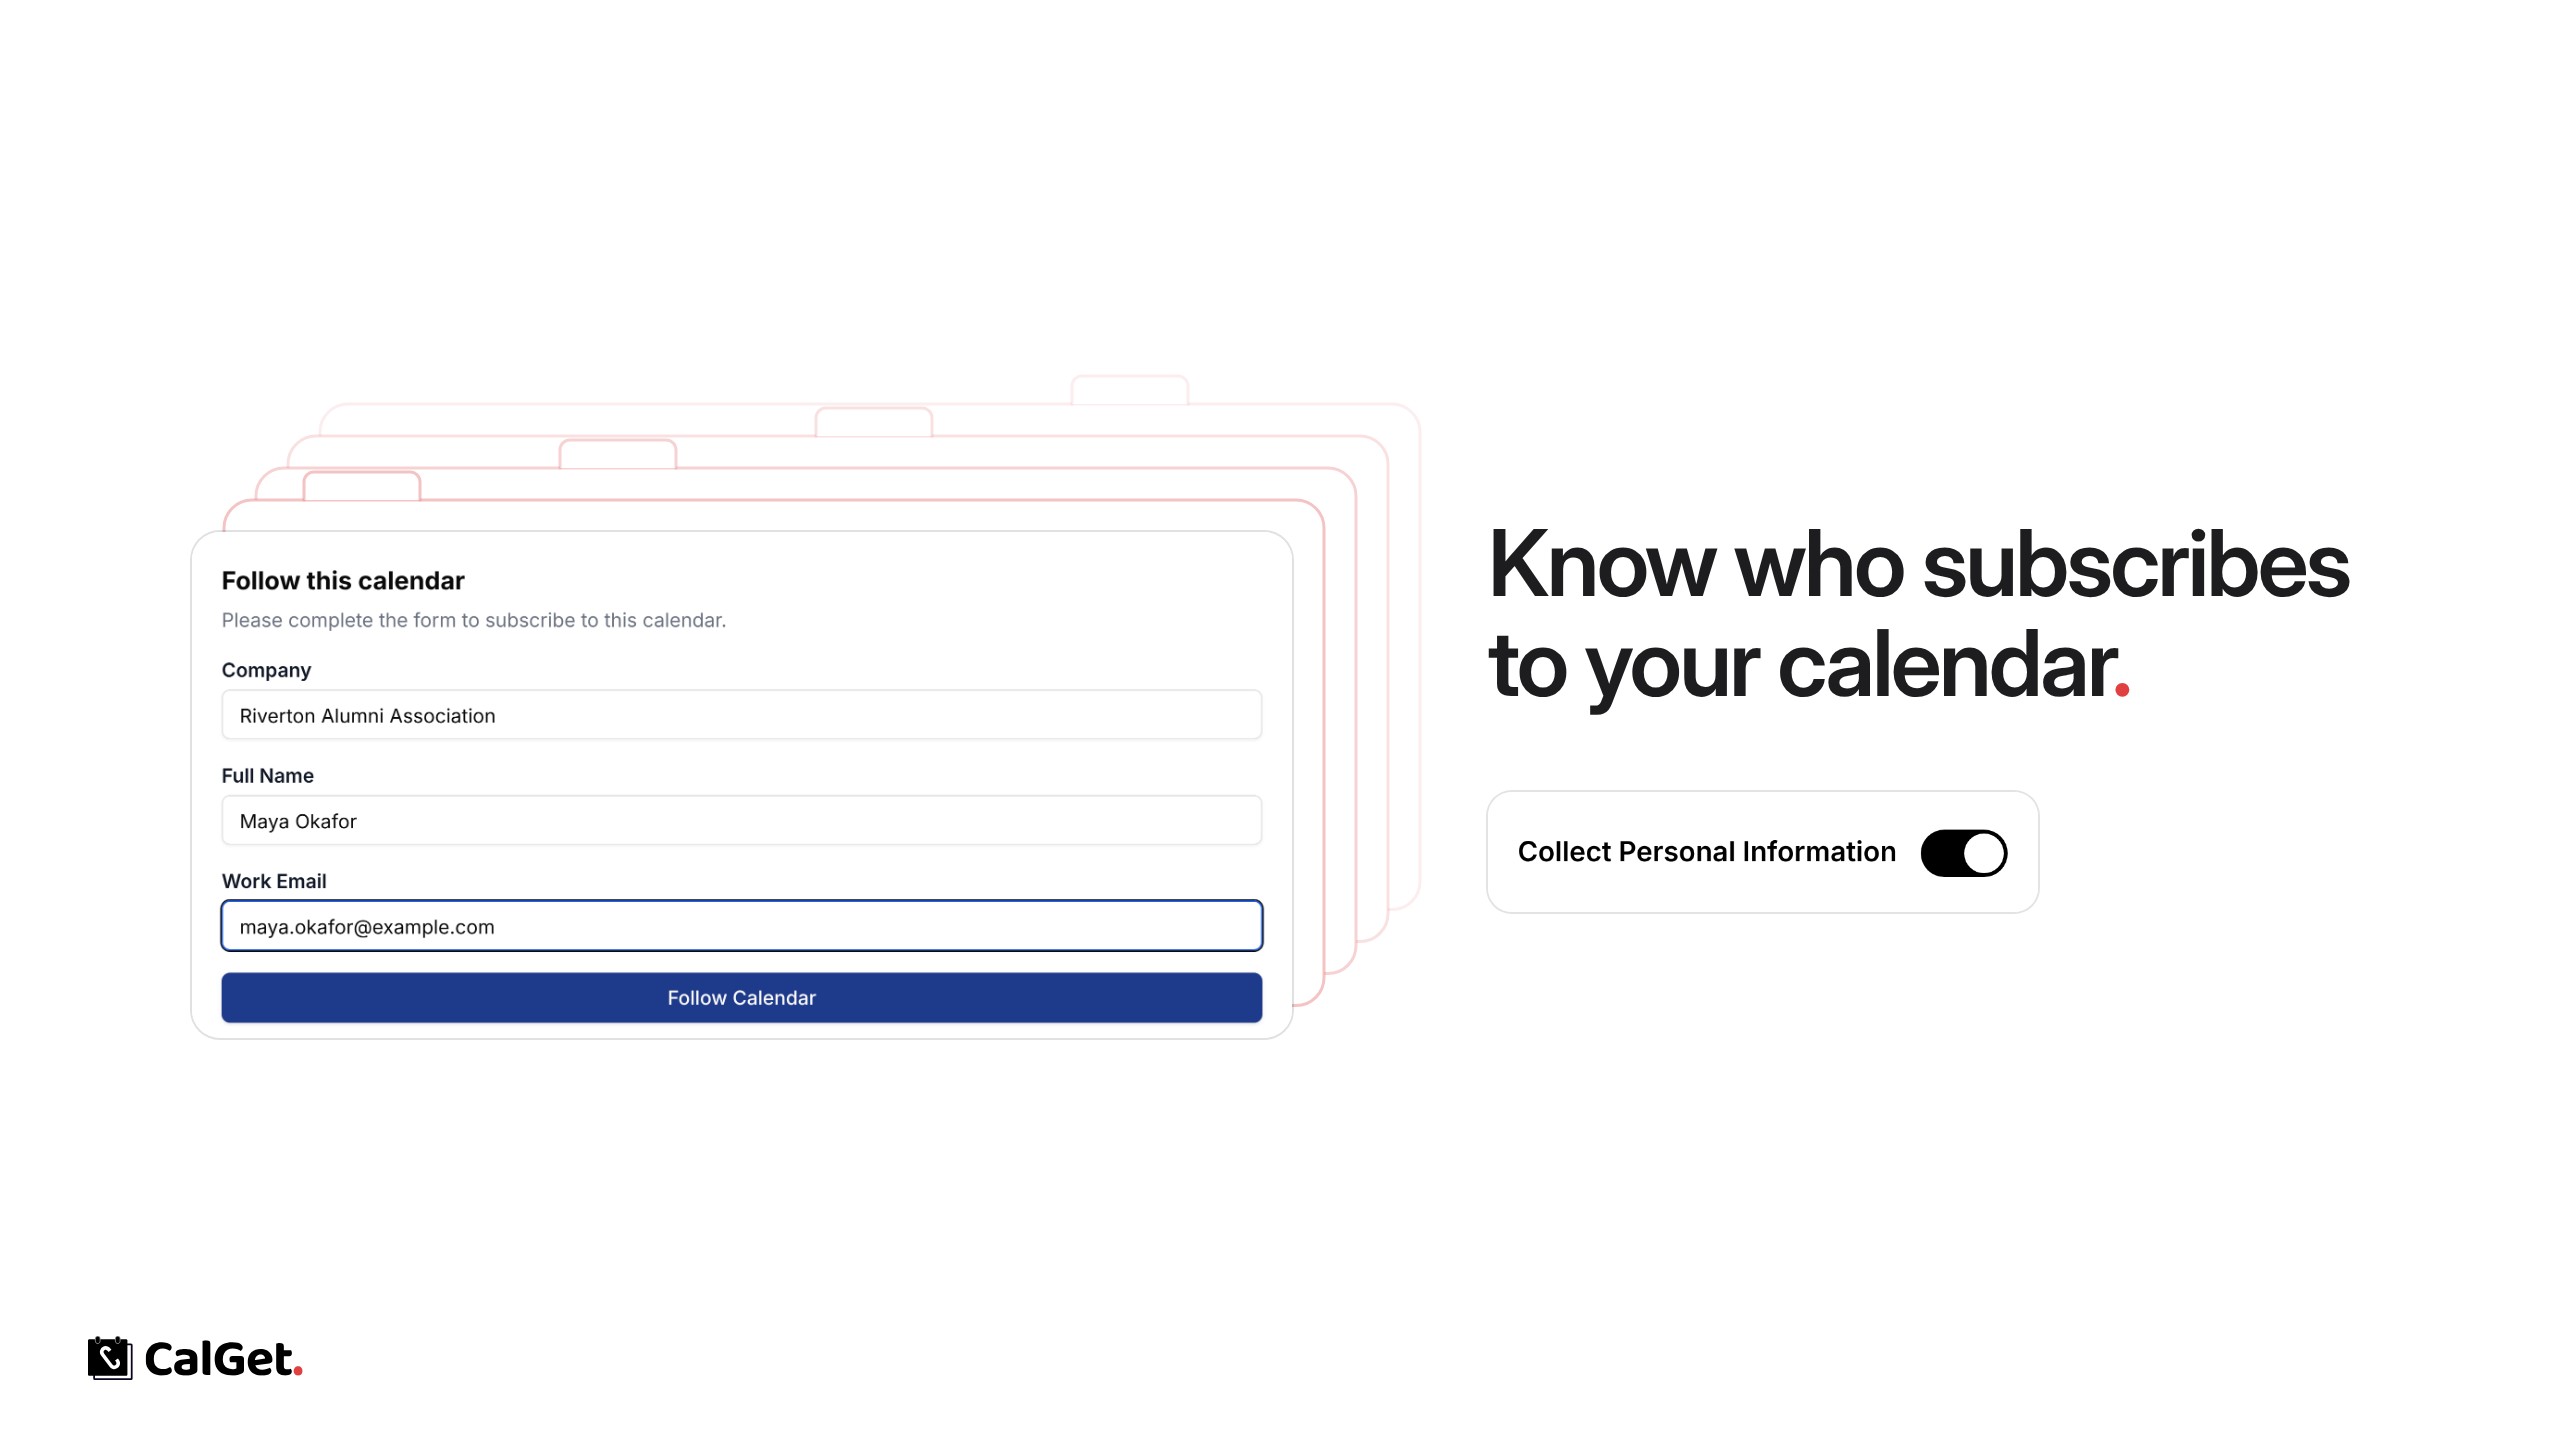
You can now ask people for their details before they subscribe to your calendar. When it’s on, your public calendar page shows a short form, and every subscriber’s answers are saved in your Subscribers List.

The basics – Name and email for every subscriber.

Your own questions – Edit the form to ask for anything else, like a company, a phone number or how they’d like to be contacted.

Export – Download the list from Export List for your follow-ups.

To turn it on, open your calendar, go to Subscribers and switch on Collect Personal Information. Click Edit Form to change the questions.

The CalGet Help Center

Step-by-step articles on every part of CalGet, by topic or by search, with a way to reach support.

The CalGet Help Center

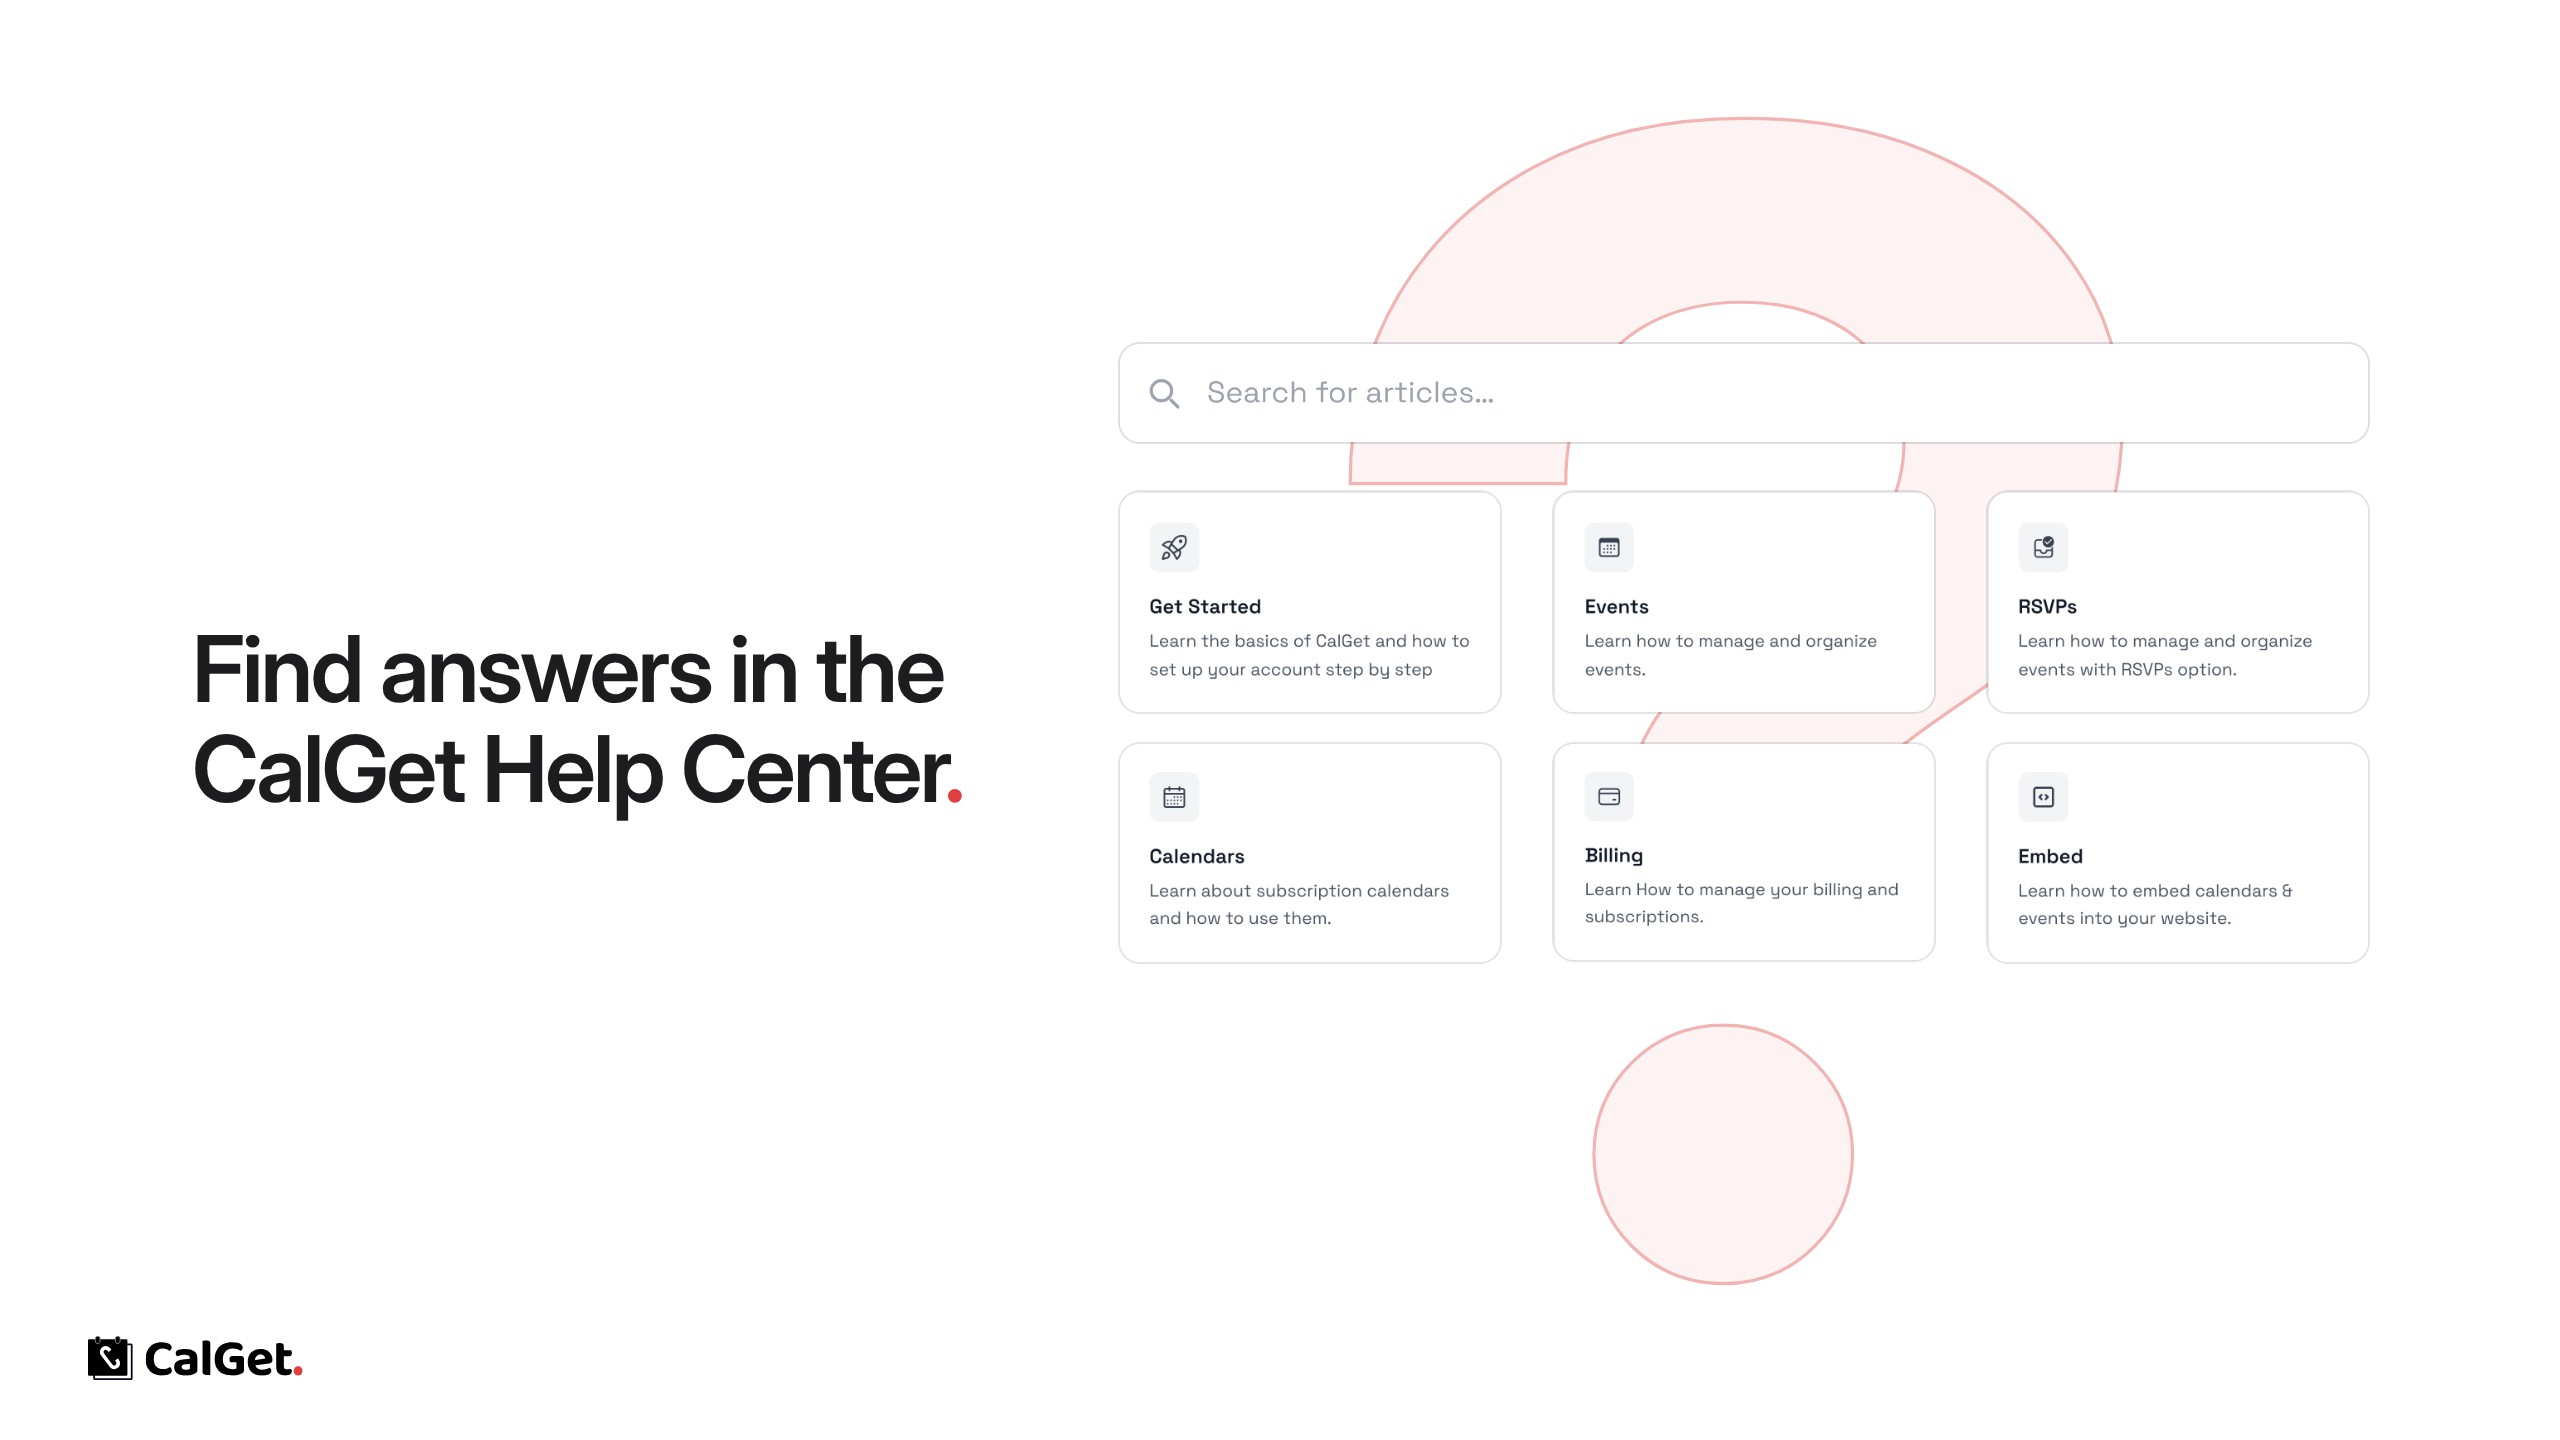
CalGet now has a Help Center with step-by-step articles on setting up and using every part of CalGet.

Browse by topic – Get Started, Events, RSVPs, Calendars, Billing and Embed.

Search – Type what you’re looking for and jump straight to the right article.

Contact support – If you can’t find an answer, reach our team from the bottom of any Help Center page.

Find it under Resources → Help Center on calget.com, or in the Support menu inside your dashboard.

Rebrand : Cal.et is Now CalGet.com! 🎉

Rebrand : Cal.et is Now CalGet.com! 🎉
  • Rebrand:
    • Cal.et has officially rebranded to CalGet.com.
    • The dot (.) in Cal.et has been replaced with a 'G', creating the new name: CalGet.

Impact:

  • No User Action Required:
    • All existing shared links, subscriptions, and account details remain the same.
    • User data is unaffected, and no migration steps are necessary.
  • New Domain:
    • The platform is now accessible at CalGet.com with all features and functionality unchanged.

Notes:

  • The rebrand represents the company's growing vision and commitment to enhancing the user experience.

Thank you for your continued support!

— The CalGet Team (formerly Cal.et)


Dashboard 2.0: Event Search and Filters

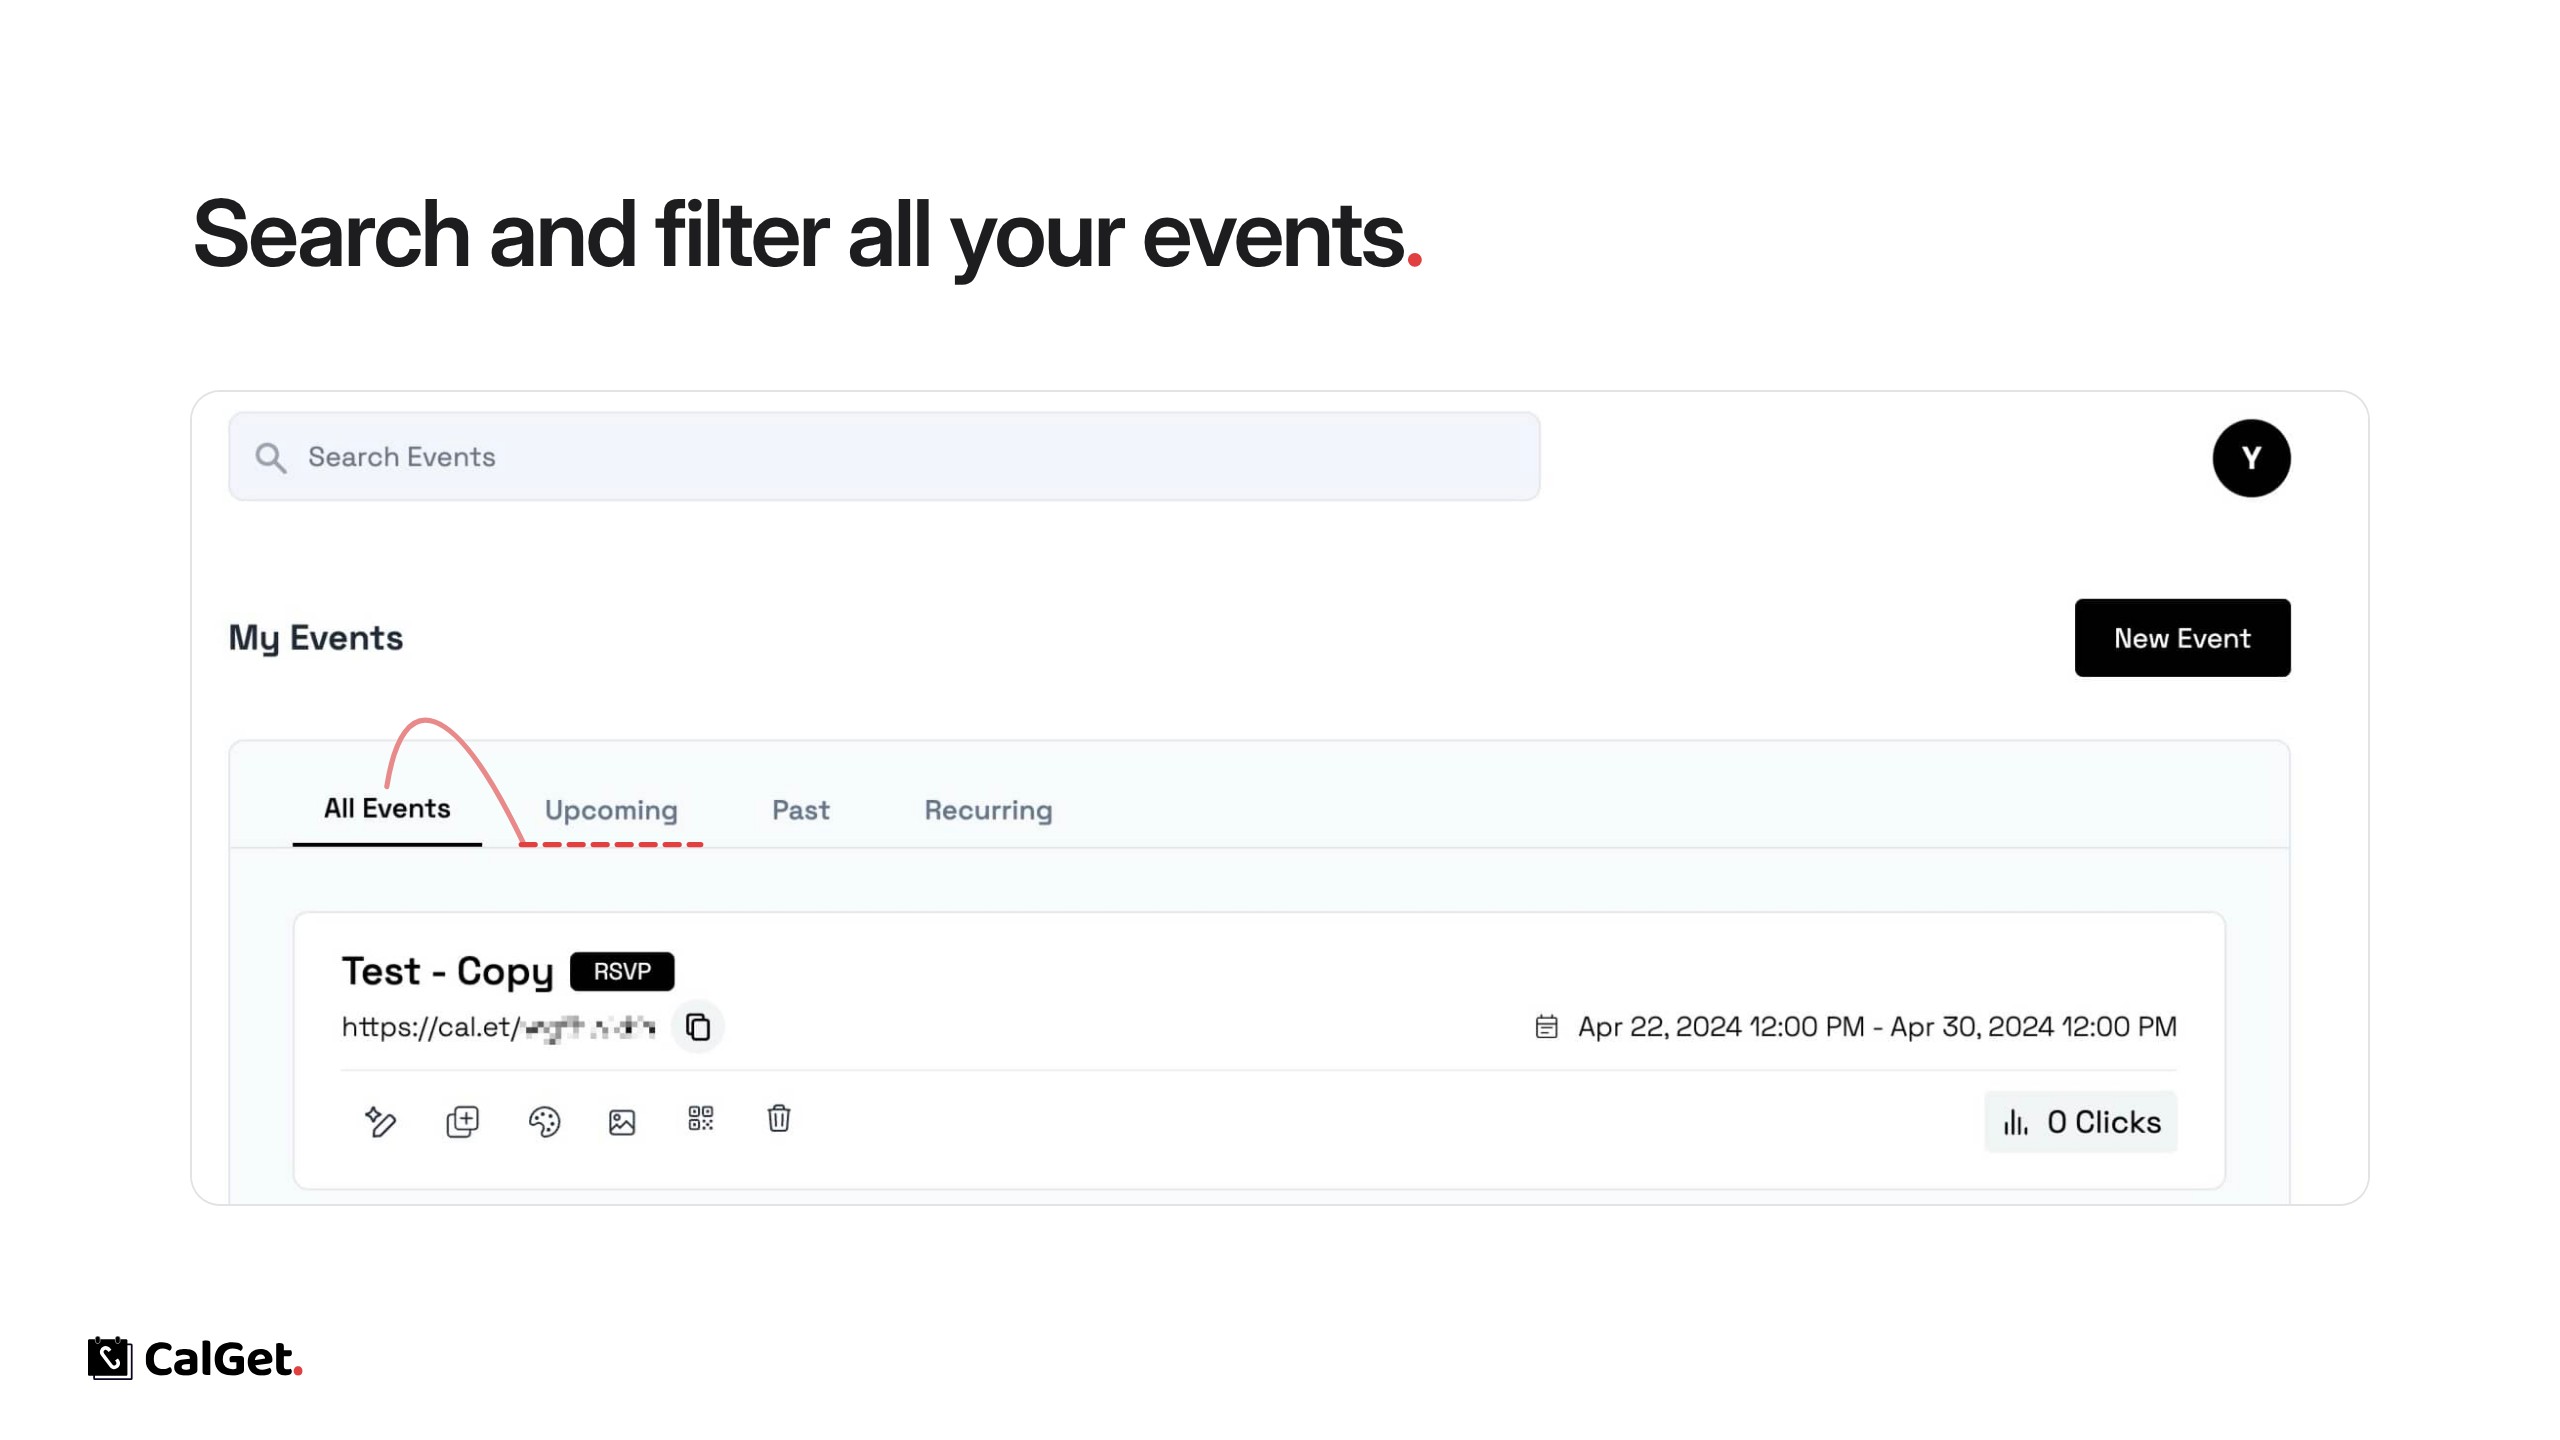
A redesigned dashboard with event search and All, Upcoming, Past and Recurring filters.

Dashboard 2.0: Event Search and Filters

Dashboard 2.0 is here: a redesigned dashboard that makes it quicker to find and manage your events.

A cleaner layout – Your events, calendars and tools in one simple view.

Event search – Type a word from an event’s name to find it right away.

Filters – Switch between All Events, Upcoming and Past, or see Recurring events on their own.

The search box sits at the top of My Events, with the filters right below it.

Embed Your Event Calendar on Your Website
Show your CalGet events as a calendar on your own site. Copy the embed code once, and it stays up to date.

Embed Your Event Calendar on Your Website
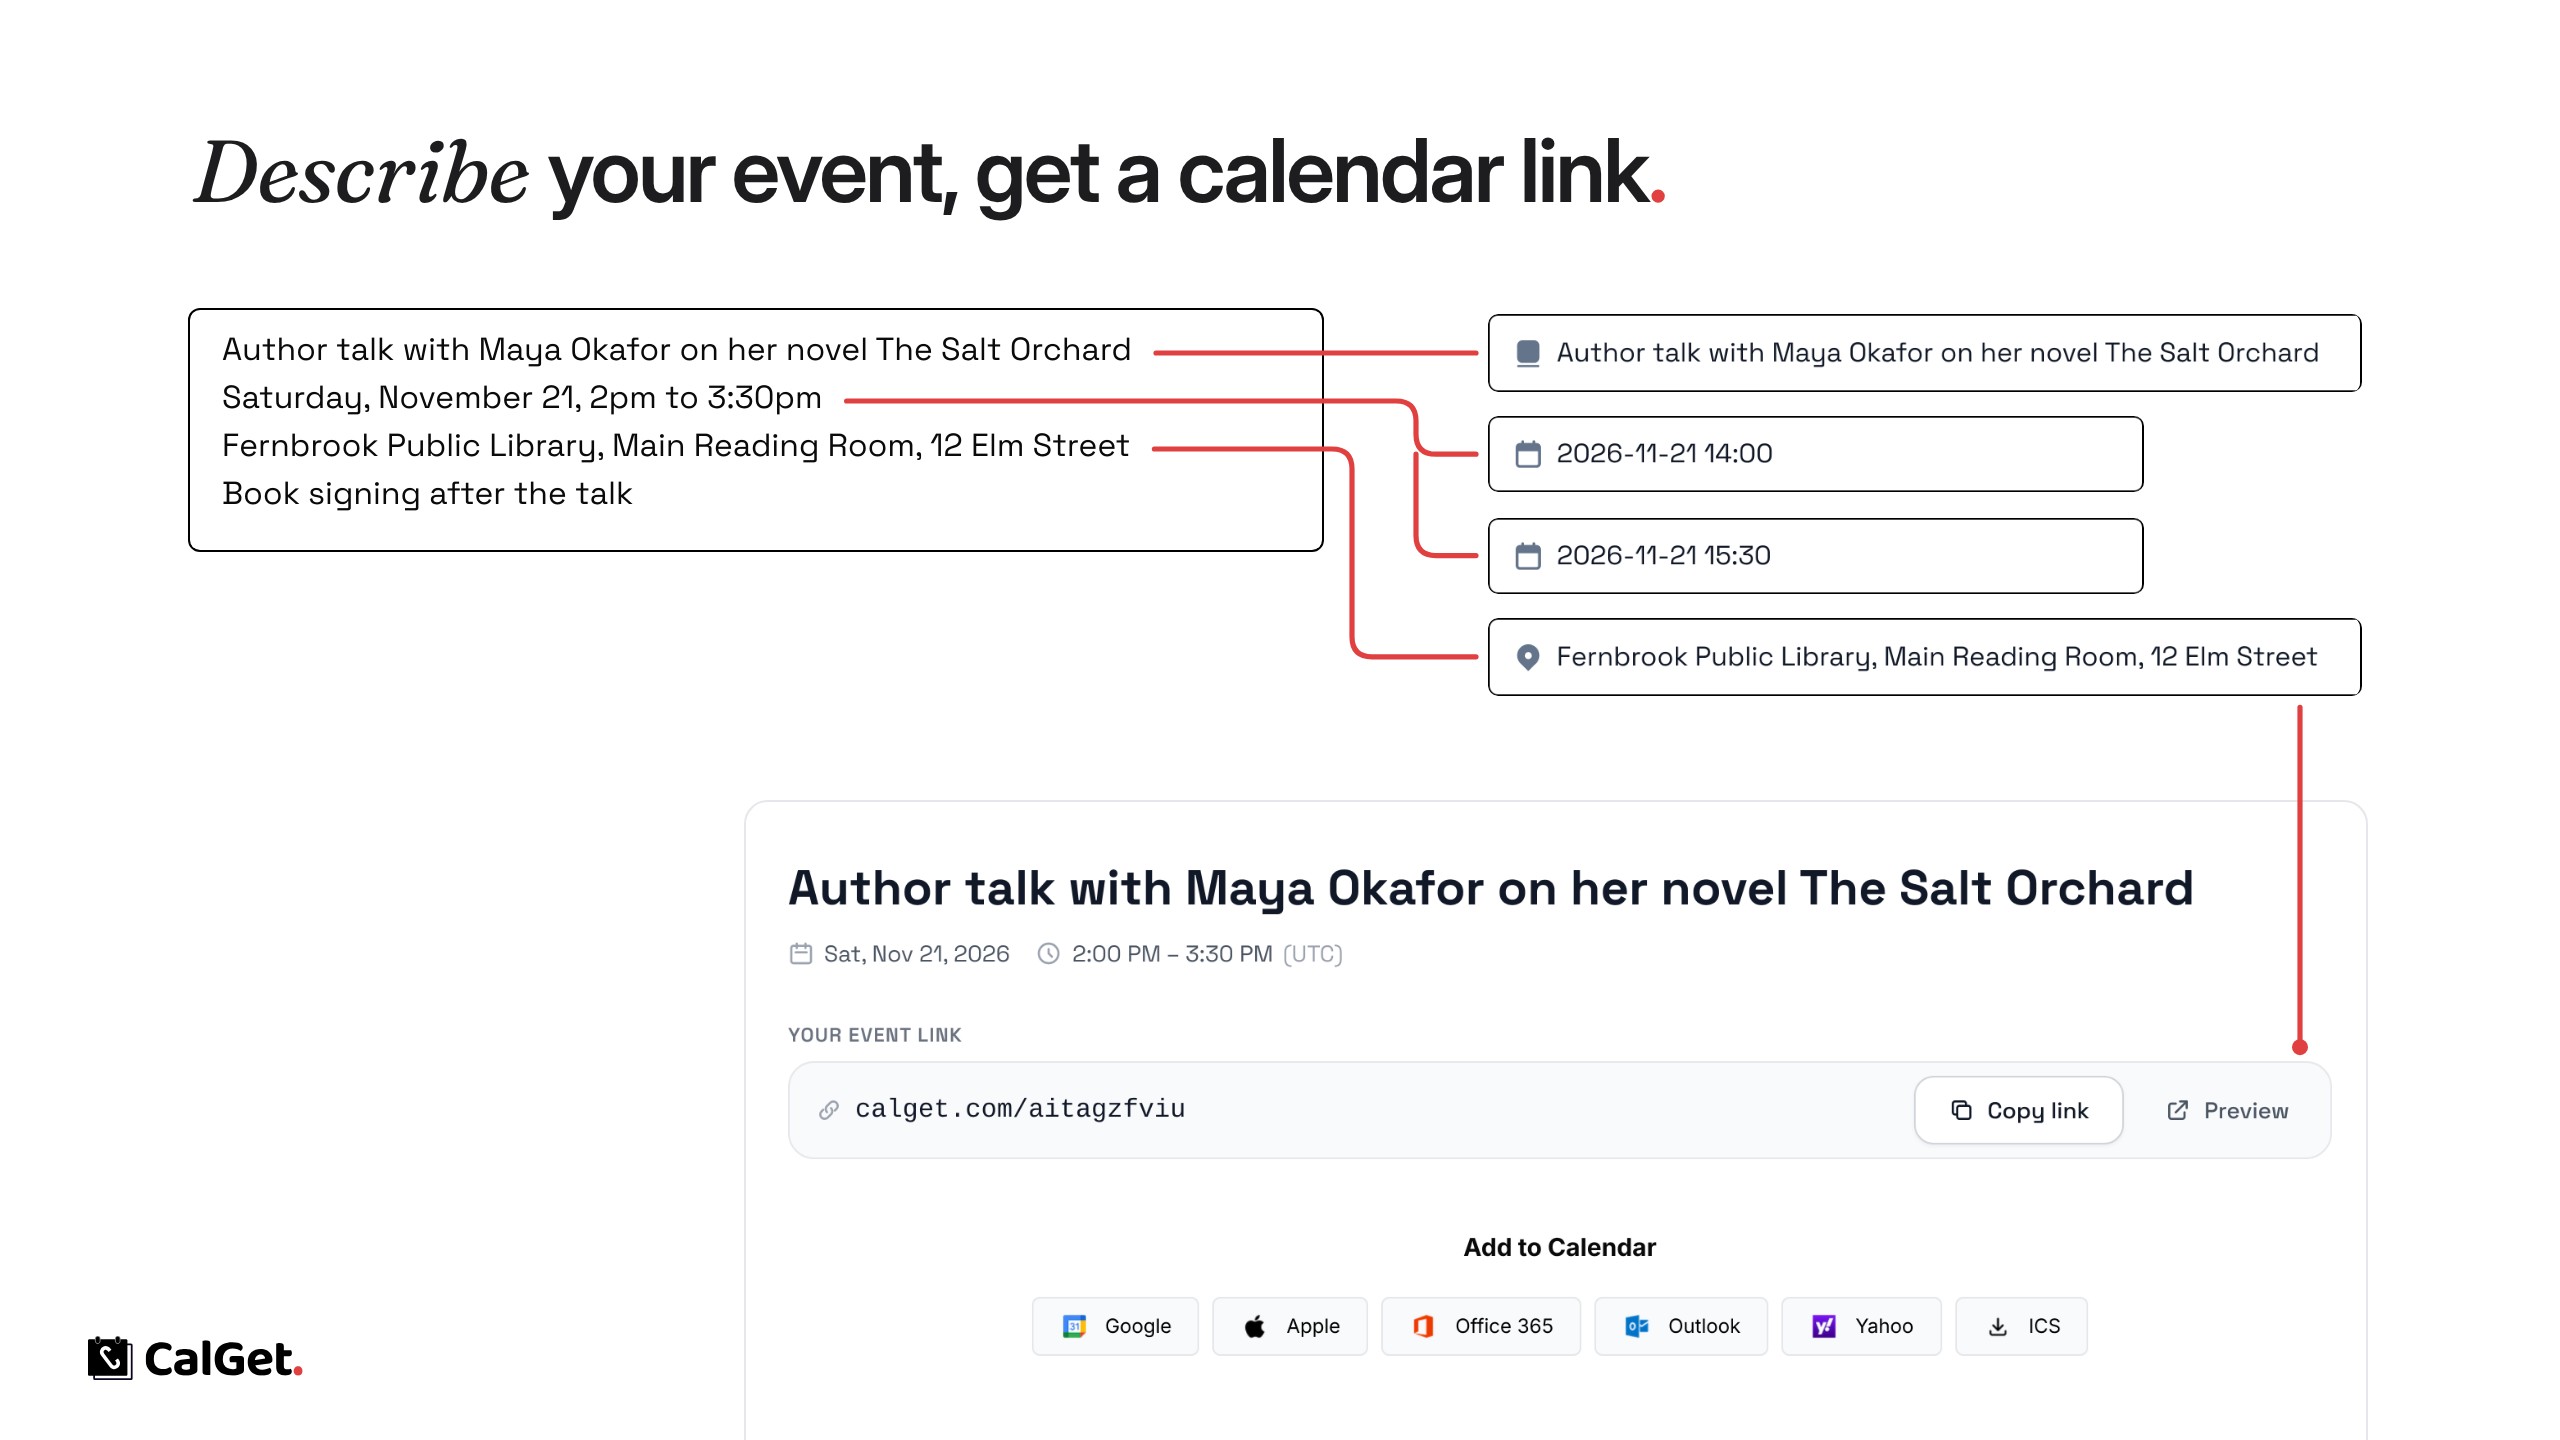
You can now put your CalGet events on your own website as a calendar. Visitors see your upcoming events, open any of them, and add them to Google, Apple, Outlook, Office 365 or Yahoo Calendar.
Your design – Pick a color and a view, and the calendar matches your site.

Always up to date – Change an event in CalGet and the calendar on your site changes with it.
Works on any site – Copy the embed code and paste it into WordPress, Wix, Squarespace, Shopify or any page that accepts HTML.
To get the code, open your calendar, go to Embed, choose your options and click Get embed code.

Connect CalGet to Thousands of Apps with Zapier

Use Zapier to create CalGet events from other apps, send RSVPs to your tools, and make calendar links automatically.

Connect CalGet to Thousands of Apps with Zapier

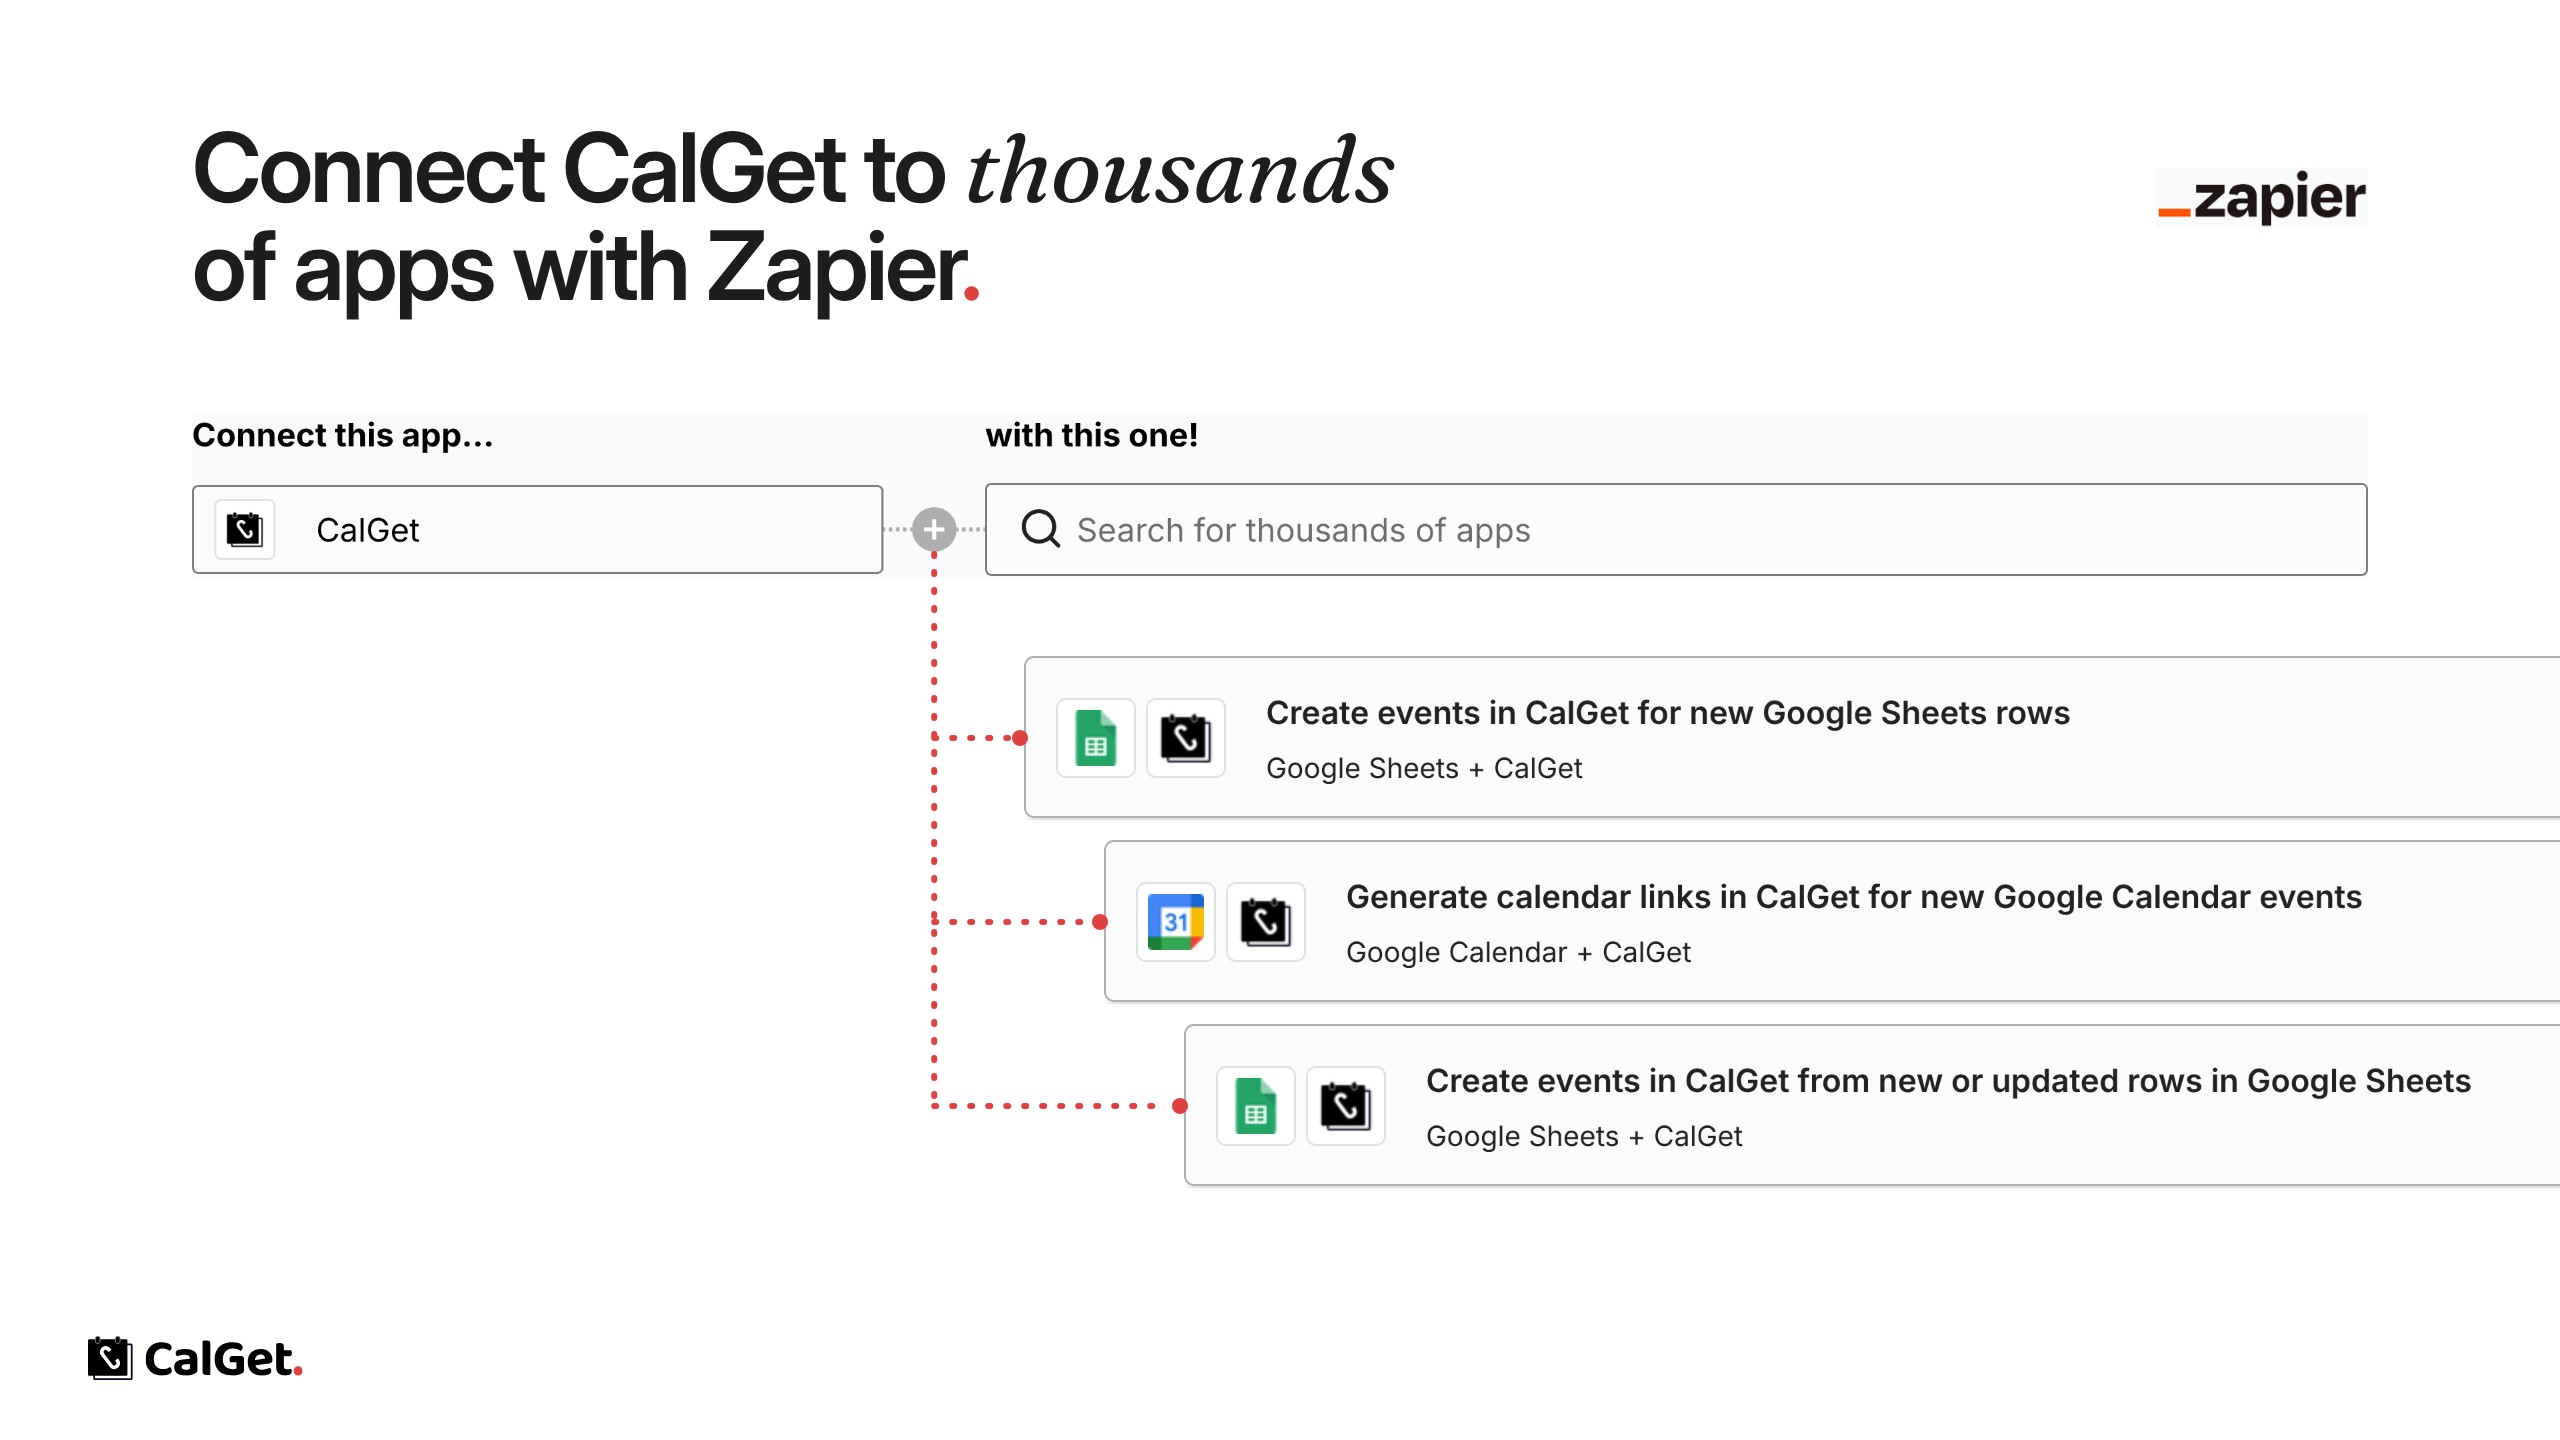
CalGet now works with Zapier, so you can connect it to thousands of other apps without writing code.

Create events from other apps – For example, add a CalGet event for every new row in a Google Sheet.

Act on RSVPs – Send new RSVP responses to your email or CRM tool, like tagging subscribers in Kit.

Make calendar links automatically – Generate CalGet calendar links for new Google Calendar events.

To start, open Integrations in your dashboard, pick one of the ready-made workflows or search for the app you want to connect.

Build Custom RSVP Forms with Your Own Questions

Add your own questions to the RSVP form, like a meal choice or the number of guests, and see the form as you build it.

Build Custom RSVP Forms with Your Own Questions

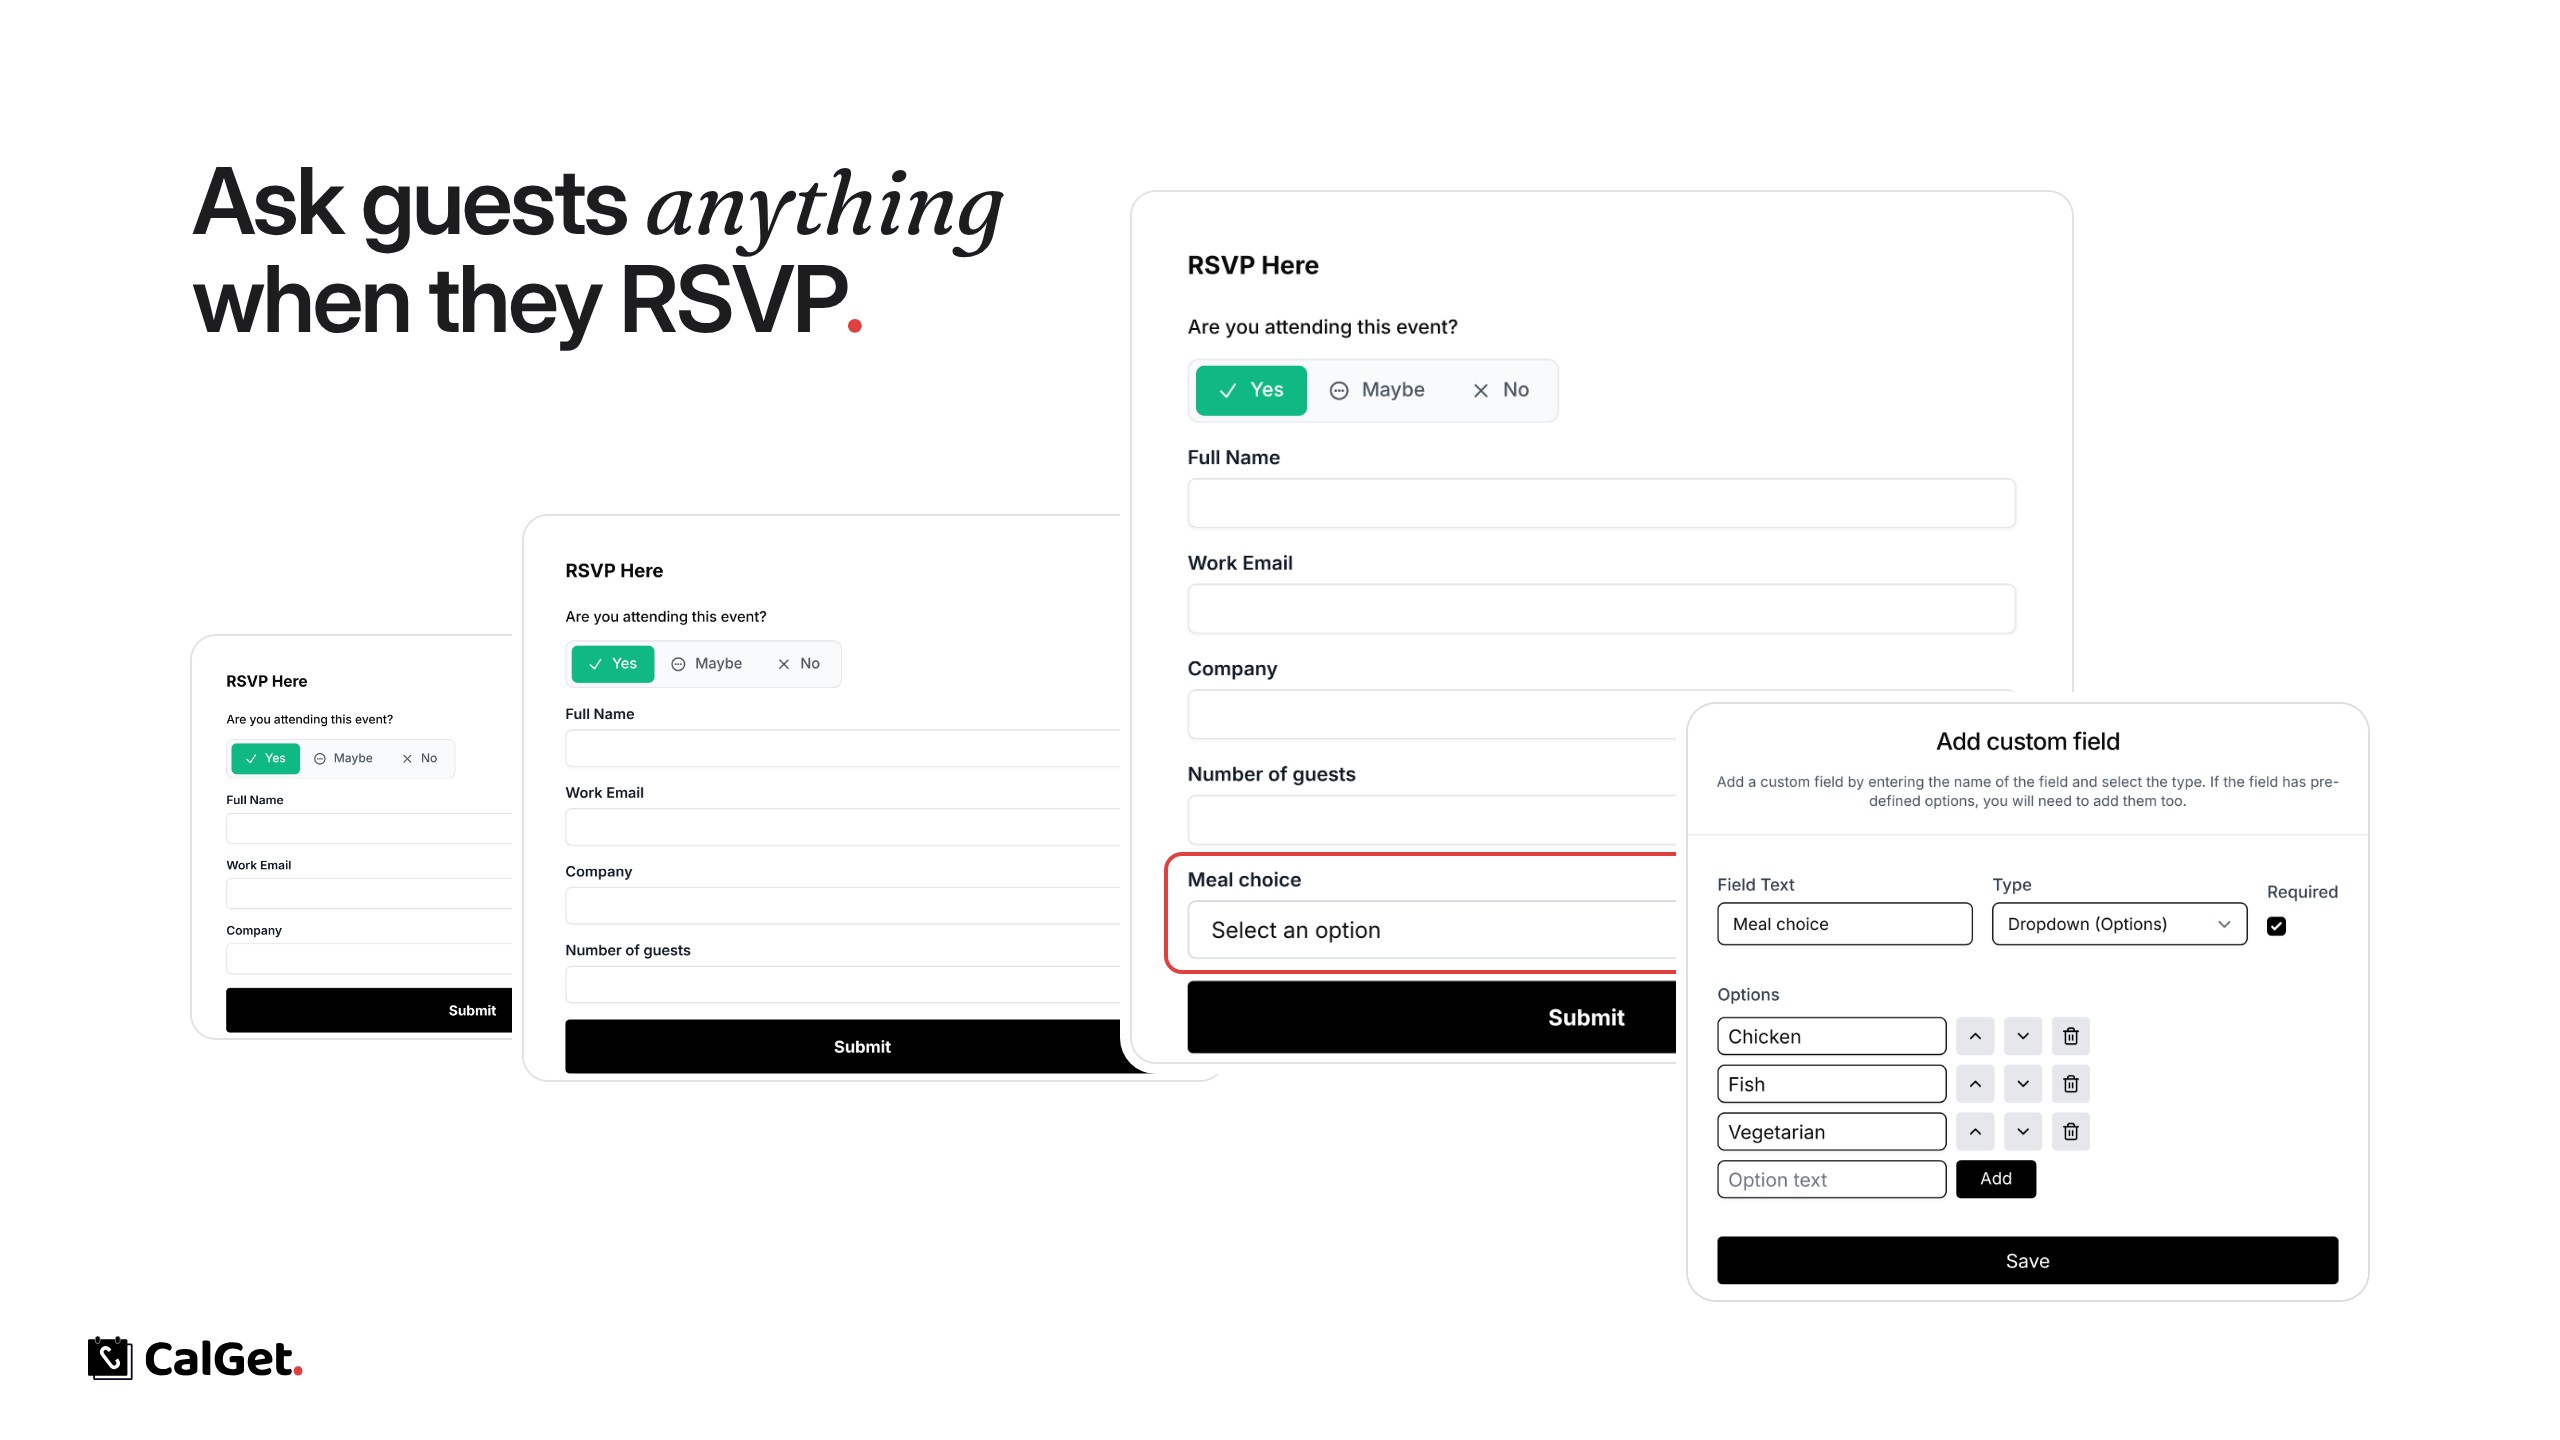
You can now build your own RSVP form. On top of Yes, Maybe or No with a name and email, ask guests whatever you need to know before the event.

Add your own questions – Text, Number, Email or a Dropdown with your own options, like a meal choice or the number of guests someone is bringing.

Make them required – Tick Required for anything you must know.

See it as you build – The Design Preview shows the form exactly as guests will see it.

To create one, go to RSVP Forms, click New RSVP Form, add your fields with Add field and save. Then choose the form in your event’s RSVP settings.

Create Recurring Events

Set an event to repeat every day, week, month or year, on the days you pick, and choose when it ends.

Create Recurring Events

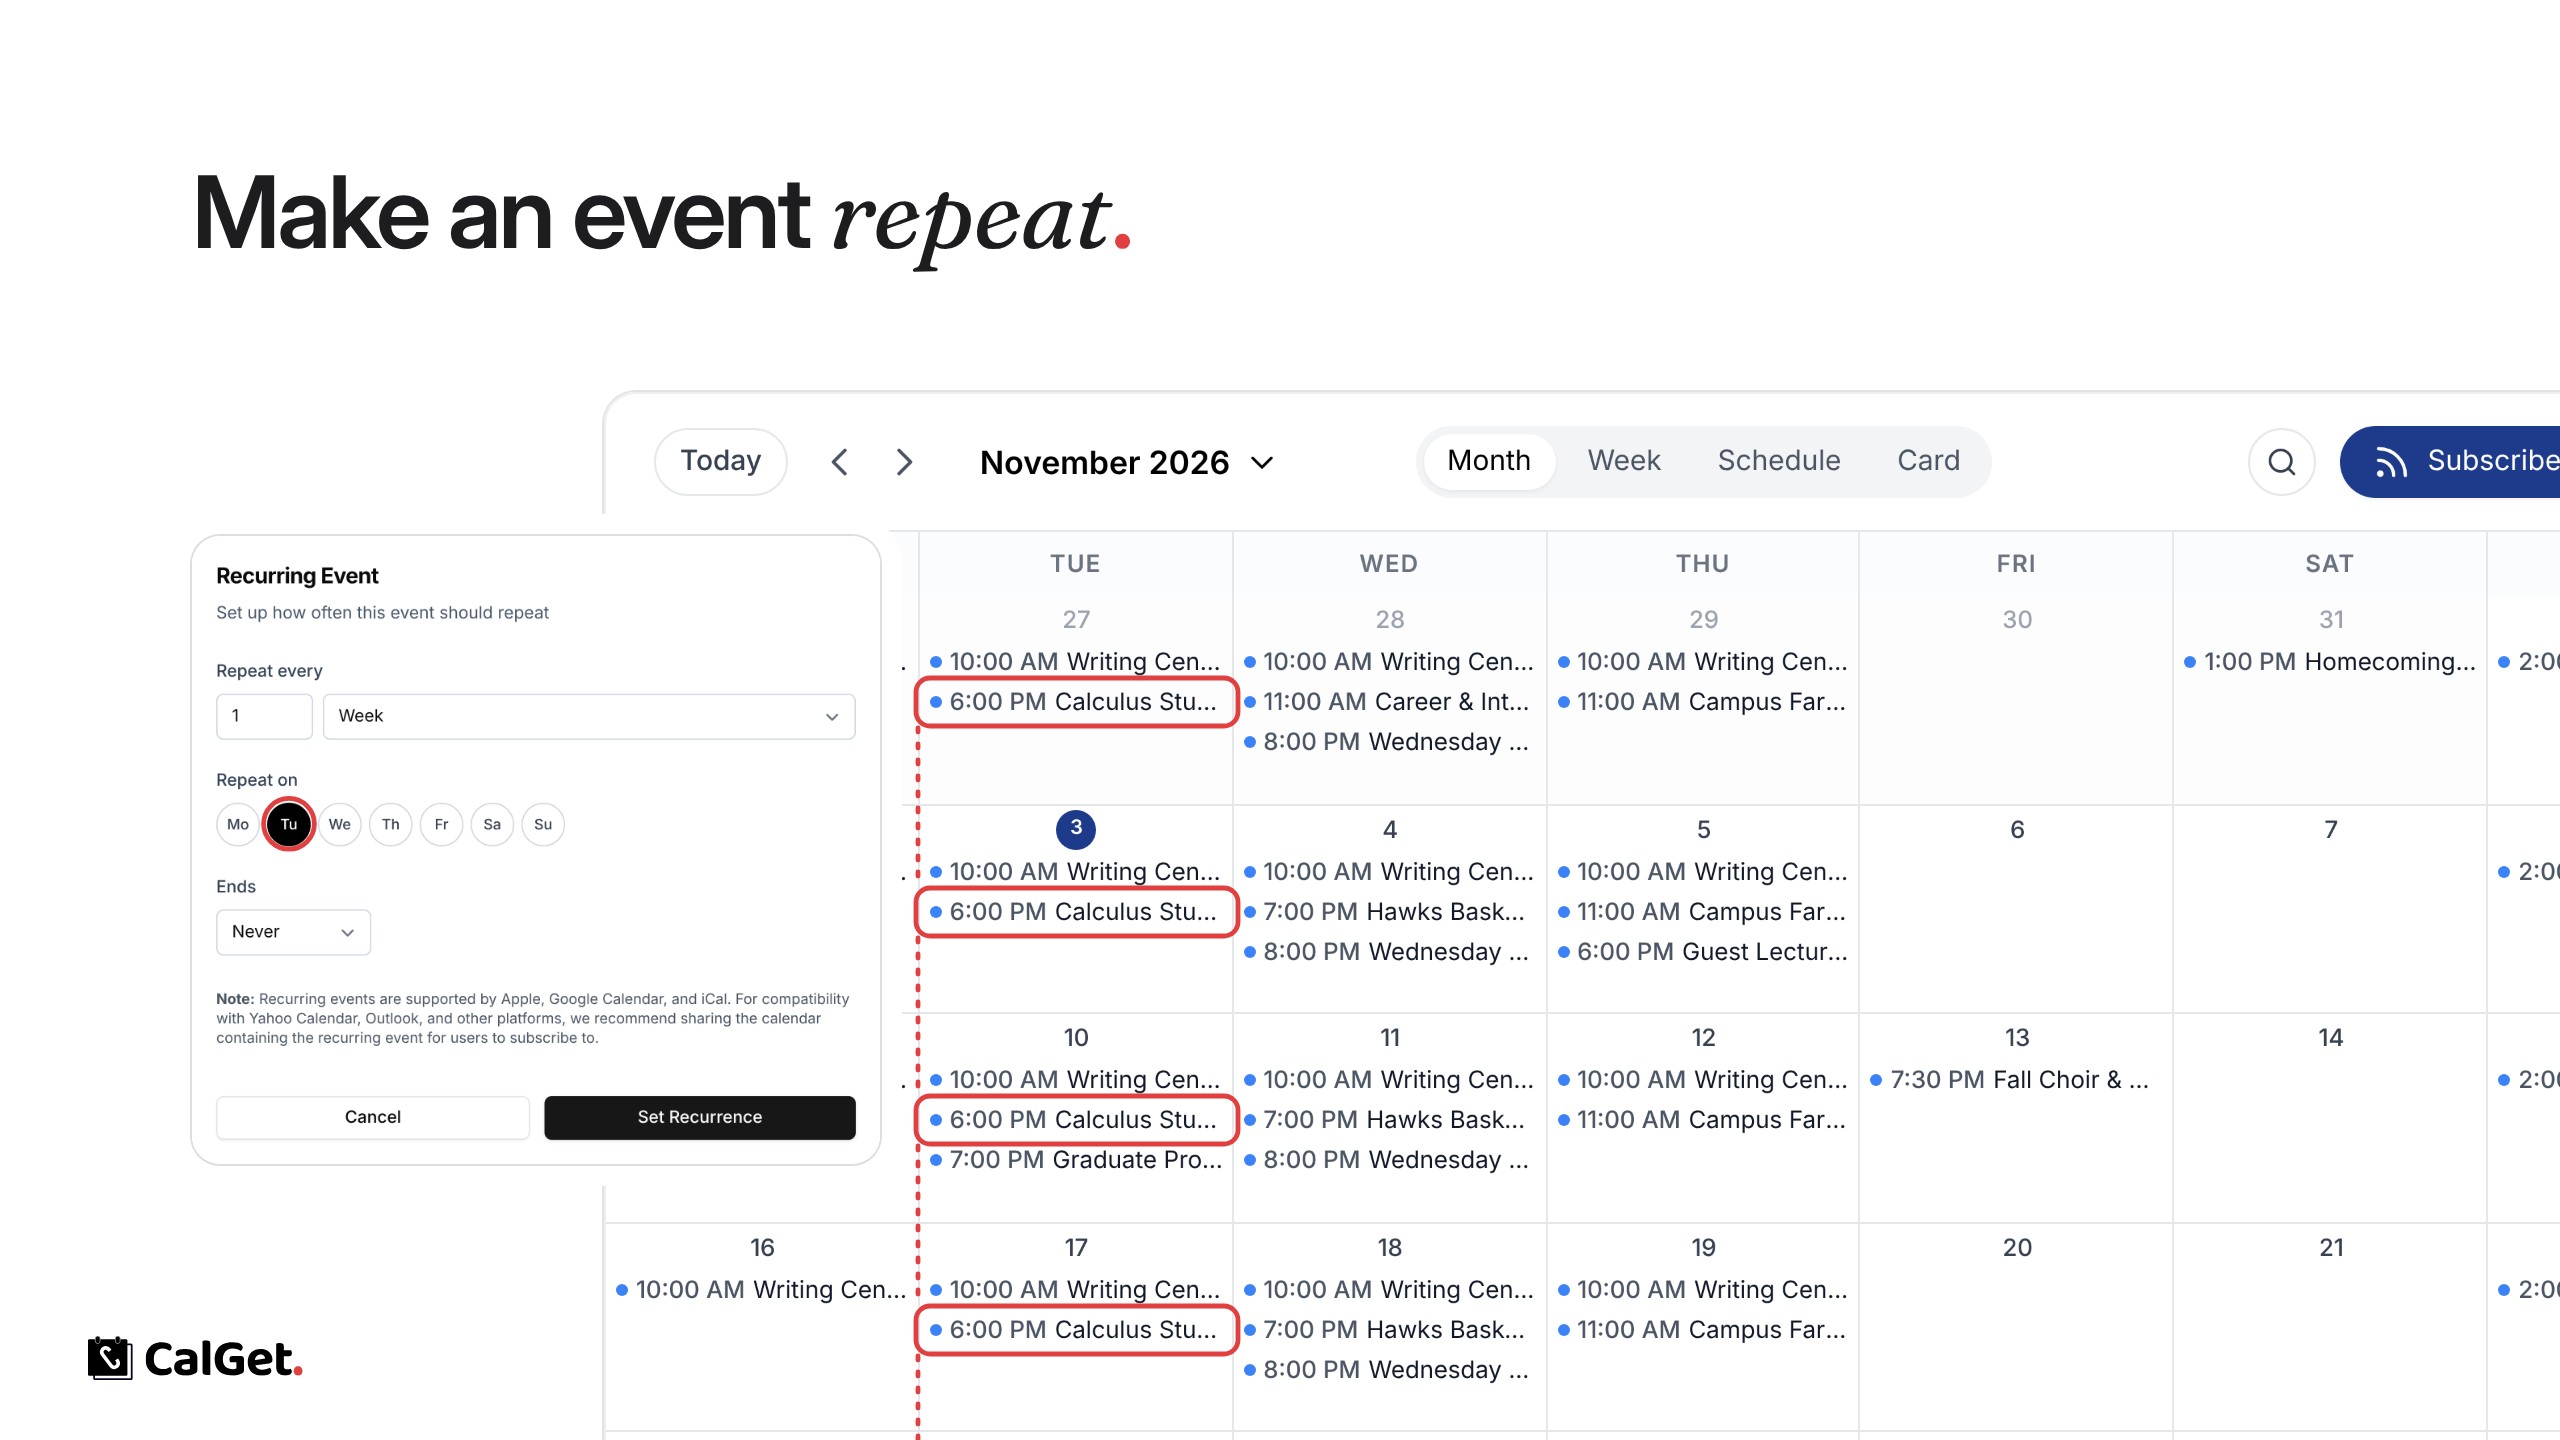
You can now make an event repeat. Set it up once, and CalGet adds every date to your calendar and to the Add to Calendar links.

Repeat every – Choose a number of days, weeks, months or years.

Repeat on – For weekly events, pick the days of the week.

Ends – Never, after a number of times, or on a date.

To set it, open your event, go to Edit, click Edit next to Recurring, choose the pattern and click Set Recurrence. Repeating events work in Apple and Google Calendar; for Outlook and Yahoo, share a calendar that guests can subscribe to.

RRULE Generator for Recurring Events

Pick how often an event repeats, on which days and when it ends, then copy the RRULE string into any calendar.

RRULE Generator for Recurring Events

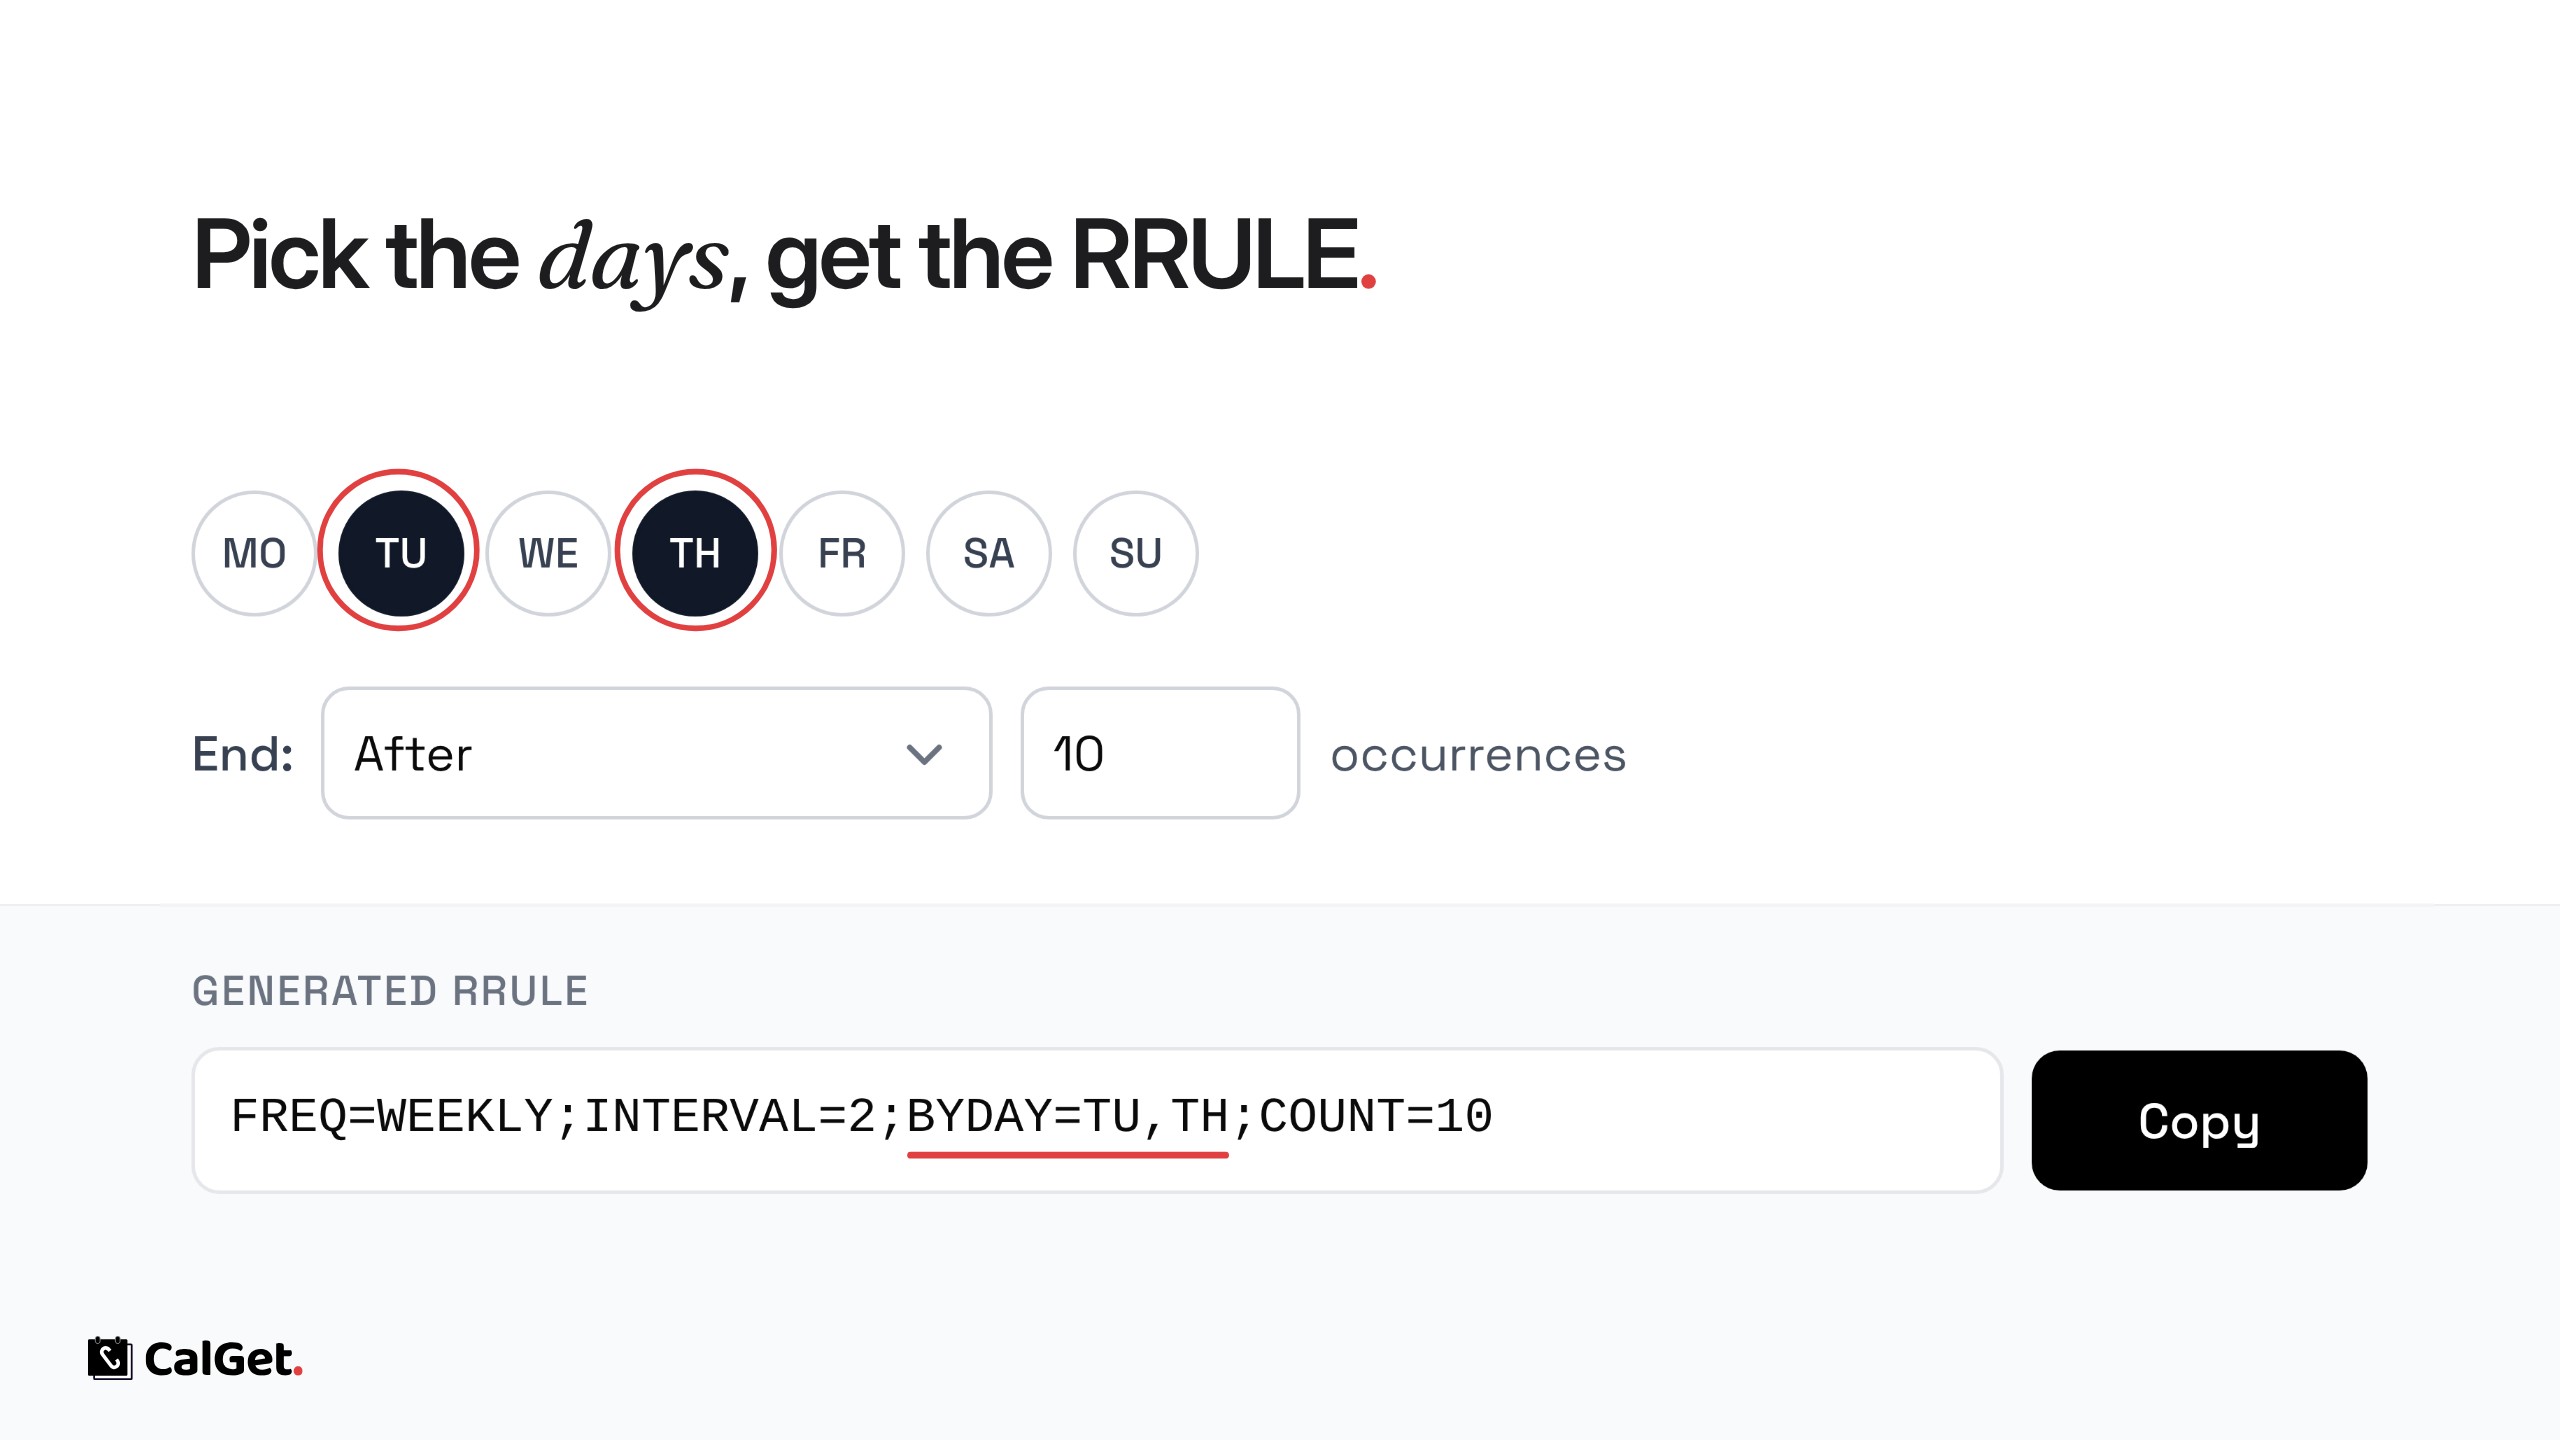
The RRULE Generator builds the recurrence rule (RRULE) for a repeating event, the line that iCalendar files use to say when an event happens again.

Frequency – Daily, Weekly, Monthly or Yearly, every 1 to 31 days, weeks, months or years.

Days – For weekly events, pick the days of the week.

End – Never, after a number of occurrences, or on a date.

The rule updates as you change the options. Click Copy and paste it into any iCalendar app or file. Everything runs in your browser.

Open it at calget.com/tools/rrule-generator.

Custom Social Media Card for Events

Upload your own image and set the title and description people see when your event link is shared on social media.

Custom Social Media Card for Events

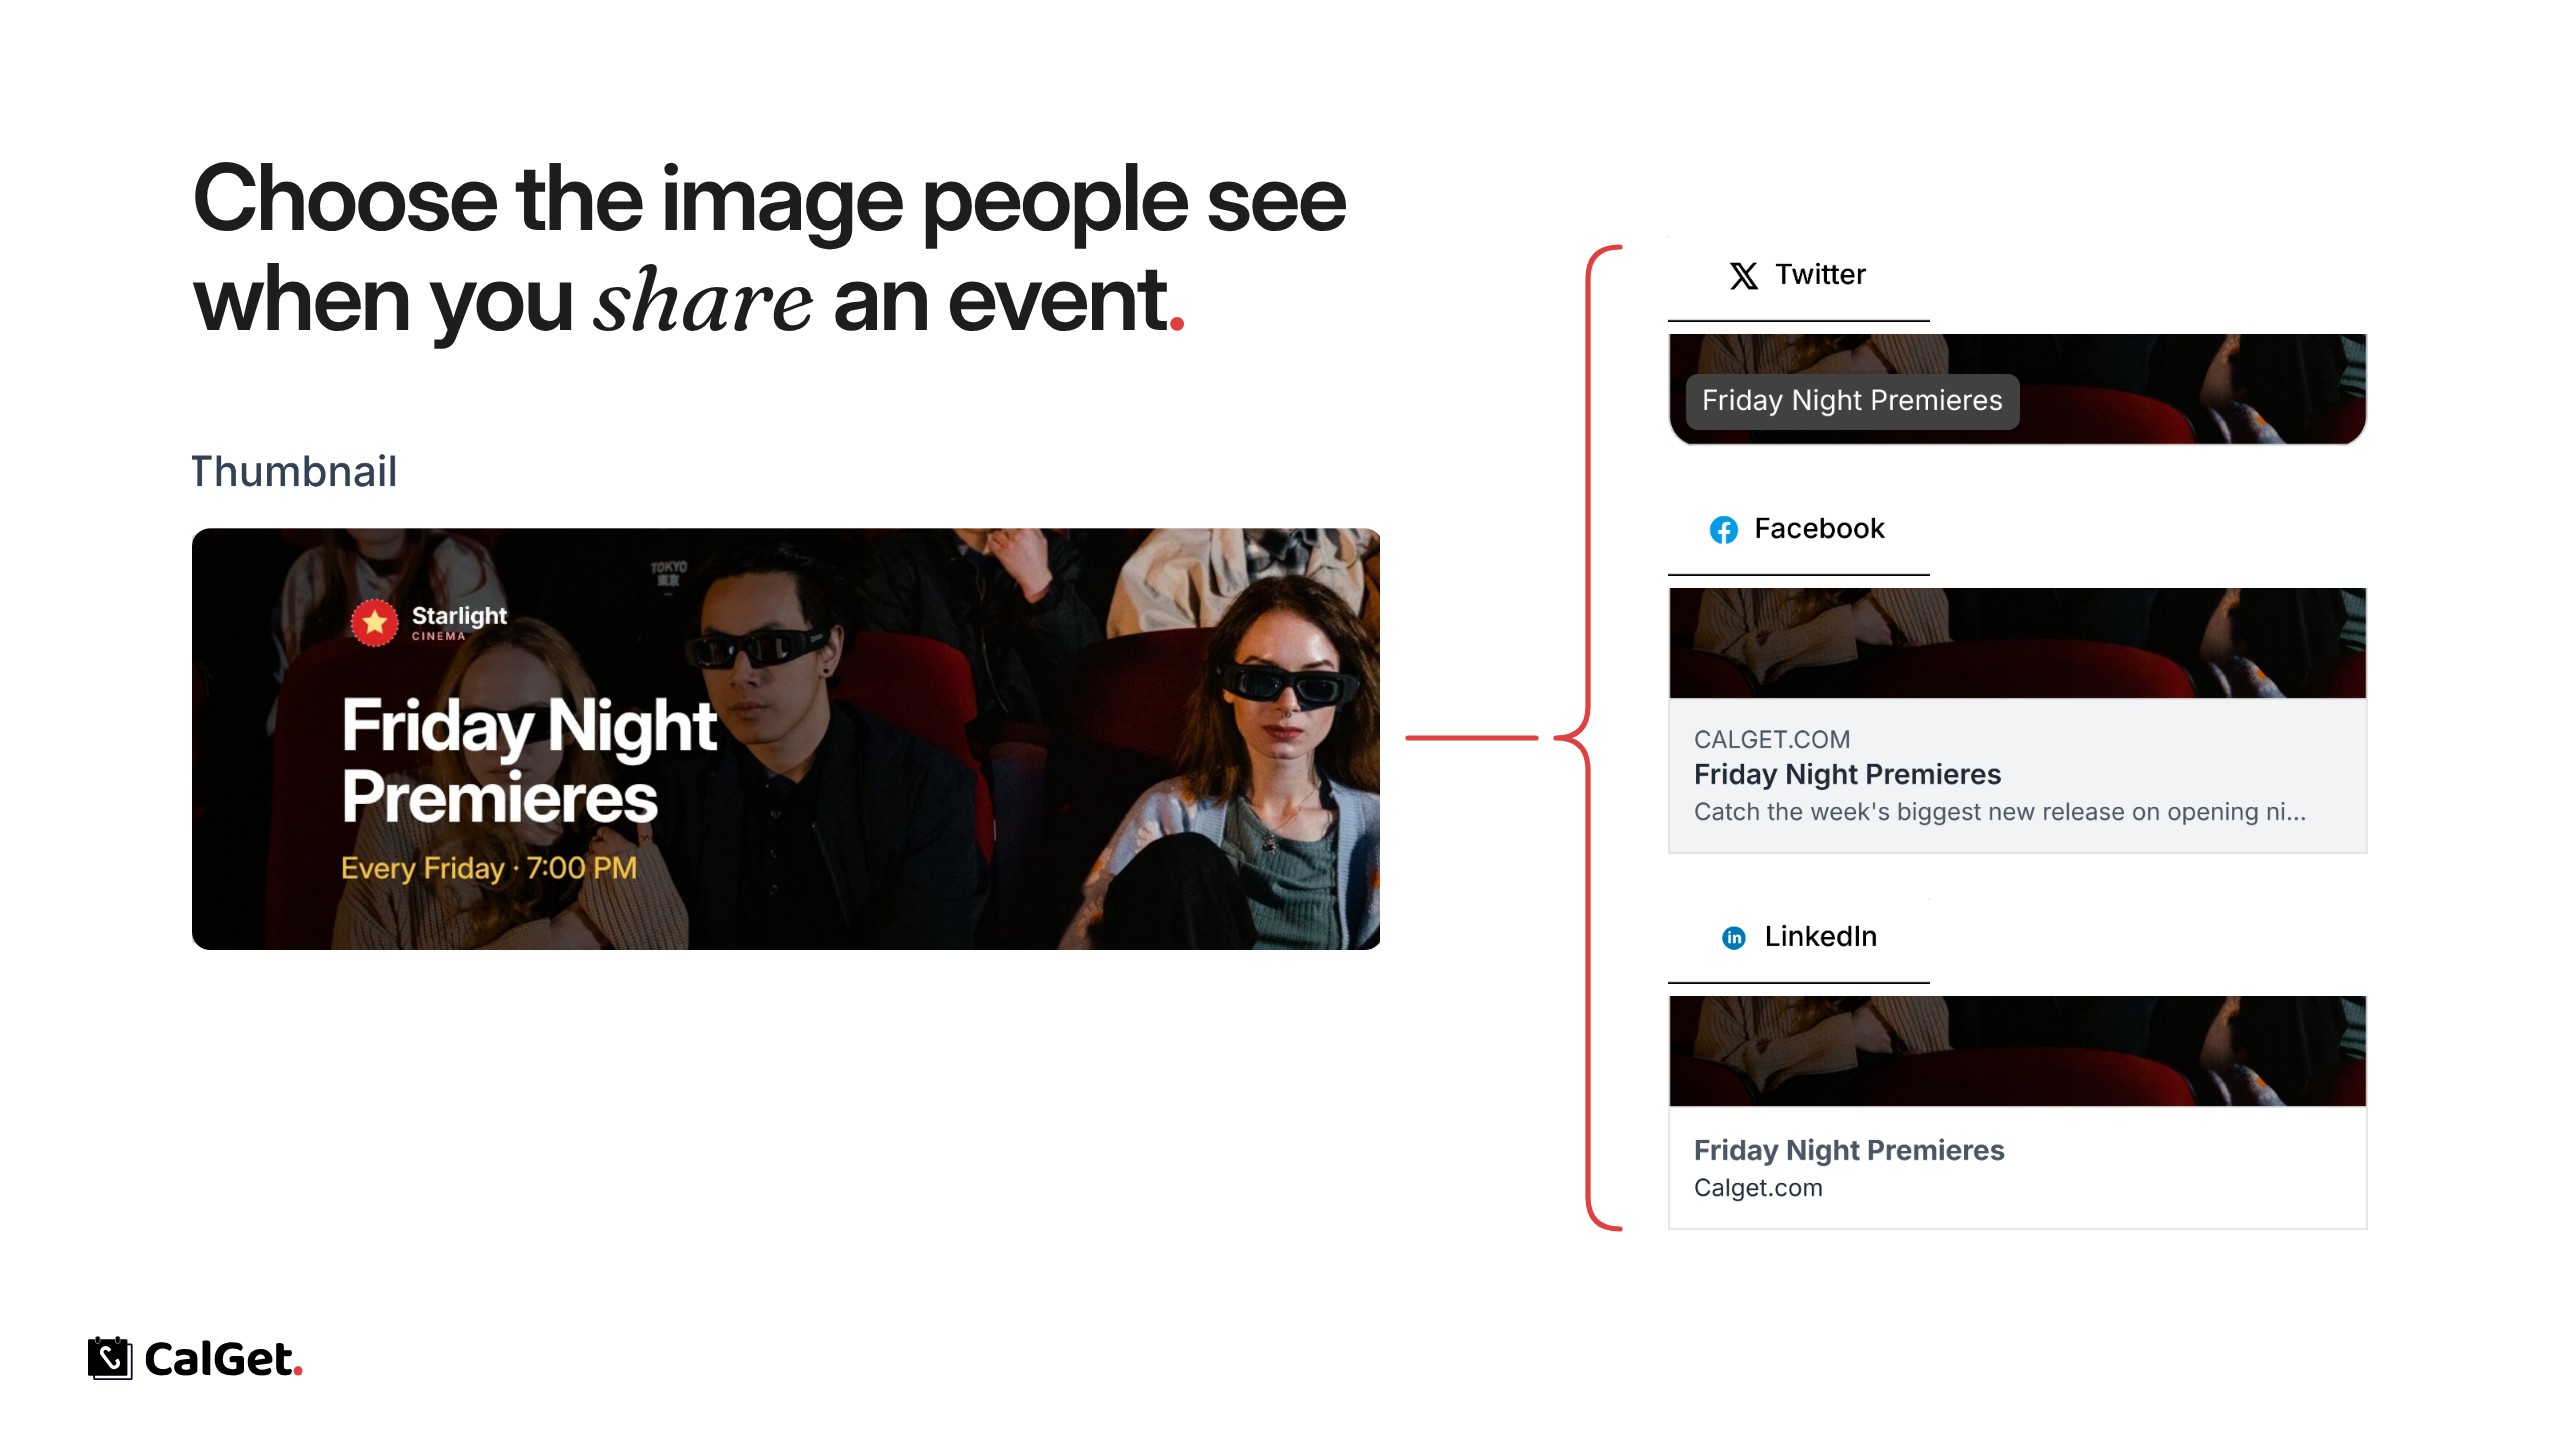
You can now choose how an event looks when its link is shared on social media. Upload your own image, and set the title and description that appear with it.

Thumbnail – Upload an image; 1200 × 630px is recommended.

Title and Description – The text shown under the image (up to 160 characters for the description).

Preview – See the card as it will look on Twitter, Facebook and LinkedIn before you save.

To set it, open your event, go to Edit, click Edit next to Social Media Preview, make your changes and click Save Changes.

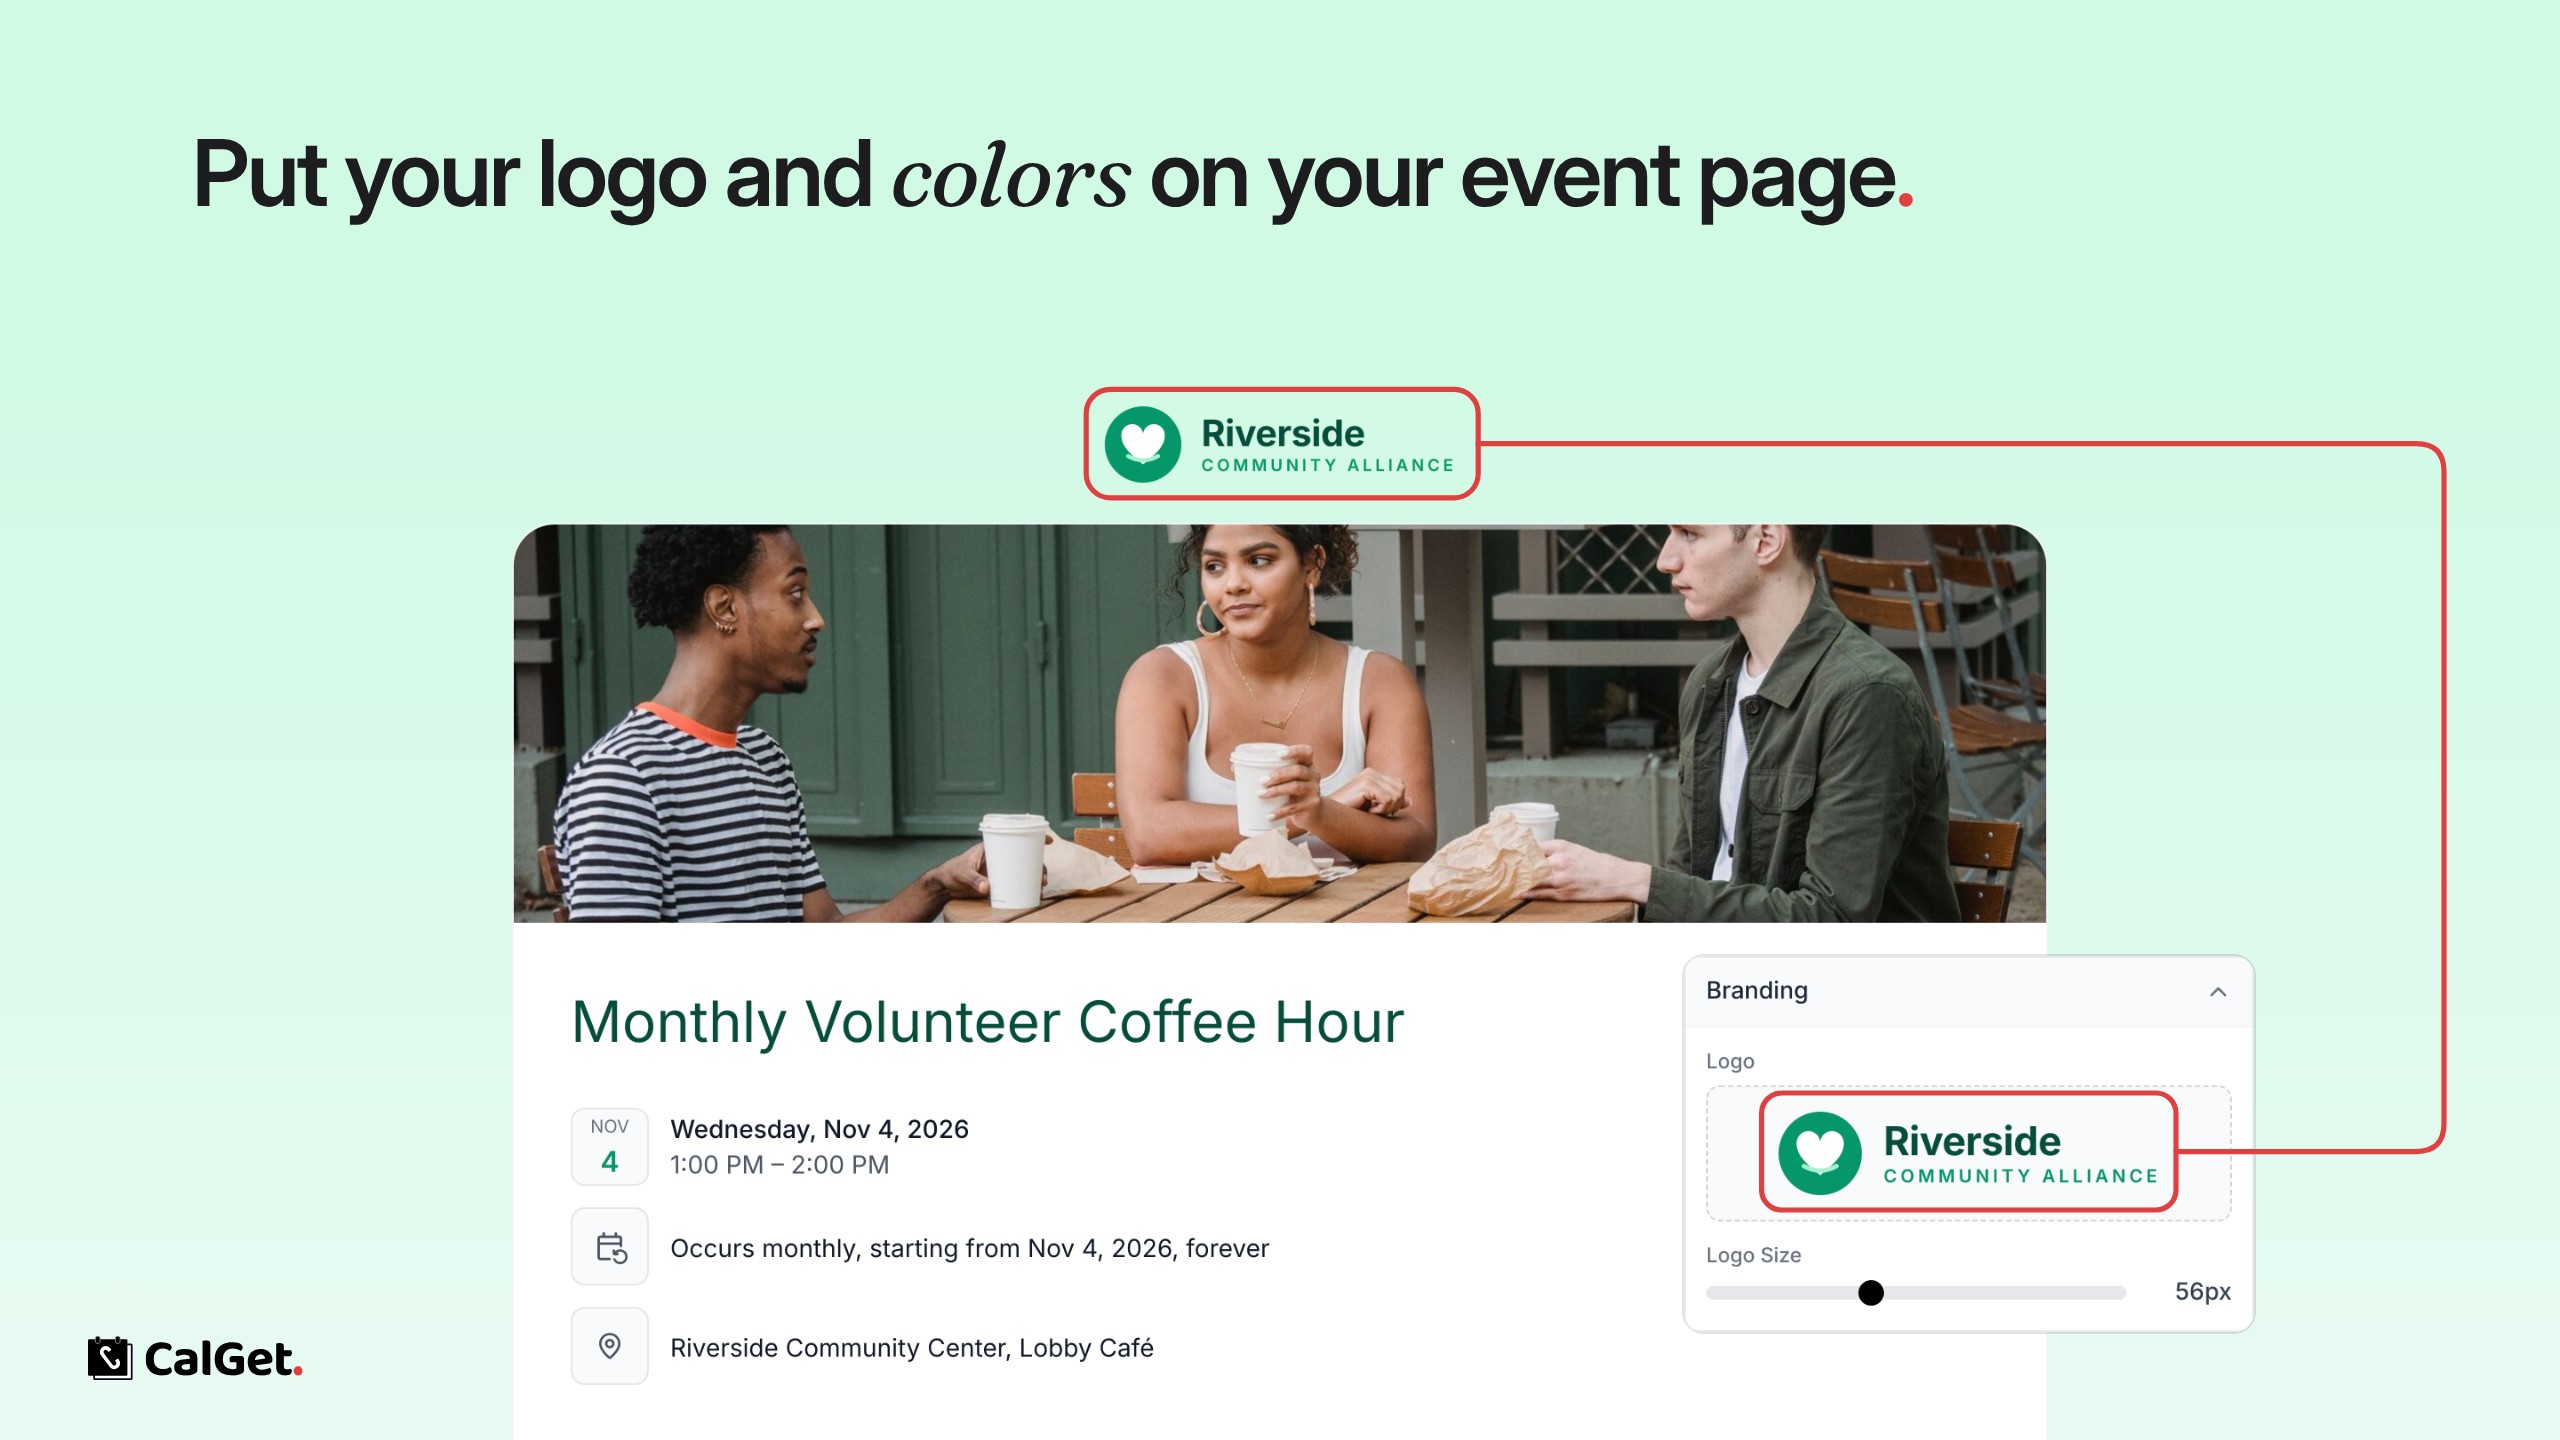
Custom Branding for Event Pages

Add your logo, background, fonts and colors to a theme, then use it on any event page.

Custom Branding for Event Pages

You can now style your event pages with your own branding. Create a theme once, then pick it for any event.

Logo – Upload your logo and set its size; it shows at the top of the event page.

Background – A solid color, a gradient or an image.

Colors and fonts – Choose the title font and color, and the link, date and button colors.

Buttons – Pick the button style, the button text and which calendar options guests see.

To set it up, go to Themes, click New Theme (or Edit Theme), make your changes and save them. Then open an event, go to Edit and choose the theme under Theme.

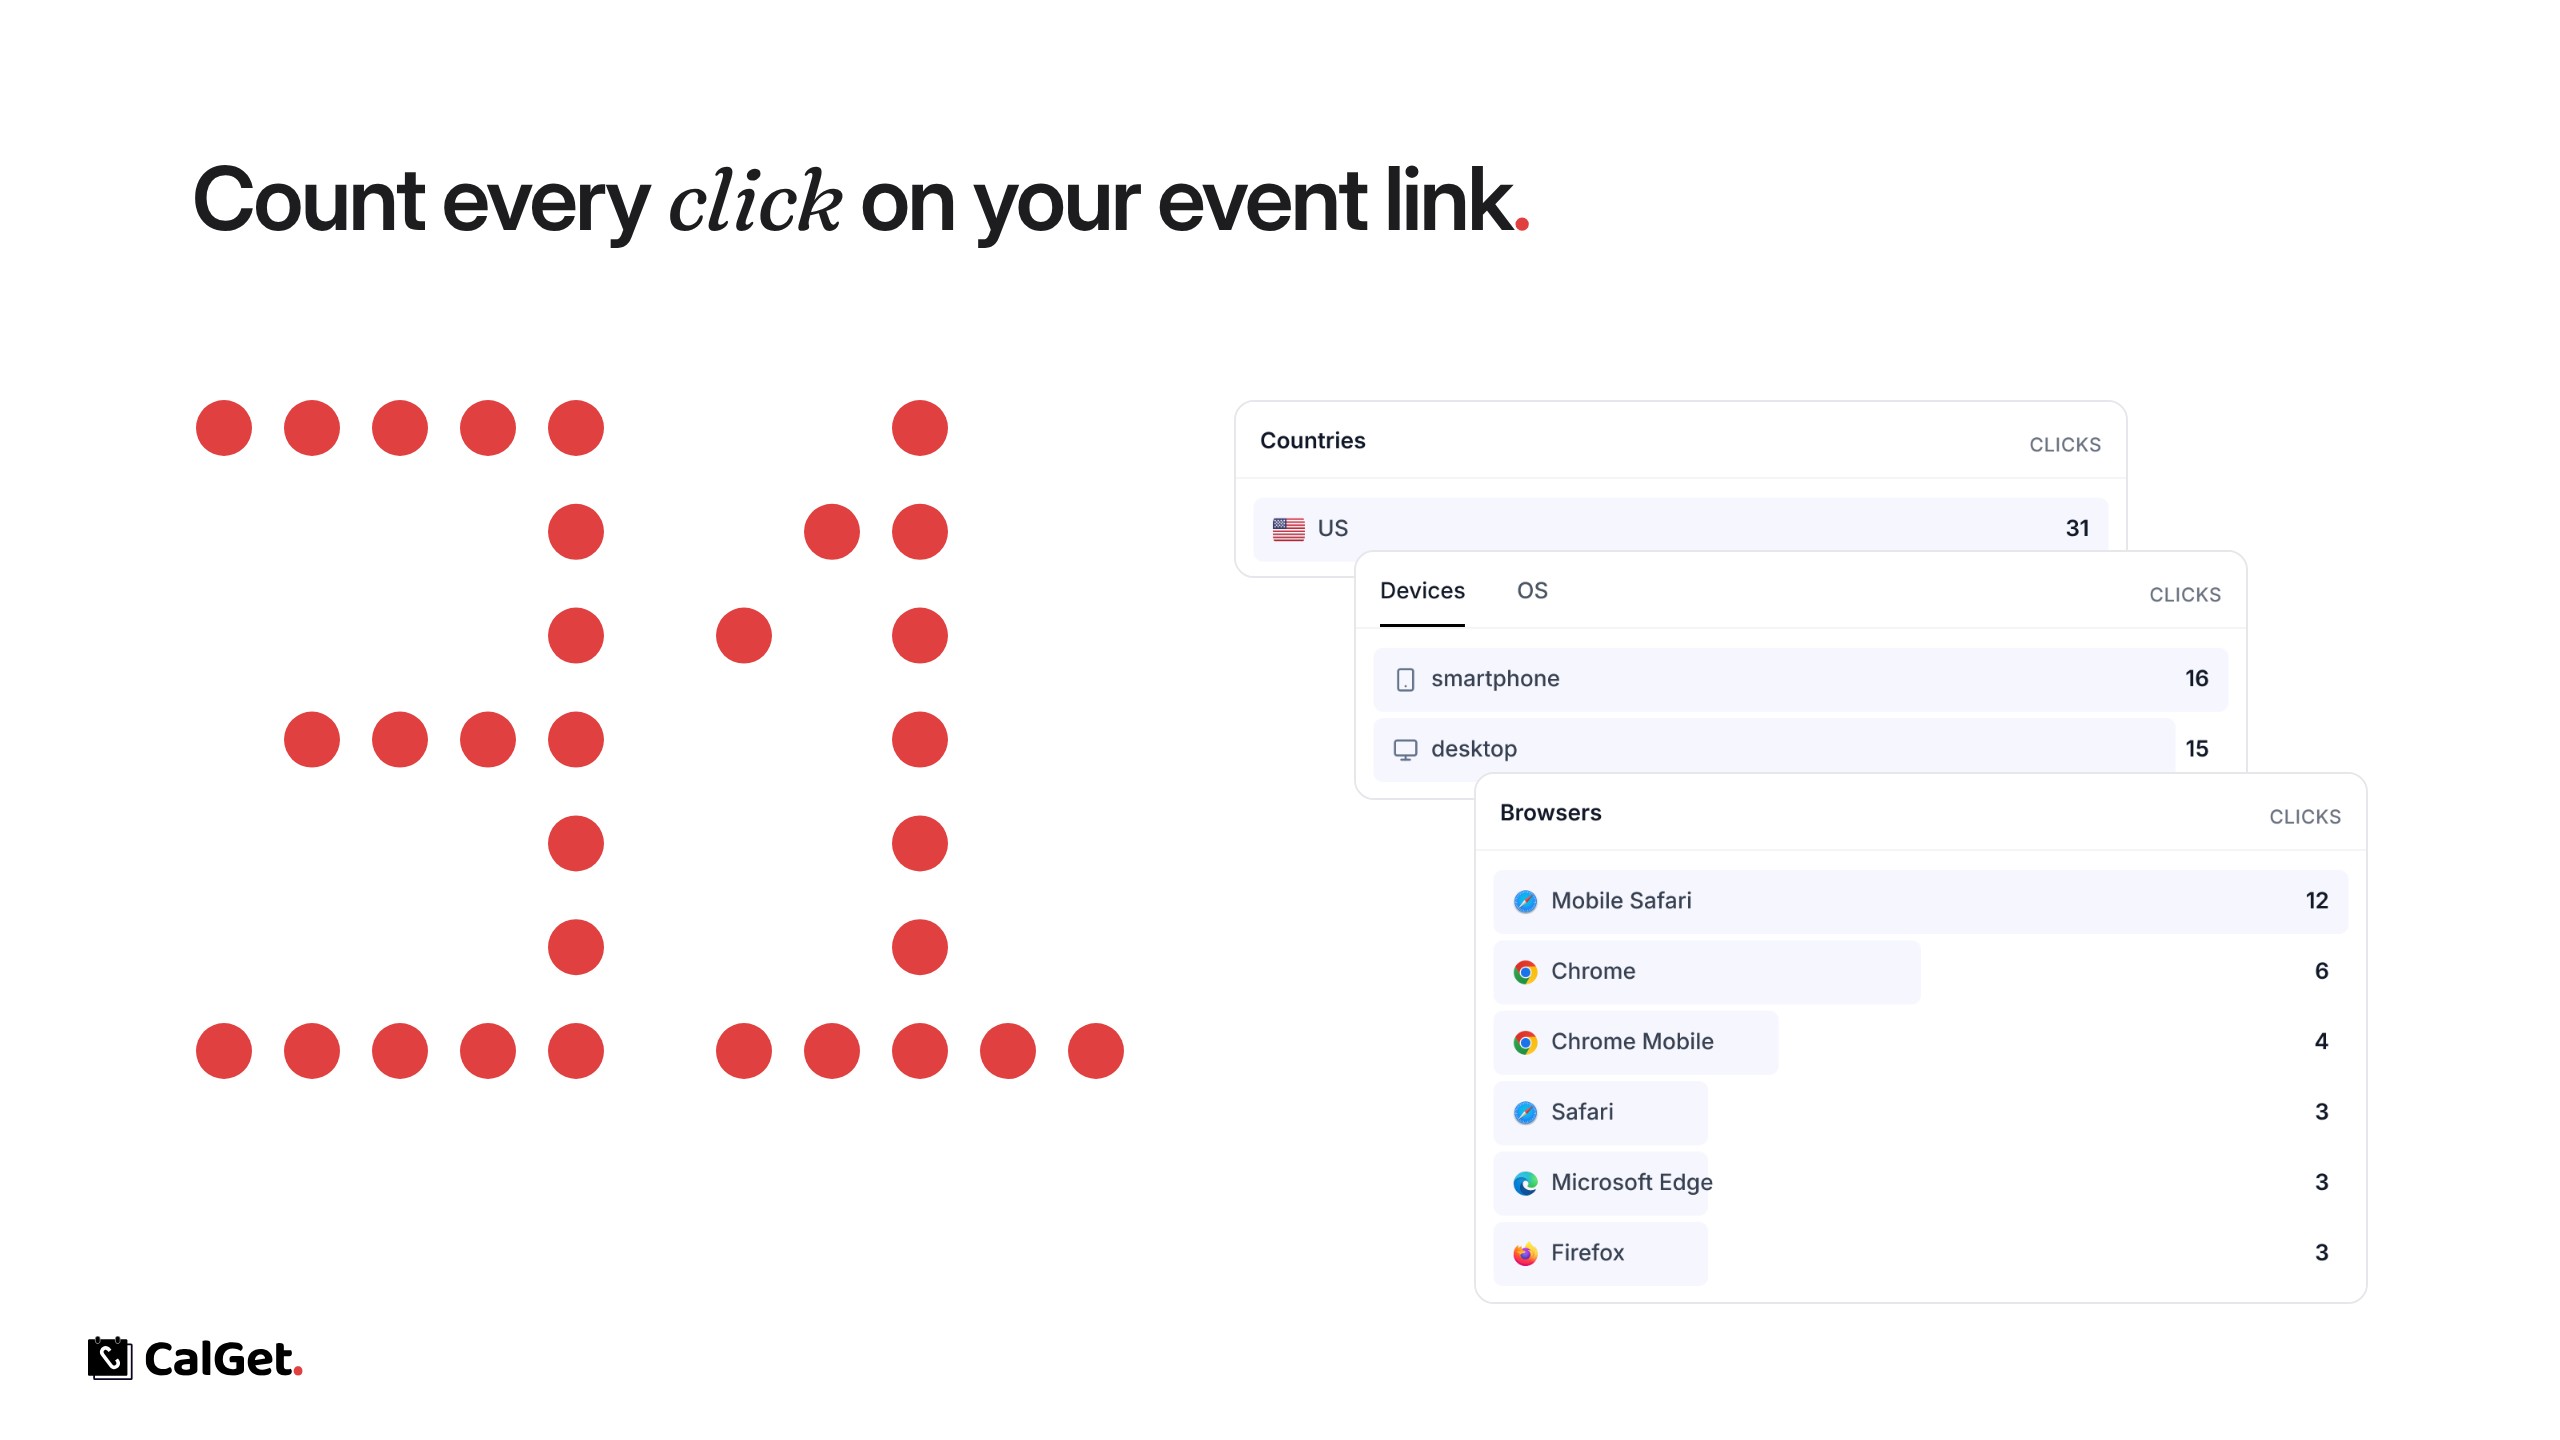
Click Analytics for Event Links

See how many times your event link is clicked, and which sites, countries and devices the clicks come from.

Click Analytics for Event Links

Every event now counts the clicks on its link. Open an event and go to Analytics to see how many people opened it and where they came from.

Clicks – How many times the event link was opened, shown over time for the range you pick (for example Last 30 days).

Referrers and UTM Parameters – The sites and campaigns the clicks came from.

Countries, Devices, OS and Browsers – Where your visitors are and what they use.

The same tab also shows Calendar Adds and RSVPs for the event.

Calendar Subscriptions

Share one link to a whole calendar. Subscribers get every event in their own calendar, and new events appear automatically.

Calendar Subscriptions

You can now share a whole calendar of events with one link. People who subscribe get every event from that calendar in their own calendar app, and new or changed events show up there automatically.

Public link – Each calendar has its own page (calget.com/c/…) listing its upcoming events.

Subscribe to Calendar – Visitors pick Google, Apple, Outlook, Yahoo, Office365 or iCal.

It works well for recurring events, event series or any group of related events. To find the link, go to Calendars, open a calendar and copy its Public Link; the Subscribers tab shows who has subscribed.

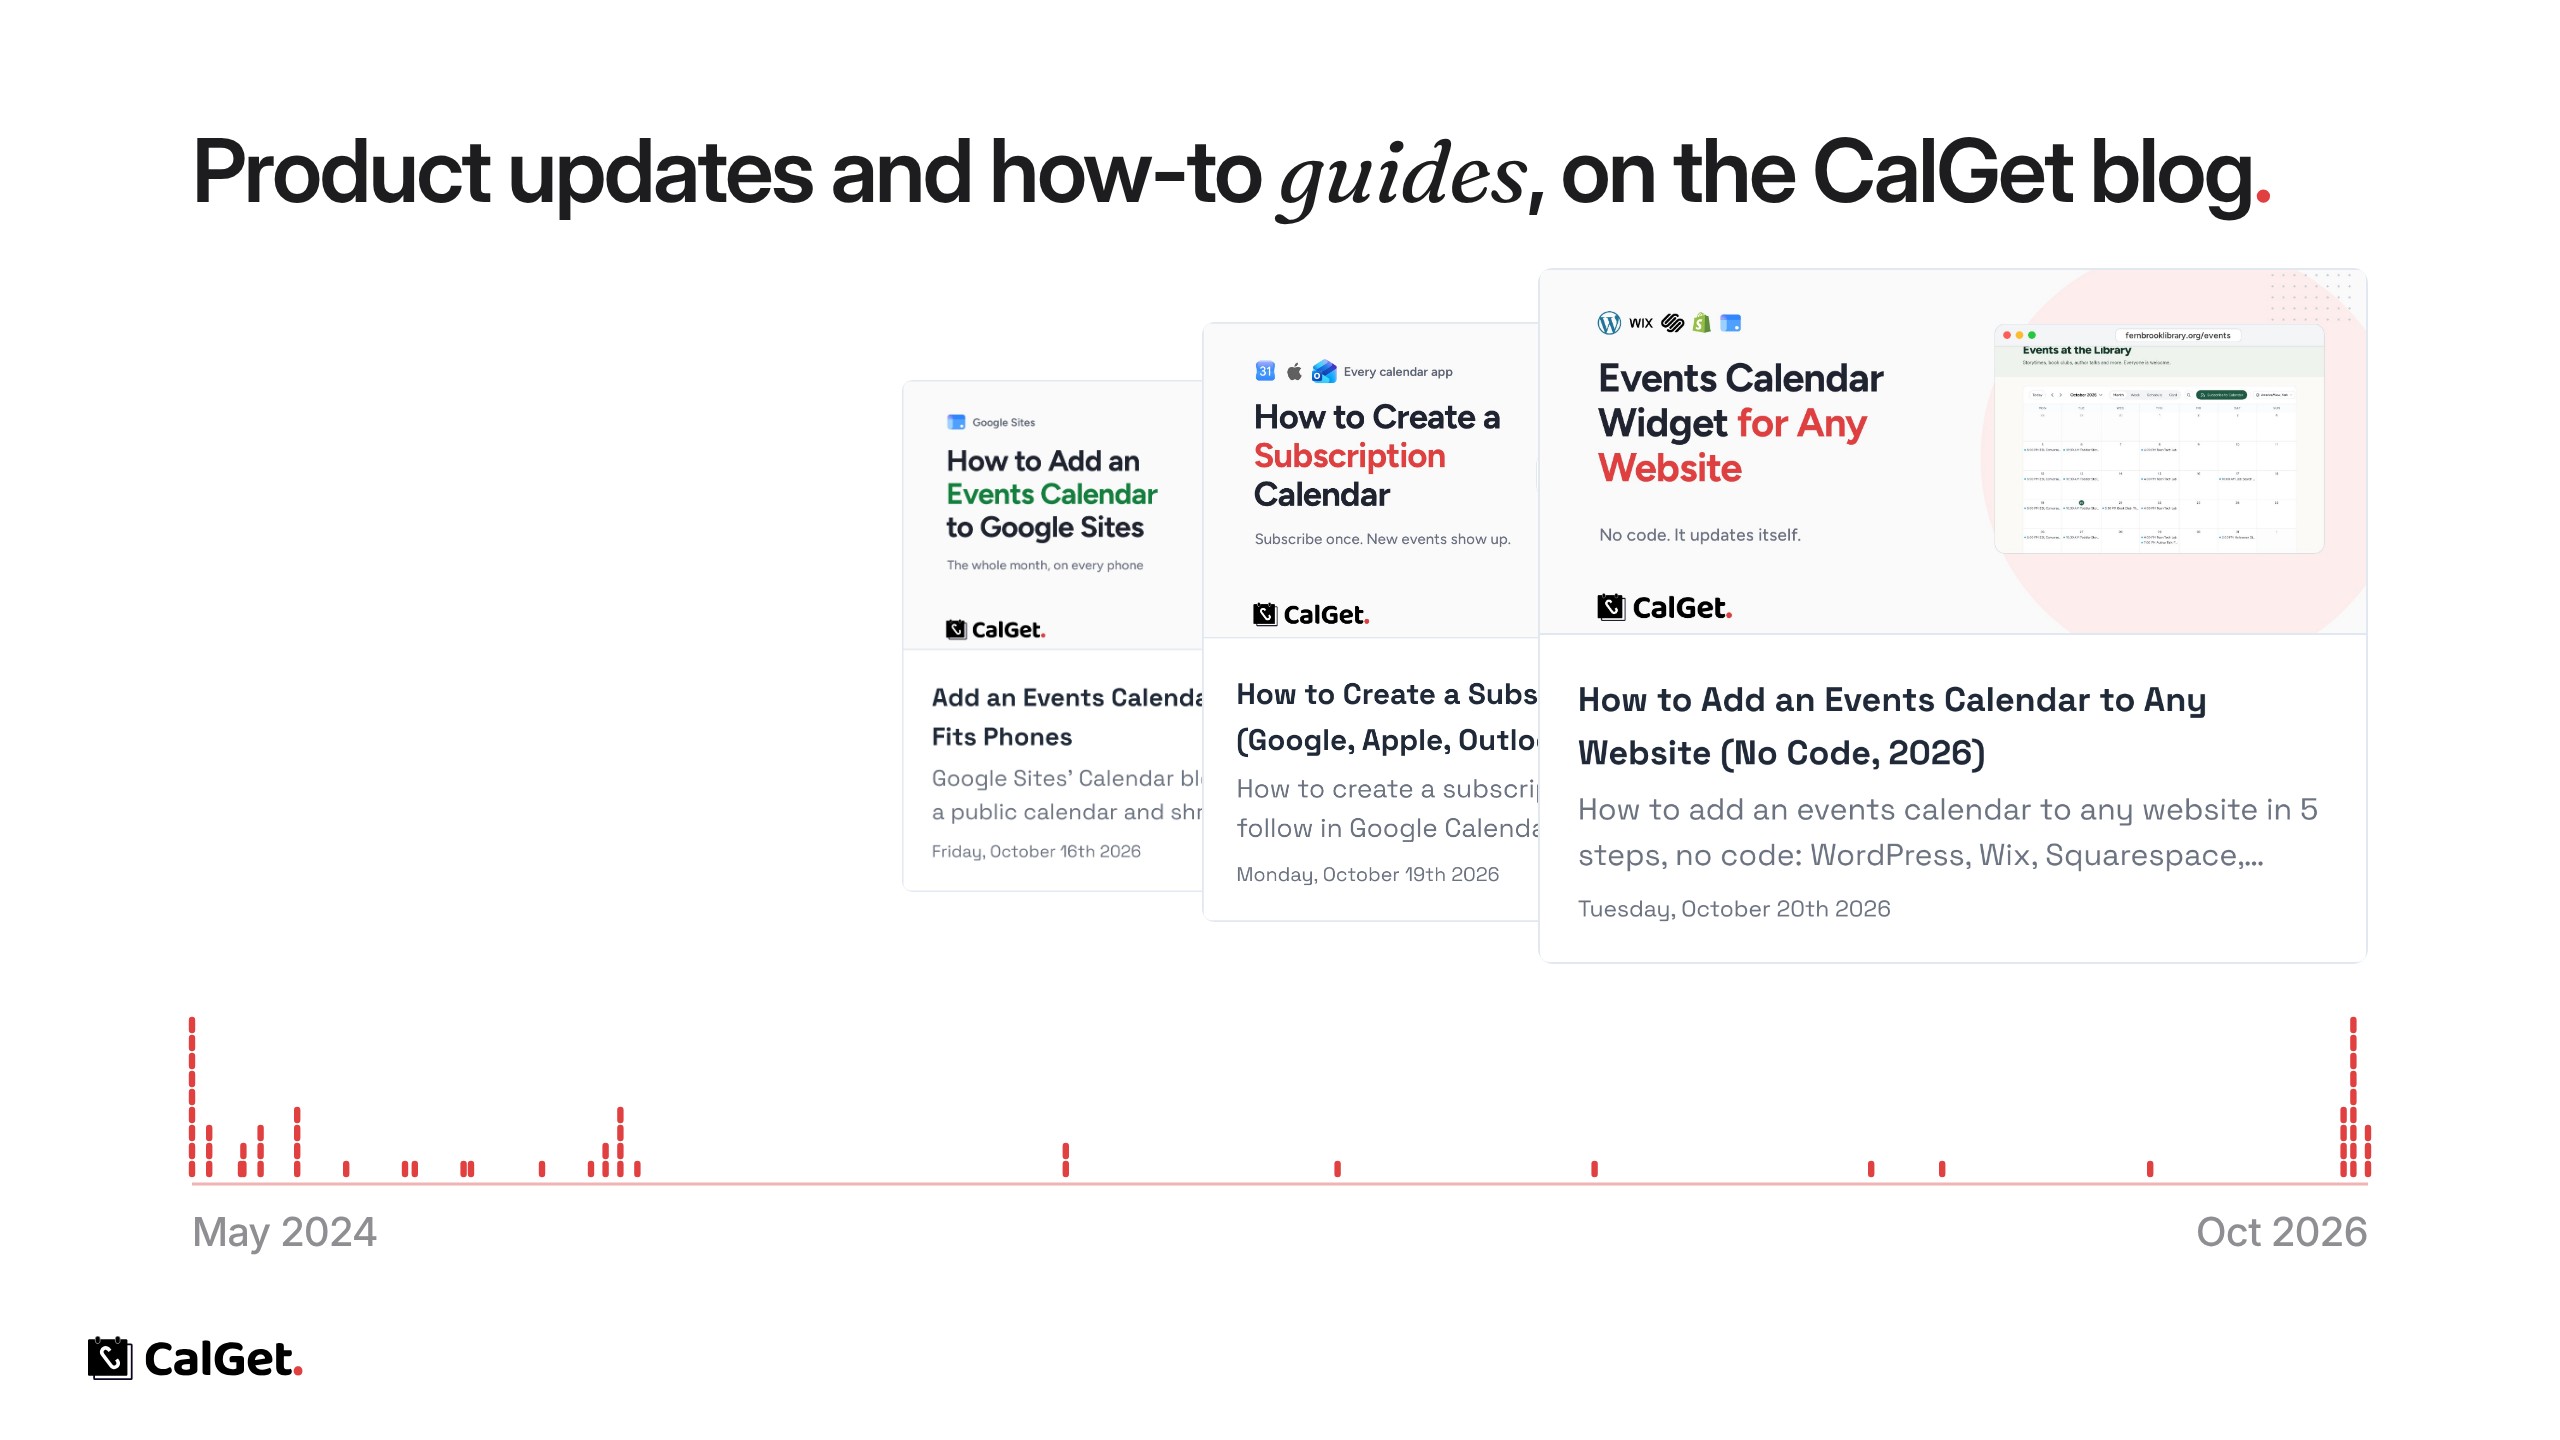
The CalGet Blog: Updates and How-To Guides

Product updates and step-by-step guides for using CalGet with your website, email and calendar apps.

The CalGet Blog: Updates and How-To Guides

CalGet now has a blog. It’s where we post product updates and step-by-step guides for using CalGet with the tools you already have.

Updates – New features, changes and improvements, as they ship.

How-to guides – Tutorials such as adding an events calendar to your website, creating a subscription calendar or putting Add to Calendar links in your emails.

Read it at calget.com/blog.

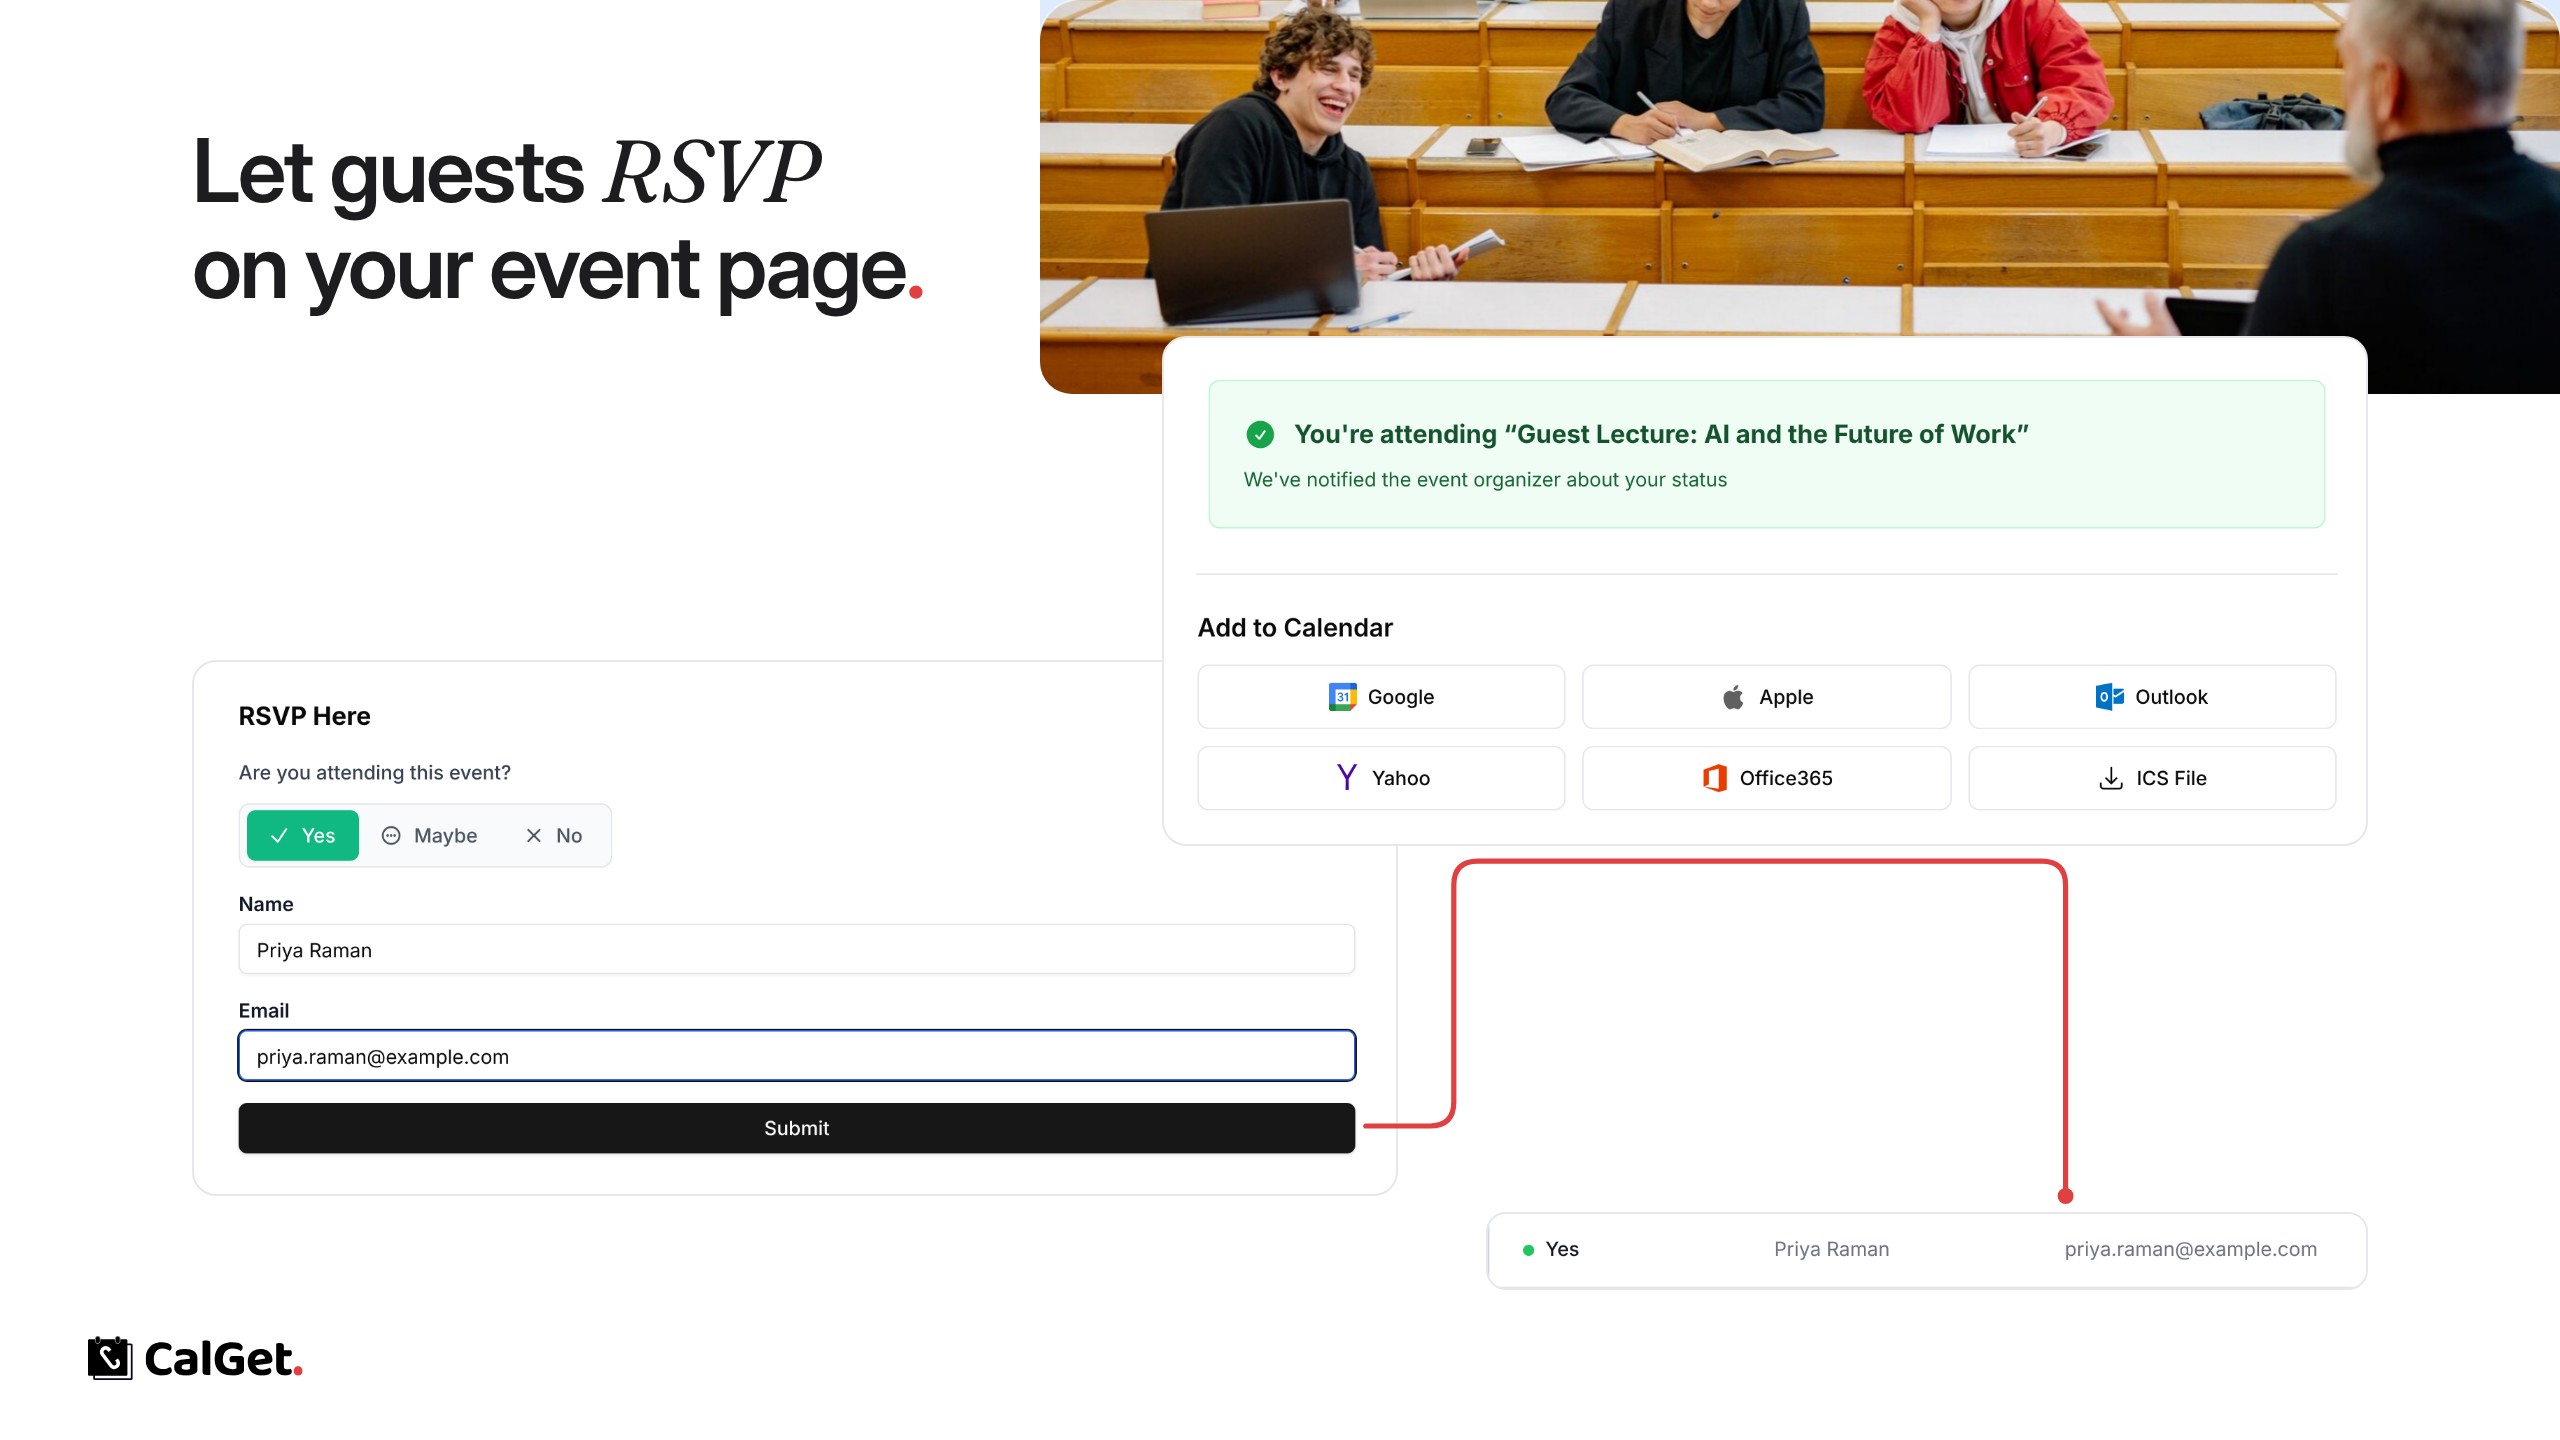
Collect RSVPs on Your Event Page

Guests answer Yes, Maybe or No with their name and email; you see every response in the Attendees List and can export it.

Collect RSVPs on Your Event Page

You can now collect RSVPs on your event pages. Guests answer Yes, Maybe or No, add their name and email, and can add the event to their calendar right after.

RSVP stats – See how many guests are attending, maybe or not attending.

Attendees List – Every response with the guest’s name, email and date. Click Export List to download it.

To turn it on, open your event, go to RSVPs and click Enable RSVP, or switch on Collect RSVPs under Edit.

That's everything so far.